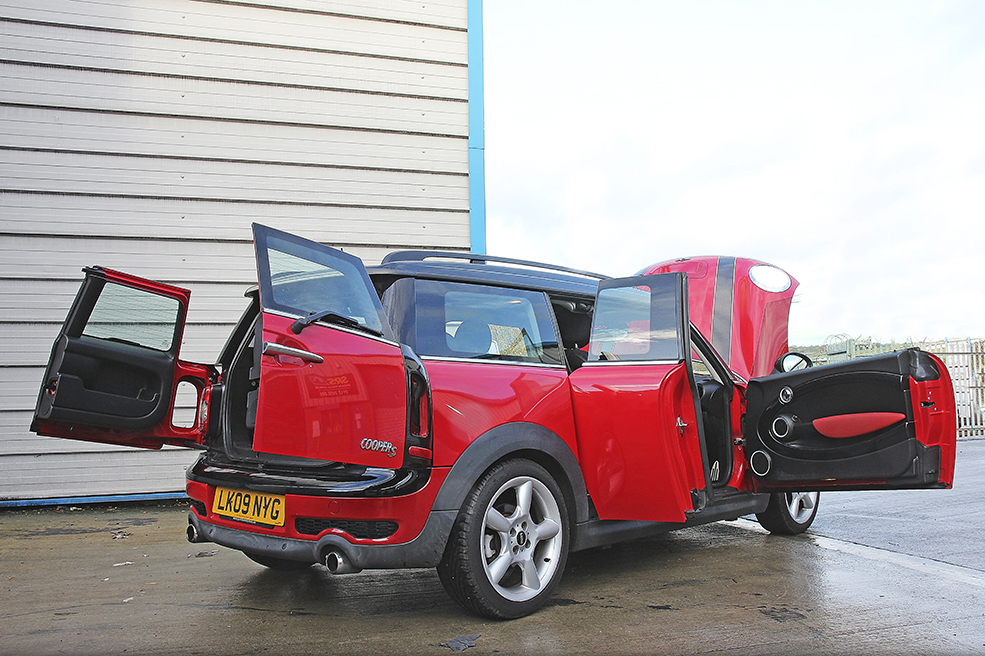

The R55 MINI Clubman is one of the most characterful modern-classic cars around – and in Cooper S form it’s fast too. We find out what it’s like to work on
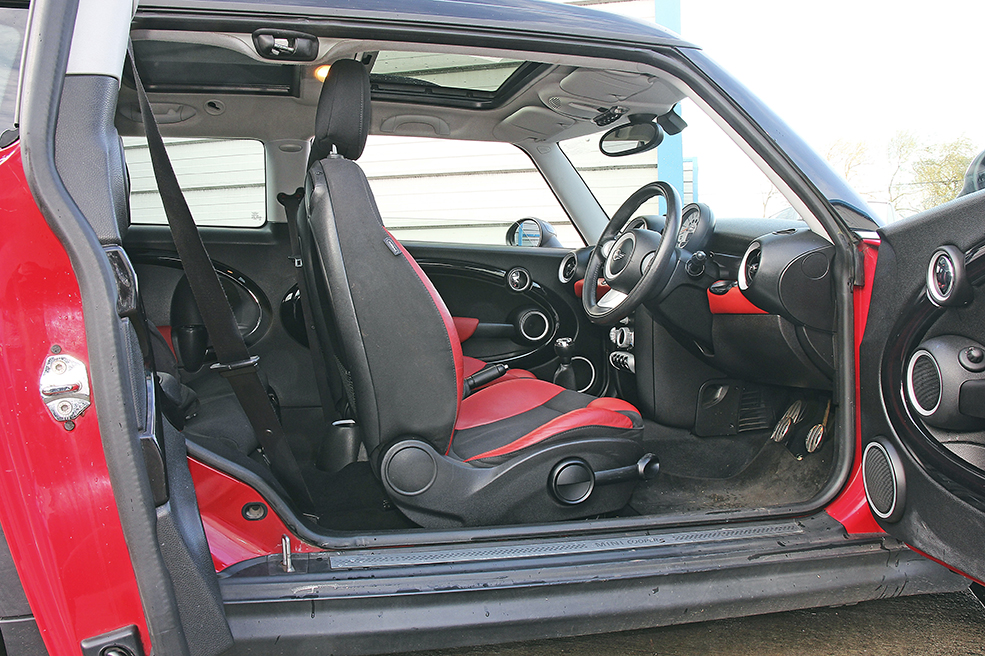
The longer, estate version of the MINI first appeared in 2007, six years after the launch of BMW’s front-wheel-drive hatchback. Known as the MINI Clubman (despite the original classic Mini estate never called a Clubman, as this was reserved for the square-fronted models), it was equipped with a small offside door to gain entry to the rear seats – although front seats can also be tilted to access them as well.
This longer version of the MINI is based around the second-generation model (known as the R56 in hatchback form) so it hasn’t inherited the steering, gearbox and suspension troubles associated with the first-gen models.
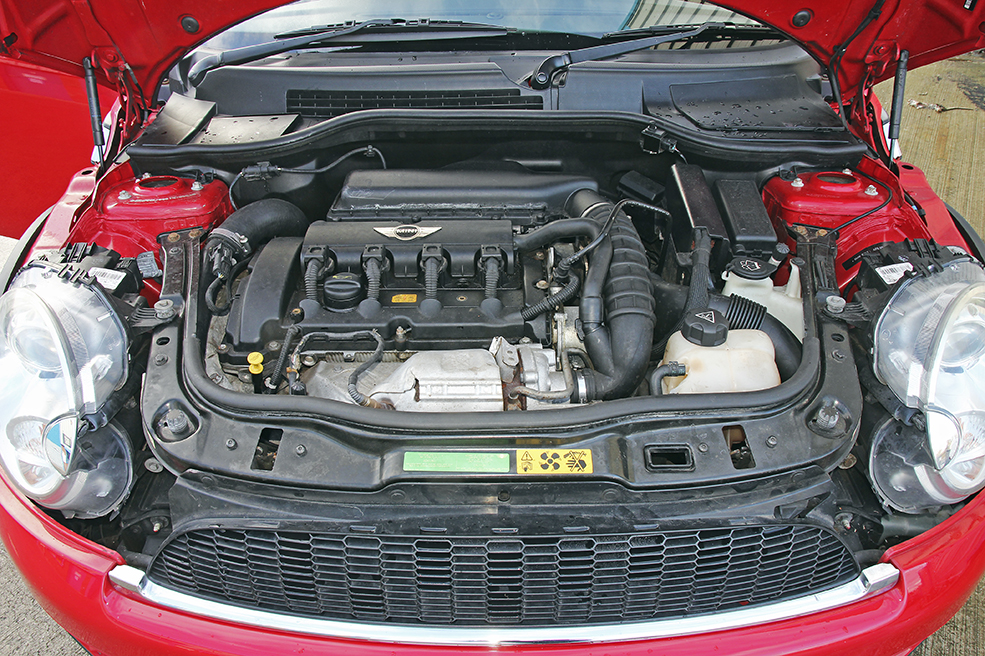
Instead, our project Clubman Cooper S has a BMW/PSA-developed 1.6-litre (1598cc) twin-cam turbocharged 173bhp petrol engine that also powered the 2006-onwards hatchback Cooper S.
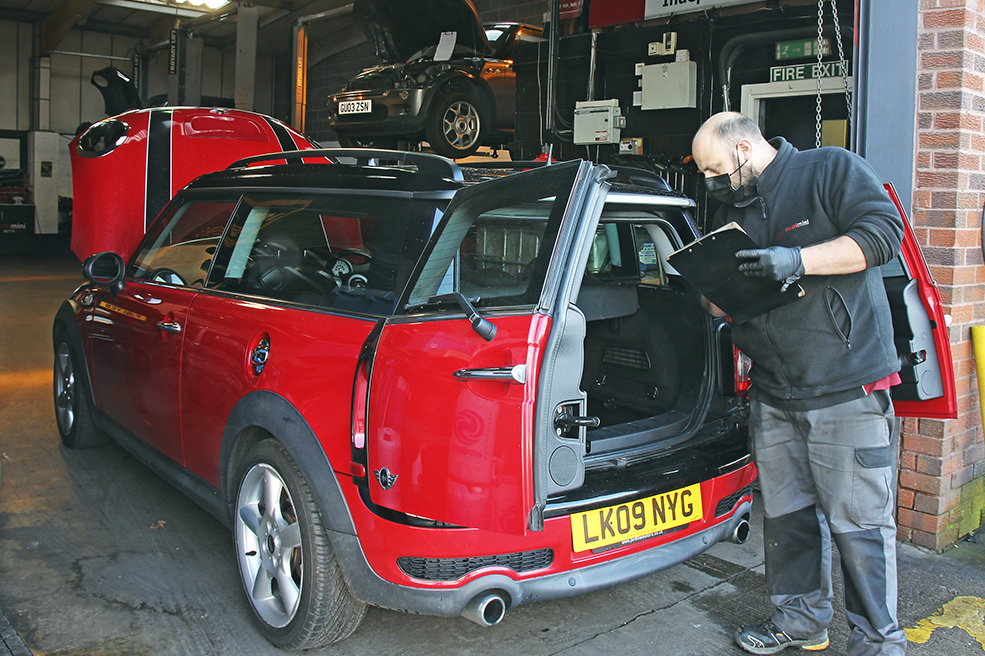
R55 MINI Clubman Cooper S: Assessment
There are a few issues to be aware of, even with what is a fairly modern car. The car’s engine is known for timing chain issues, usually noisy on start-up, with some chains stretching and eventually snapping into pieces.
Other common problems associated with the Cooper S Clubman include a couple of camshaft-related issues. The high-pressure fuel pump is driven off the inlet camshaft, and this is known to fail and leak internally. The first you know about the problem is when trying to start the engine, which will require several turns to build-up the fuel supply.
A brake vacuum pump is attached to the end of the exhaust camshaft and can fail, sometimes resulting in the camshaft being jammed, which will most probably break the timing chain, leaving the bottom half of the engine rotating.
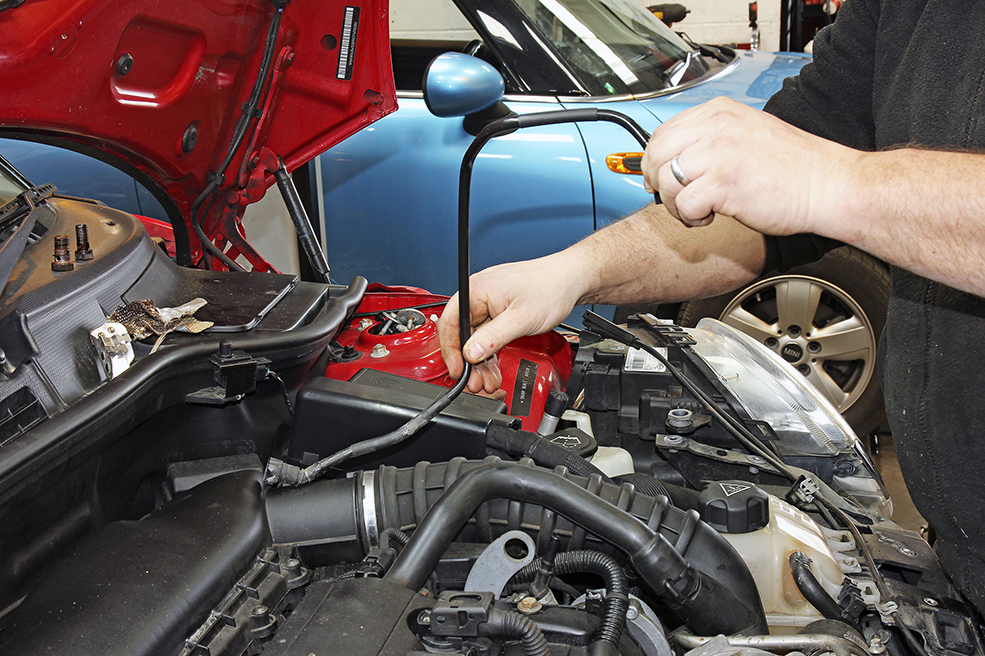
We’ve noticed a strange noise coming from the engine after switching off, which we initially suspected could be caused by the aforementioned brake vacuum pump. However, on visiting MINI specialist mad4mini in Leeds, the turbo actuator was suggested as the more likely culprit. It’s located below the air filter housing, close to the engine bay bulkhead.
One common problem mad4mini is keen to address concerns a de-coke of the engine. The direct-injection system results in a build-up of carbon around the back of the inlet valves. If this carbon build-up is excessive, the valves will remain open, resulting in loss of compression and fuelling problems. The official BMW solution is to clean those valves in situ using special blasting equipment and a handful of broken walnut shells.
On the road, our R55 MINI Cooper S Clubman feels solid and sure-footed. The steering seems to wander at times, so perhaps the wheel alignment needs checking, along with the tyres, although the low-profile non-runflat tyres fitted to our car are known to wander and tramline a little.
Car Mechanics editor Martyn Knowles found there was some juddering under braking at times, so further investigation is required. Maybe the front discs are warped or there are suspension and tracking issues.
The suspension feels firm, but positive. There are MacPherson struts at the front with lower arms, whose rearmost bushes can wear, just like on the earlier R50 MINIs. At the rear, the suspension is also similar to the R50 MINI, with strut-style coilovers, trailing arms and upper and lower control arms. Plus, there are anti-roll bars all-round.
While the Cooper S Clubman may not be too expensive to run, it’s also very refined and feels very modern. There’s a six-speed manual gearbox, climate control, automatic exterior lights and an assortment of toys including a double sunroof, although this doesn’t appear to be working at present – and the electric side windows are very slow to move up and down.
We spoke to Mintech Spares, who sell secondhand spares for the BMW MINI. They explained the bulky double sunroof can become too much for the electronic mechanism to move, especially if water gets into it. With a new mechanism costing around £1400 fitted, their solution is to disable the rear sunroof, which allows the mechanism to control the front sunroof. Total price is £250+VAT (£300).

Our Clubman Cooper S has an impressive dashboard and instrument display, but they don’t tell you much – the temperature of the coolant or the oil pressure aren’t displayed. Instead, there’s a menu system to pair your mobile phone, display the outside temperature and calculate fuel consumption. Useful features, but any engine problems are assumedly catered for with warning messages.
From our photographs, this Clubman looks clean and tidy, but the rose-tinted glasses really do need to be taken off. The lacquer has peeled off the exterior paintwork around the driver’s exterior door handle and along the nearside of the bonnet. The colour of the bonnet-mounted plastic air scoop seems to be a different shade to the rest of the metal bonnet. Mad4mini blame the colour difference on the heat from the turbocharger. A cheap solution, perhaps, is to remove it and paint it black, which in our case, will go well with the black bonnet stripes.
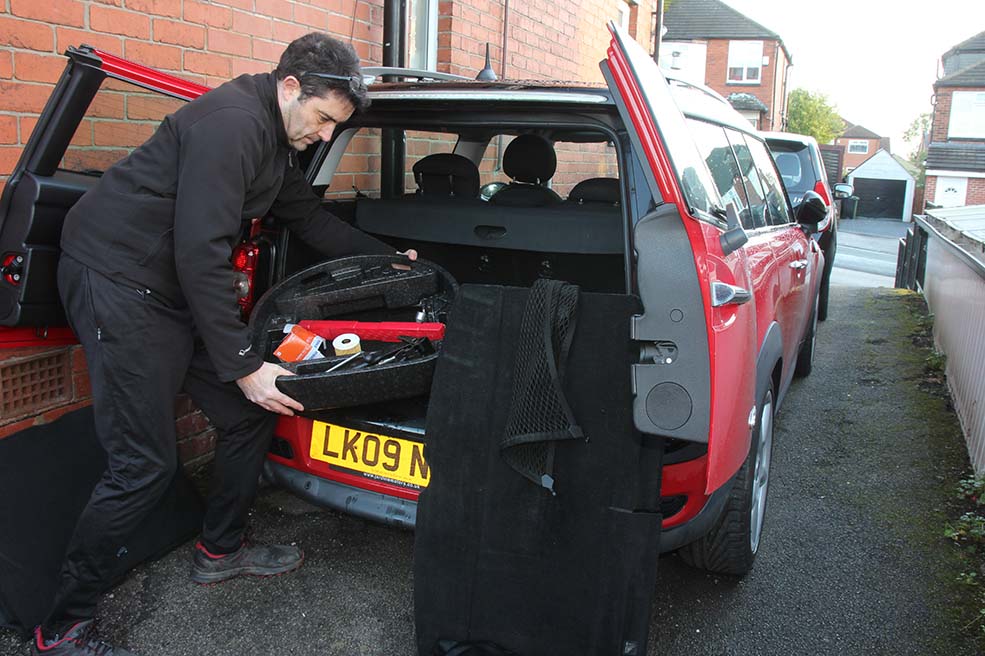
Open the rear barn doors on our project car and whilst there’s no hint of damp from the false floor, after we removed all the contents, we discovered a couple of litres of rainwater inside. And to make matters worse, there are no drain plugs.
Unlike the first-generation MINI hatchbacks, where water escapes inside via the high-level brake light, reg-plate plinth and boot seal, the Clubman doesn’t seem to share these issues. This one has got us scratching our heads as there are no signs of how the water has got inside. All we can do at present is remove the water and monitor the situation.
We also have other water issues at the opposite end of the car. After drying the bonnet prior to taking some photos, we opened and raised it and found lots of dripping water seemingly escaping from between the inner and outer skin of the bonnet. Perhaps water has come through whilst driving the MINI, seeping in via the air scoop and around the front and sides.
Our biggest concerns with our Clubman relate to engine matters. Oil is leaking from the engine, close to the front bumper. We’ve already added nearly one litre of engine oil to keep it topped-up, although the engine didn’t seem to lose any on a recent longer drive.
A common cause of oil leaks on this engine is from the oil filter housing. When we visited mad4mini, they couldn’t see if this was the cause of the problem on our car because the exhaust manifold and its heatshield are in the way, but judging by the drips from underneath the front, they are confident this is the cause.
It’s perhaps promising we’ve discovered several problems with our Clubman, and it’s maybe easy to see why because the servicing has been neglected. Typically, the annual MOT test for this MINI has usually passed without problems for most years, which often gives new owners a false sense of security and reassurance that a car has been well-maintained and looked after.
The previous owner of our Clubman bought the car in August 2020 when it hadn’t been serviced for nearly 27,000 miles and almost five years (according to the stamped service book). Thankfully, there’s a service stamp for later in August, although there’s no indication as to what was done.
So we contacted the garage, which is based in Basildon in Essex. The garage owner remembers the car and recalls changing the oil and filters, although the customer didn’t want the pollen filter changing. He also remembers renewing the anti-roll bar D-bushes and recalls the oil leak, which he suspected was coming from the rear main oil seal. He was right in thinking it was from around this area, because we’ve seen oil residue here, but we’ll start with the more common cause – the oil filter housing.
Perhaps the oil leak and the prospect of having to remove the gearbox to fix a leaking rear main oil seal was the reason for selling this MINI Clubman within two months after its last service.
During that same month as the last service, our Cooper S Clubman was submitted for an MOT test and it passed, after which the owner only kept it for a couple of months before deciding to sell – which is where we come in, having bought it at auction for £2600 hammer price. So far, we’ve driven it for almost 500 miles and not found anything too disturbing to make us regret buying it.
We’ve already devised a modest list of maintenance and repairs. Fortunately, we have nationwide parts supplier Autovaux ready to source just about everything we’ll need and mad4mini can advise and assist with specialist work, such as a de-coke, timing chain renewal, fixing the oil leak and investigating that noise when switching off the engine. They have also noticed the upper strut mounts at the front have perished.
There are some precautionary repairs we may need to consider, such as the plastic thermostat housing, which can fracture and leak. With our MINI being nearly 12-years-old, it’s highly likely the thermostat has already been renewed, but it may be worthwhile changing it anyway, and completing a coolant flush at the same time.
We’re confident our list of jobs will grow, but at the moment, we seem to be at a good starting point for this project. There’s lots to do and a mixture of work that can be completed on a DIY basis and with specialist tools and knowledge:
To-do list
- Fix boot leak
- Fix sunroof
- Identify engine noise after switching-off
- Fix engine oil leak
- Lubricate electric windows
- Repair peeled lacquer
- Replace timing chain
- Replace upper strut mounts
Fixing boot leak
Trying to find the cause of water ingress on a car that’s only been in your possession for a few weeks can be an impossible task. Traces of water residue are the best you can hope for, or throwing a bucket of water over the car and quickly looking for where the water is coming in. We didn’t have such clues, but we did find four litres of clean-looking water sloshing around the bottom of the boot floor. And there was more bad news: there are no drain holes, so we had to make our own.
As you’ll come to see, we may or may not have fixed the water leak. Snow and torrential rain resulted in only a few drops leaking through, so perhaps this is going to be an issue that needs to be checked every few months. One job we were glad to complete was dismantling the high-level rear brake light to remove all of the mould that had grown inside it.
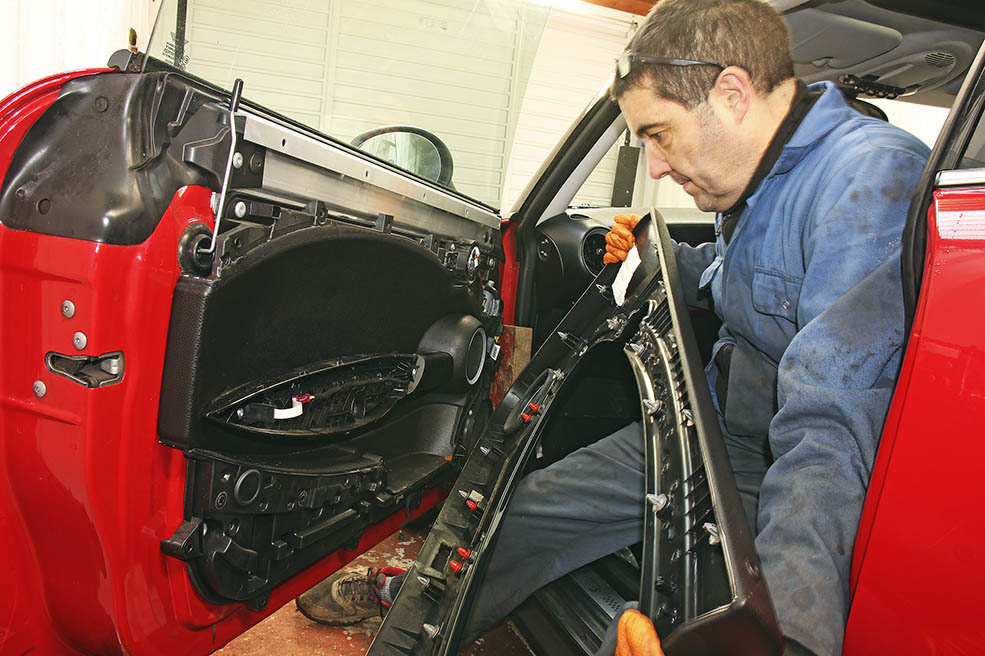
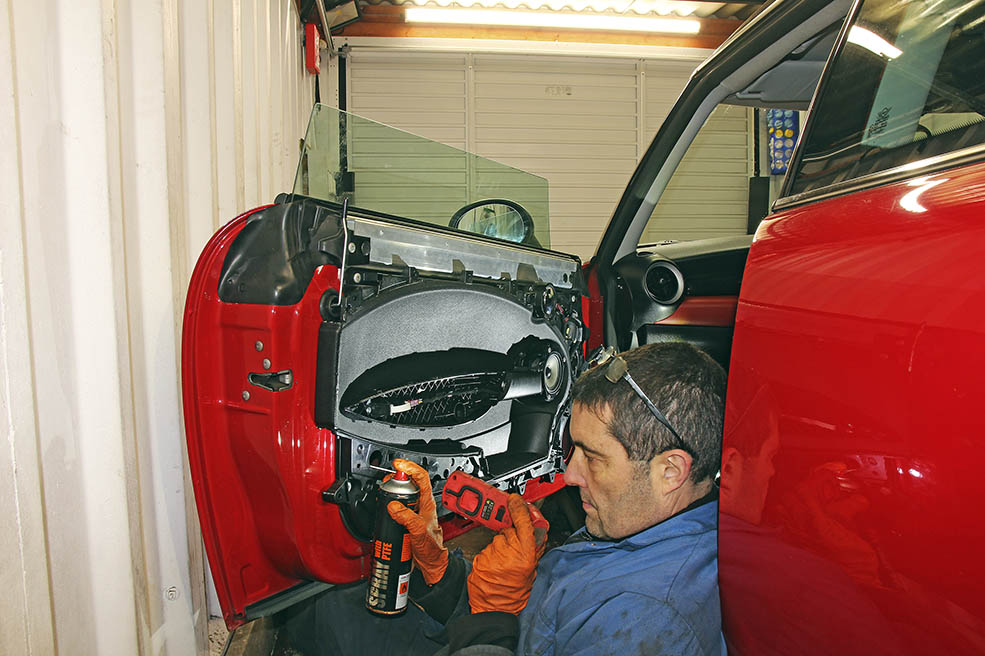
Sadly, some jobs have not been as successful as we’d hoped. The slow-moving electric windows should have at least seen some improvement after we lubricated the runners, but maybe they are slow for a reason. We were amazed at the design of the MINI’s doors (driver and front seat passenger). Most doors have a separate door card (interior panel), which can be removed to access the internal components, including in our case the window motor, mechanism and runners/guides. Not so with the MINI R55: instead, the door card and electric window components are all removed as a complete assembly, making it so much more time-consuming and frustrating.
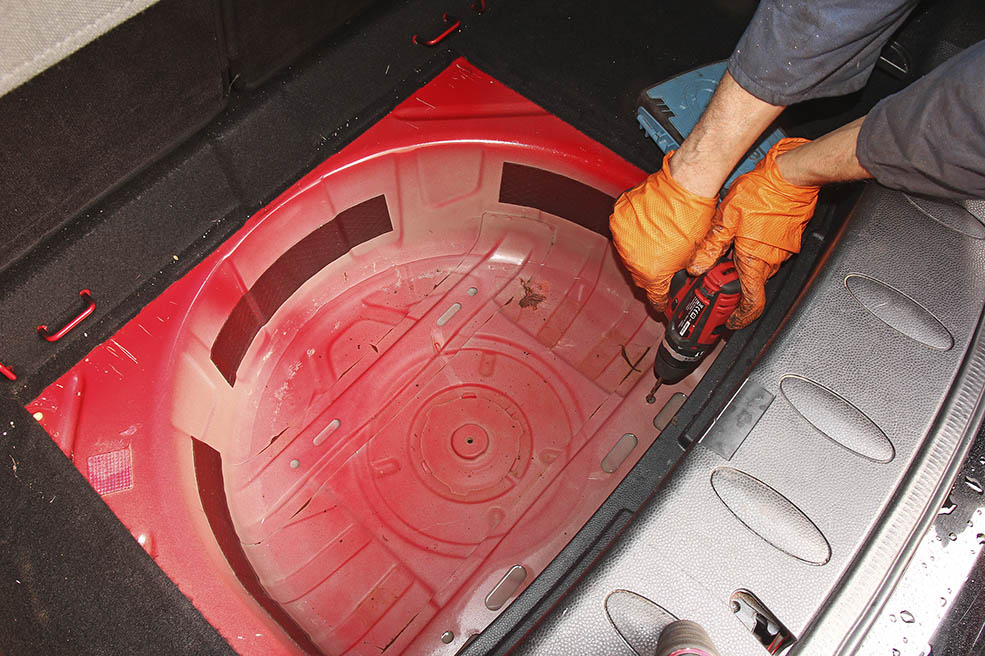
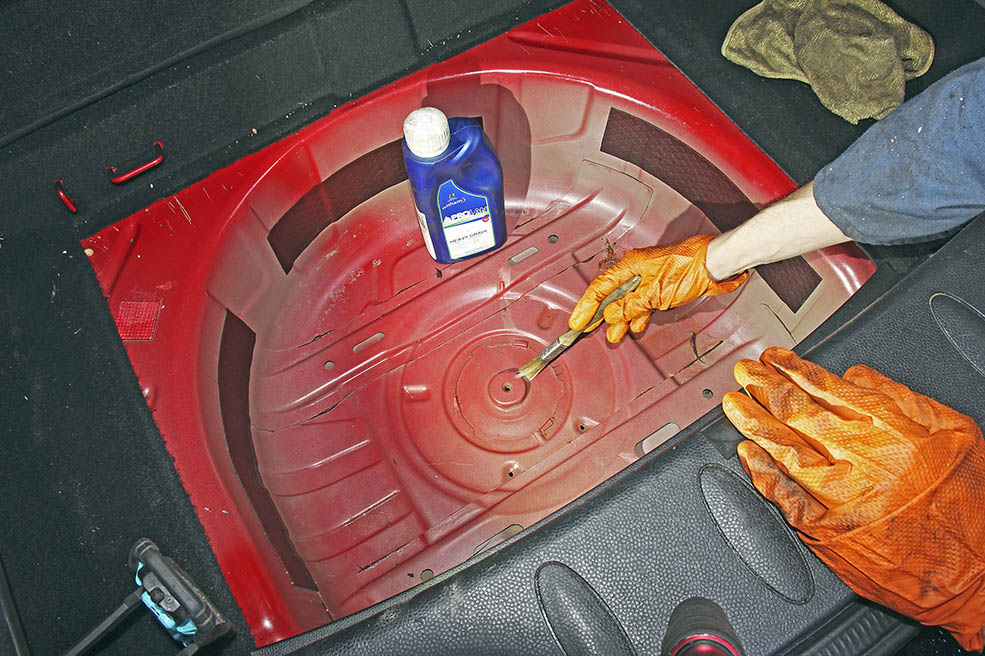
Before we started to look for the cause of the water that had collected inside the well of the boot floor, it had to be removed. There are no drain plugs, so we checked underneath, then drilled a couple of 5mm holes. It took several minutes for the water to drain from the boot into a drip tray, and there was still a small amount remaining, which had to be dried with a cloth. We decided to measure the amount of water that had been inside the boot, and we were amazed to roughly find four litres of clean water that had been sloshing around inside the boot. Our only dilemma now was trying to work out how it had got inside and how we could stop it happening again.
Potentially, some water may always collect inside the bottom of the boot, so we decided to rust and waterproof this area. First, it needed thoroughly drying before any treatment could be applied, so a heat gun was used on its lowest setting. Next, we applied a small amount of Prolan Heavy Grade general purpose lubricant. This waterproof solution is extracted from sheep’s wool and is used in agriculture to rust-protect machinery. A small amount was applied to the seams and our drilled holes inside the boot floor.
While trying to figure out how the boot of the MINI had filled up with four litres of water, we noticed the high-level LED brake light was rather mouldy. Could this help identify the cause of the problem? Looking underneath the strip of LEDs and its housing, we spotted eight Torx T25 screws. All of them were undone to see if the high-level brake light could then be removed and the water leak further investigated.
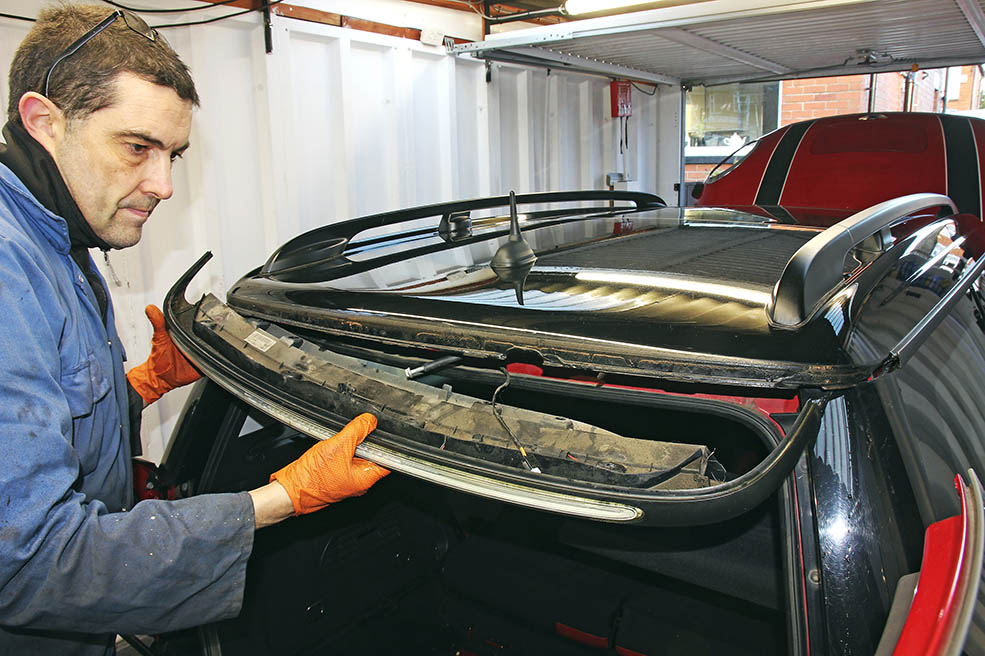
The entire housing for the high-level brake light, along with its outer edging trim was carefully pulled away from the rear edge of the MINI’s roof. There was lots of hidden dirt and moisture lurking inside. The brake light housing also accommodates the washer jets for the rear glass, so the small hose to the jets was detached and blocked, and the wiring for the LEDs was disconnected before the housing could be fully removed. There was lots of moisture and dirt along the rear edge of the MINI’s roof, which had been concealed by the brake light housing. Had rainwater leaked past here? Or maybe the washer jets were blocked, so pressurised fluid leaked out.
Looking underneath the rear edge of the roof, we spotted a series of rubber grommets (blanks), so these were removed to look inside and check for water ingress. It was dry with no signs of water residue. The mould around the LED brake light looked as though it could be cleaned off, so a trim tool was used to carefully detach the strip of LEDs from its plastic housing. This took a few minutes of careful manipulation.
Using an old toothbrush and some mould cleaning solution, the green gunge was removed from around the edges of the LEDs. Luckily, water and mould hadn’t got inside the sealed light strip. We forced some maintenance spray through the washer jets and discovered one of them was blocked. Had this caused the water leak back inside? We sprayed through both sides of the blocked jet to clear it. The LED strip was refitted into the housing, making sure the wiring was pulled through and located in position. We breathed a sigh of relief that none of the plastic tags that hold everything together had broken.
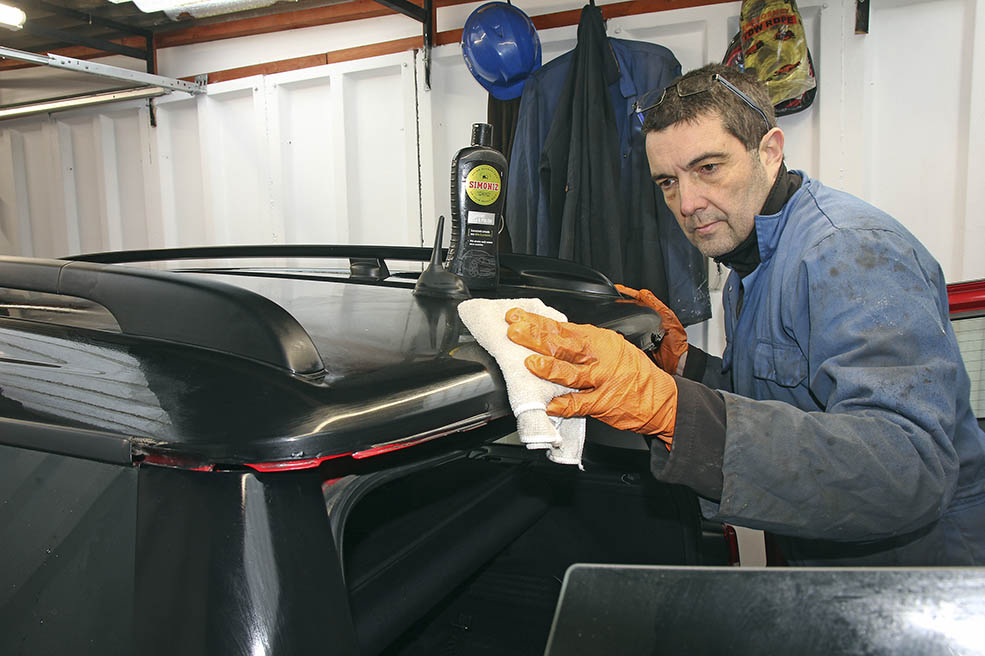
Before refitting the housing, we decided to polish the rear edge of the roof to help keep it clean and applied some black plastic treatment to the housing to revive its slightly faded finish. Finally, the high-level brake light housing was refitted, making sure the hose was reconnected to the washer jets and the electrical plug for the LEDs was reattached. Had we fixed the leaky boot?
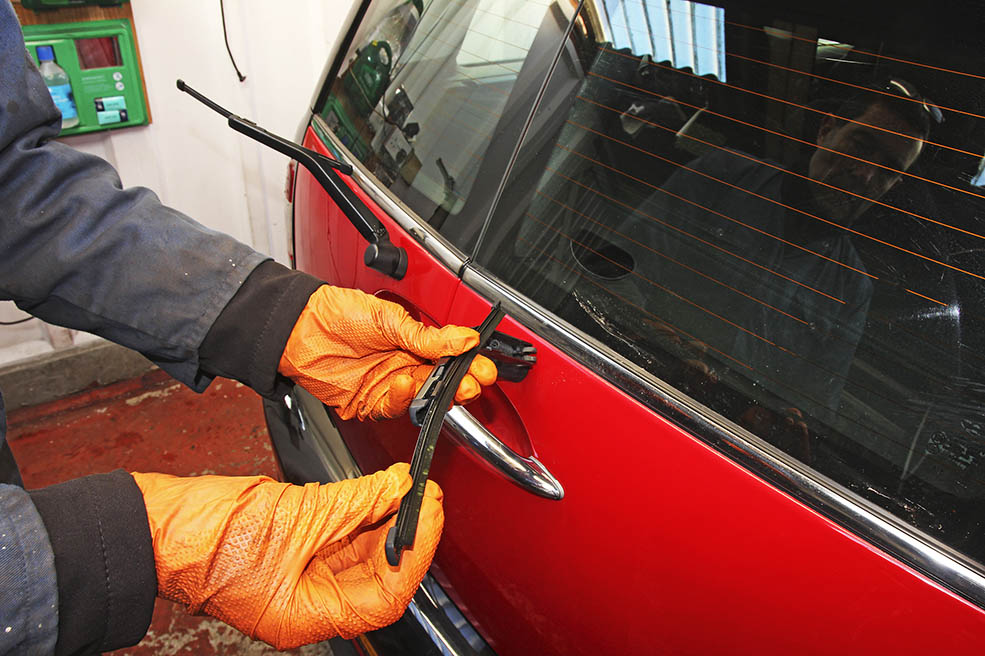
Upon initial inspection, the twin rear wipers for the rear doors of our MINI seemed to be in reasonable condition because they clear the glass, but close-up, the rubber blades had clearly worn. Furthermore, the wiper arms were stiff, so their springs didn’t appear to be helping to apply any pressure onto the glass. We sprayed over them with a light grease and this successfully restored them.
The caps that cover the ends of the arms of the wipers and help protect the mounting nuts that hold them onto the spindles were stiff to prise up, so these were also lubricated. Thankfully, there was no corrosion around the mounting nuts. We noticed several deep scratches in the glass of the rear doors. Had this been caused by the wipers and a worn rubber blade? They were too deep to be fixed with some glass polish.
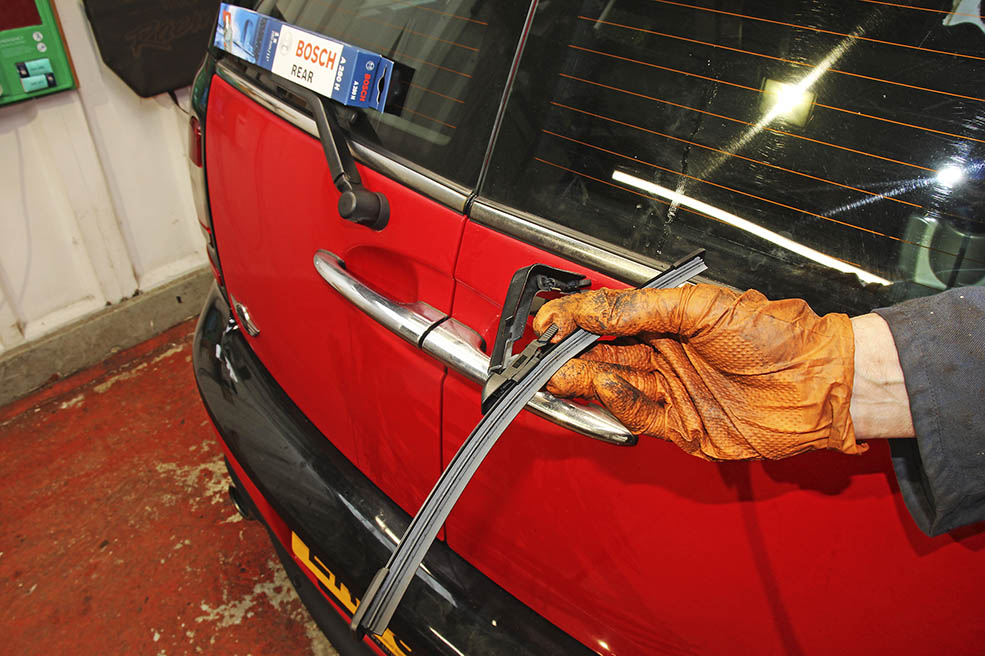
We decided to replace both rear wipers, so Autovaux supplied a pair from Bosch that were the correct dimensions and had the same fittings. Each one costs £8.26+VAT. The rear wipers seem to loosely clip into the arms, but appear to be securely held in position. Removal and refitting is much easier than most wiper blades.
Both electric windows seem a little slow, so we decided to see if we could lubricate the runners for the passenger door. First, we unclipped the armrest, then extracted a plug for the door handle surround and prised it off.
The puddle light was prised off the bottom of the door card and detached, then the outer trim for the inside of the door card could be easily removed as it’s only held in position with plastic plugs, but sadly, it revealed no better access to the window channels that need lubricating. Several Torx T30 screws secure the door card to the metal door, so we progressively slackened all of them, then removed them. The door card was now a little loose, but showed no signs of parting from the door.
Thinking there were some hidden fastenings we released the trim from around the door’s upper speaker and tried undoing a few Torx T25 screws, but this didn’t help. The aluminium strip across the inside top of the door is clamped with Torx T30 screws at the front and rear edges. Despite it felt as though it was separate to the door card, we cautiously removed all its fastenings.
There are a couple of access holes to enable the clamps (Torx T30 screws) that hold the bottom of the door glass to be released by winding the glass halfway down. Surely this isn’t necessary to remove the door card? We called mad4mini for advice: it is.
Now, realising that the entire innards of the door can only be removed altogether, we looked for an easier way to grease the window channels. First, the lower door speaker was removed, secured with four Torx T25 screws. We could now see further inside the door via the speaker hole and could lubricate the frontmost window channel with multi-purpose grease.
As for the rearmost window channel, the access hole for one of the clamps provided enough room to spray a light grease over it. Rob crossed his fingers that he’d done enough to lubricate the two runners for the door glass. Perhaps the scraper fitted along the outer top edge of the door was dragging, so this was prised off and cleaned with a brush. It has a felt finish on the inside and there was lots of dirt along it.
The door was partly reassembled, leaving the outer trim off, then the window was operated. It was a little better. Then we noticed two drain plugs along the bottom edge of the door. Upon extracting them, a little moisture escaped. The two drain plugs provided access to the Torx T25 screws that secure the bottom of the window channels to the door card assembly. By adjusting the position of the bottom of the channels, we hoped we could improve the speed of the glass.
Servicing
We have to admit we hit a couple of minor head-scratchers on our project MINI Cooper S. Nothing disastrous – merely evidence that you never stop learning.
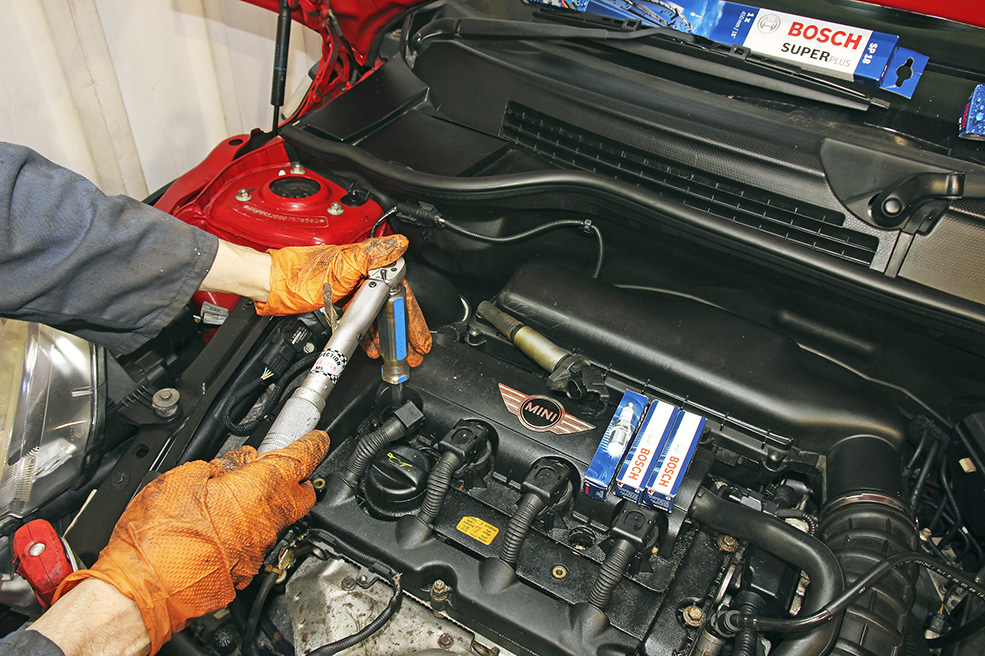
Take the Bosch spark plugs we’ve fitted to the N14 1.6-litre turbocharged engine: most spark plugs require a 16mm or 21mm spark plug socket, although there are some that require a 14mm socket.
Not so on the MINI; we found that a 15mm multi-hex deep socket was needed, and with the plugs set deep inside the top of the engine, we were a little nervous as to whether we could extract them without a dedicated spark plug socket with a rubber bung inside. Luckily, a magnetic pick-up tool came to the rescue and we found a length of rubber hose with an 8mm inside diameter to lift a plug out. This hose was used to fit each new spark plug and start threading it into the cylinder head.
Changing the years-old pollen filter had us stretching our back muscles to be able to reach inside the passenger footwell. The filter is fitted at an awkward angle, turning it from a flat-shaped filter to a curved one. Fortunately, the Bosch filter we were supplied by Autovaux slid straight into position.
Our final dilemma had us all confused and concerned the recommended minimum thickness of the brake discs. According to Autodata, BMW specifies a minimum thickness of 7.6mm for the rear discs on our MINI, but if the brake pads are being replaced, they recommend a minimum thickness of 8.4mm, which is the same value as a refaced disc.
In theory, we can see the sense of this – if you are going to replace the brake pads, there’s no point in not changing the disc if it’s close to the 7.6mm limit – hence the larger thickness. However, it’s a little confusing; if the disc has to be changed anyway, then new brake pads must be fitted. It’s perhaps reflective of long service intervals and many owners’ neglect for checking, so maybe it’s suitably wise and cautionary.
The half-leather upholstery inside our MINI could needed a clean and condition, so we applied a suitable leather treatment and left it to dry. We noticed the edge of the driver’s side outer seat base is a little more worn than the rest. This is typical, as it’s the area that gets squashed and rubbed against every time the driver gets in or out of the car.
We also did a spot of computer-based diagnostics. Armed with Launch’s CRP MOT diagnostic equipment, we plugged in the Bluetooth OBDII connector into the MINI’s port, which is located underneath the dashboard, inside the driver’s footwell. The diagnostic equipment recognised the vehicle and even confirmed the vehicle identification number (VIN), model and mileage. We then decided to look for any logged fault codes.

Several fault codes had been logged. Some of them related to super knocking, which appears to be either timing or fuel quality related. This requires further investigation, but may have been a one-off fault. Other fault codes we found related to the power supply being cut-off and a problem with the air-conditioning. These may also have been one-off logs. Having noted all of them, we cleared the fault codes and will see if they return.
Rustproofing
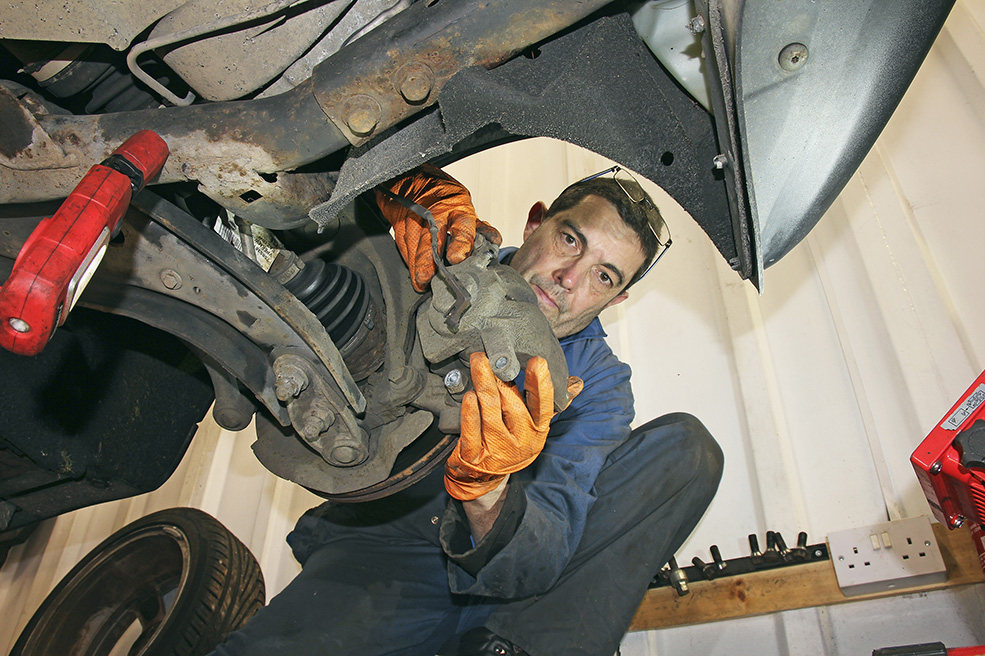
We weren’t expecting copious amounts of corrosion on the underside of our 11-year-old MINI, but were quite surprised by what we found around the rear suspension. This is a common potential rot-spot on the first-generation of MINIs and doesn’t appear to have been prevented on the next.
Surface corrosion was also evident around the backs of the sills, which is yet another issue on earlier MINIs. And despite they weren’t rusty or seized, we cautiously extracted all the mounting bolts for an exhaust shield and lubricated them as this is a potential problem area.
The metal exhaust shield that was fitted on the first MINIs is known to corrode, and more worryingly, its M8 10mm-headed bolts can seize. Rob cautiously sprayed over them with a penetrating fluid before trying to slacken them.
Fortunately, all six of the mounting bolts were straightforward to slacken with a 3/8in ratchet, then to speed up the job, we used an impact ratchet with a suitable 10mm impact socket.
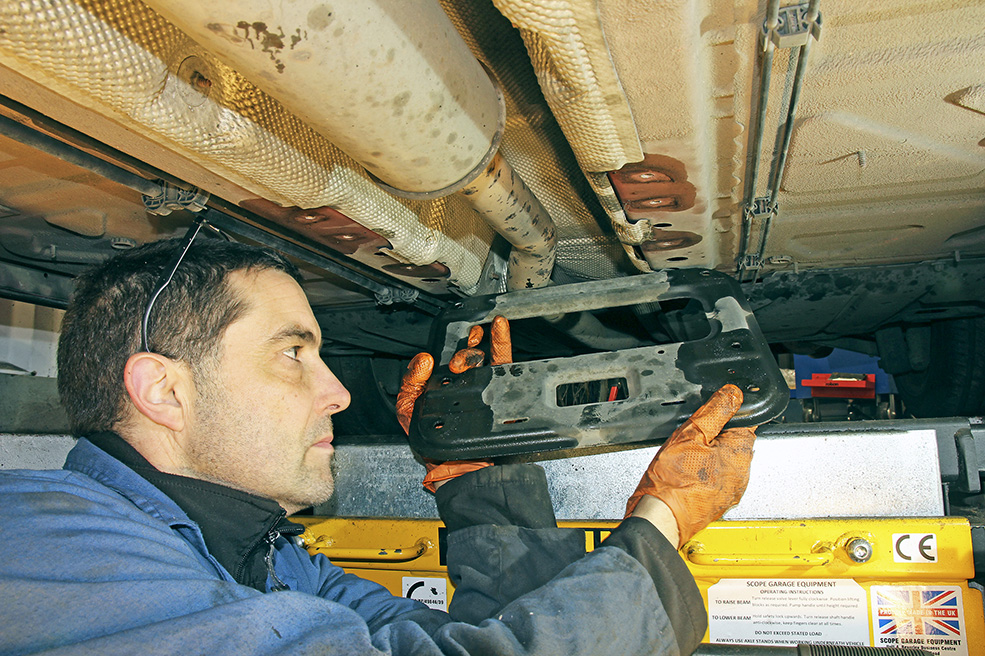
With all six of the bolts undone, the metal exhaust shield dropped down and there didn’t seem to be much in the way of corrosion. This has been a bigger problem on older MINIs, so is worth checking.
We applied an anti-seize grease to the threads of the mounting bolts, then wound them in and out a few times to help lubricate and protect the threads inside the chassis rails. The Prolan soft grease we used has been proven to last for 30 years.
As for the metal exhaust shield, we gave it a thorough clean and discovered that although some of the paintwork was a little crusty, surface corrosion hadn’t taken a hold, so we refitted it.
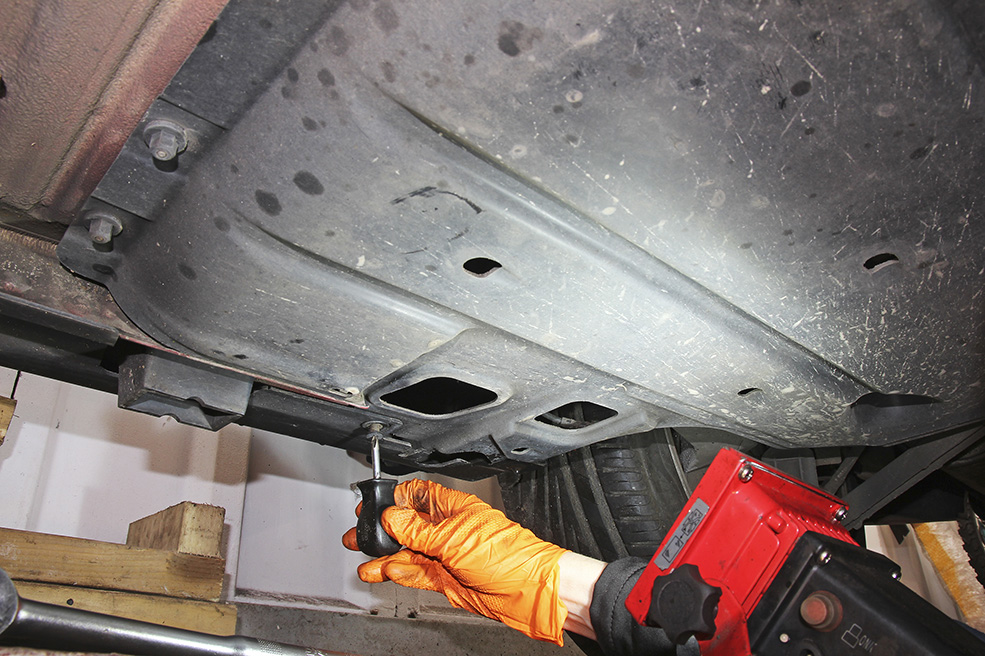
Still underneath the MINI, but a little further towards the rear, we noticed a couple of plastic undertrays. Could these be hiding corrosion? We started to undo several plastic 10mm securing nuts and a plastic crosshead trim screw.
A rusty-looking Torx T20 screw looked as though its head could easily be chewed, so it was sprayed over with penetrating fluid and left to soak before attempting to undo it. Fortunately, none of them put up a fight.
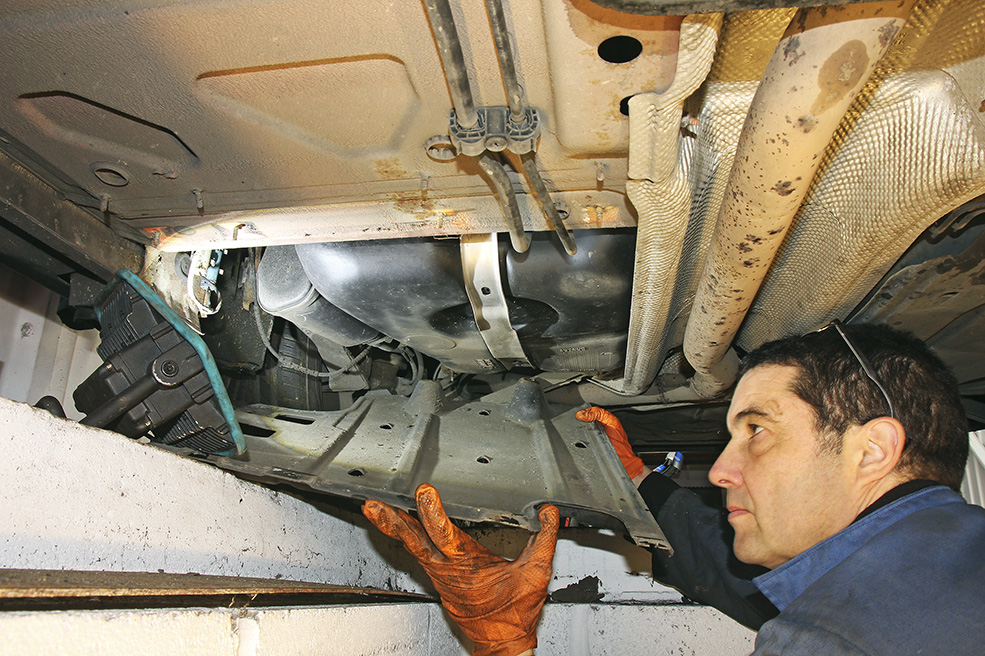
With both plastic undertrays removed, we could see the tank straps for the petrol tanks, which unlike earlier MINIs, are rust-free. Another common rot-spot is around the back edge of the sills. Minor surface corrosion was found on both sides, so we prised the rubber grommets out to look further inside. As far as we could see, the rust hadn’t gone any further.
After moving the wiring for the brake pad wear sensor and ABS, a wire brush was used to remove any dirt and surface corrosion from around the rear edge of each sill.
A rust inhibitor was applied to any ingrained corrosion on the bodywork. This will help to form a protective barrier before applying further paint and rustproofing products.

The rusty sections of the rear subframe ideally need to be thoroughly cleaned all over, but that requires the rear assembly to be removed. For now, we decided to treat and protect it, starting with a rust inhibitor.
The next day, we applied a couple of coats of thick black stonechip paint to the areas of the rear subframe that had been treated. This will hopefully help to protect it for now, but it will need to be inspected next year.
A couple of coats of black stonechip paint were also applied to the ends of the sills where corrosion had been discovered and treated. This area will be concealed by the plastic undertrays, so a mismatch of colours isn’t too problematic.
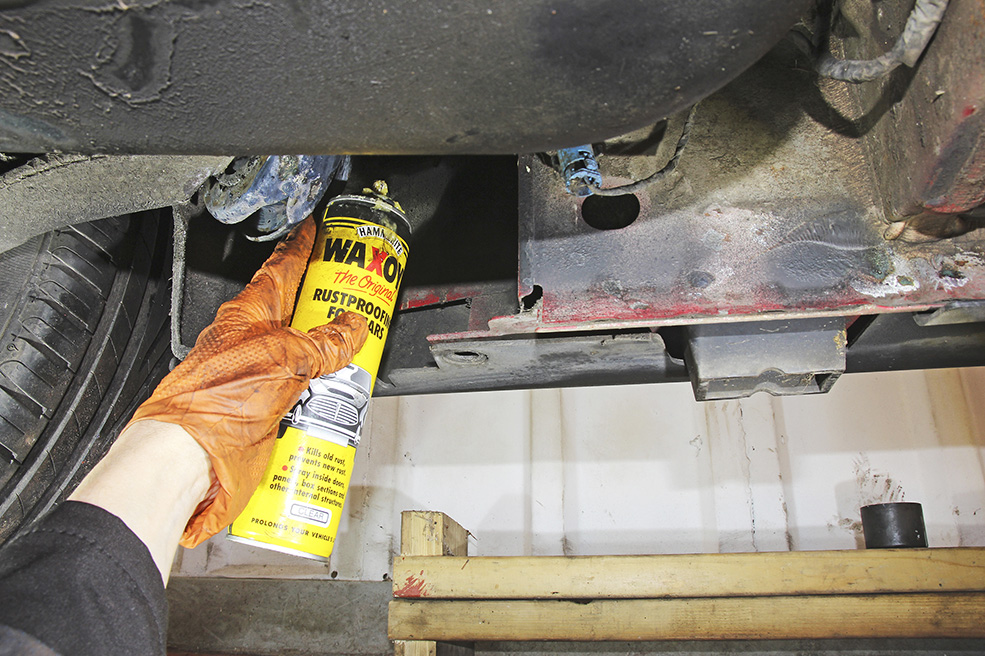
For added protection, a little wax was sprayed inside the backs of the sills to help reduce the risk of corrosion forming or spreading. This will hopefully help to disperse any moisture and reduce the risk of it settling here.
We found a number of cavities and holes where the rustproofing wax could be injected, including chassis rails and this box section behind the rear seat squab area. We were careful to not apply too much and risk blocking any drain holes.
Fixing oil leaks
To solve some oil leaks on our MINI we booked some workshop time in at mad4mini. The plan was to see if the oil leak was coming from the oil filter housing, which is a common cause, but we also suspected the oil sump needed resealing.
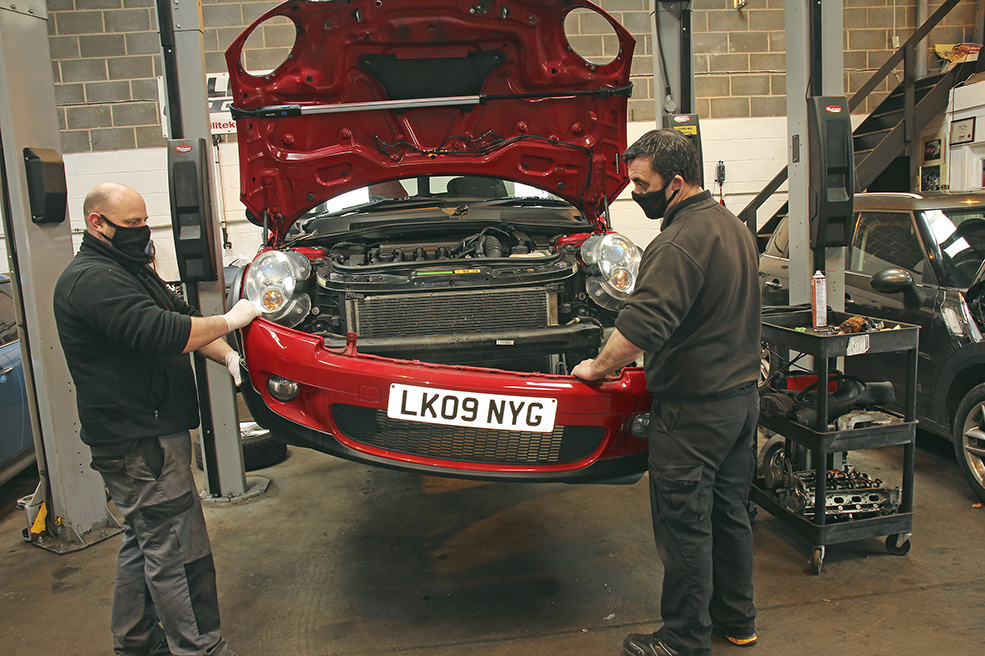
Removing the front bumper, slam and crash panels helps to create more space around the engine to access the oil filter housing that’s leaking oil, so we started by removing the front grille, which is secured across the top with plastic plugs. We then discovered two of its locating lugs were broken.
The outer edges of the bumper need to be separated from the wheelarch trim. There are a couple of plastic crosshead screws to extract, then the two panels can be pulled apart to release their clips. The front bumper is secured with several Torx T25 screws. We started by undoing one at either side of the radiator, then peeled back each wheelarch trim to remove another one hidden behind.
The final fittings for the bumper are along the underside, comprising two Torx T25 screws and three plastic trim plugs. The bumper was pulled forwards to enable the wiring for the fog-lights, outside temperature sensor and sidelights to be disconnected, then it was removed.
The slam panel needs to be taken off to improve access to the oil filter housing. First, we detached the bonnet release cable, but noticed its plastic housing had broken where it’s mounted, so cable ties had been used to secure it. After cutting the cable ties, the release cable was disconnected.
The slam panel is secured with four 13mm bolts, six 10mm bolts and four Torx T30 bolts (these hold the bonnet catches). The headlights were now loosely fitted, but Rich reassured us that the markings left by their mounts will help to refit them correctly. The crash panel was the final large component to be removed at the front of the Clubman. We started by undoing a couple of Torx T20 screws at each side, close to each headlight. Then he removed the two lower 13mm nuts nearby, but only slackened the top nut to ensure the crash panel was still secure.
There are four more concealed 13mm bolts to undo from inside the crash panel, but first, we detached the headlamp washer pipework that’s clipped to it. Then he removed a lower trim panel that’s secured with three rusty-looking screws. With the front part of the inner wheelarch trim suspended out of the way, we could see the two 13mm bolts that secure each outer edge of the crash panel. Their heads can round-off, but we were lucky on this occasion. Finally, the crash panel was removed. The remaining components at the front of the Clubman can be pulled forward thereafter, but it helped to undo the 10mm bolt hidden behind the wheelarch outer trim.
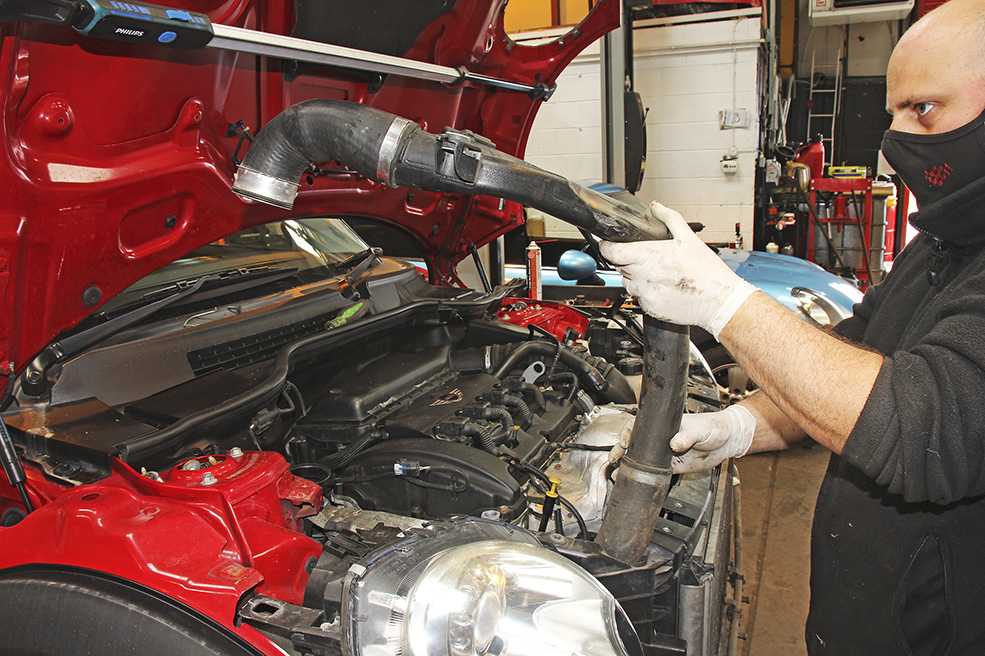
The boost pipe between the intercooler and throttle body was removed to help create more space and allow the components at the front of the Clubman to be pulled forwards. It’s secured with a Jubilee clip at the intercooler and there’s a Torx T20 screw to undo for a mounting/steady bracket near the throttle body.
There are three heatshields to remove that obstruct access to the oil filter housing. We started on the upper heatshield, removing the pre-cat Lambda sensor with a 22mm open-ended spanner. The upper heatshield is secured with six 10mm bolts. These can shear, but we were lucky and found they were all easy to undo. The engine was still warm, so some heat had been transferred to these bolts, which helped when undoing them.
Talking of using heat from the engine, we undid three 13mm nuts that secure the exhaust downpipe and cat in position. This assembly needs to be removed to access the oil filter housing. Two of the 13mm nuts were seized, so their studs were wound out.
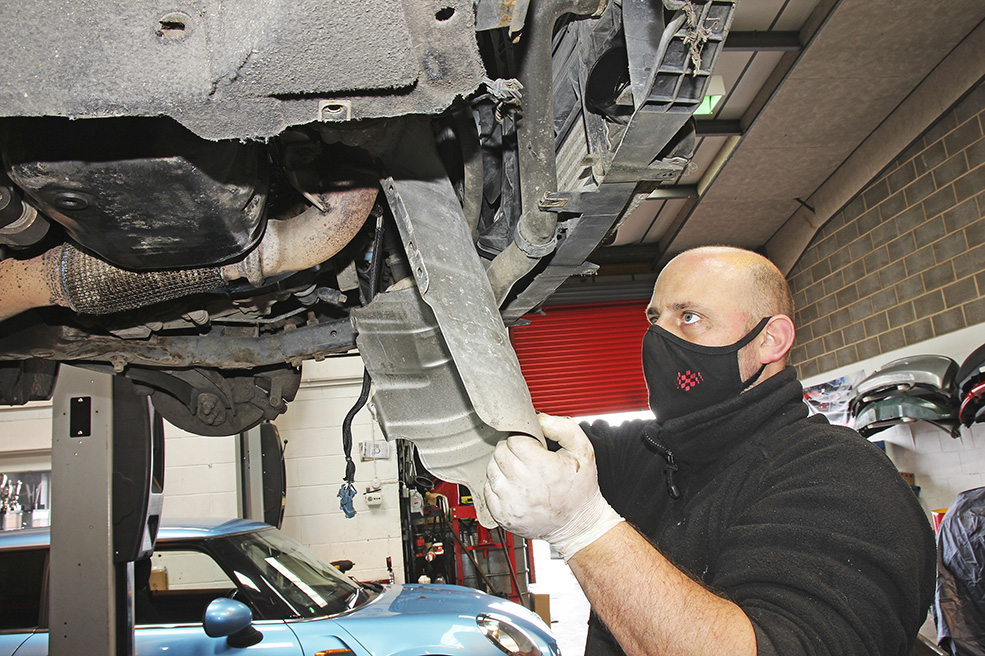
The lower heatshield was removed, which is secured with four 13mm bolts. The wiring for the post-cat Lambda sensor was detached to enable the heatshield to be removed from underneath the engine bay. The catalytic converter was the next component to be removed, which is fitted almost in front of the oil filter housing. We started by undoing a couple of 13mm nuts that secure the cat’s mounting bracket onto the engine block.
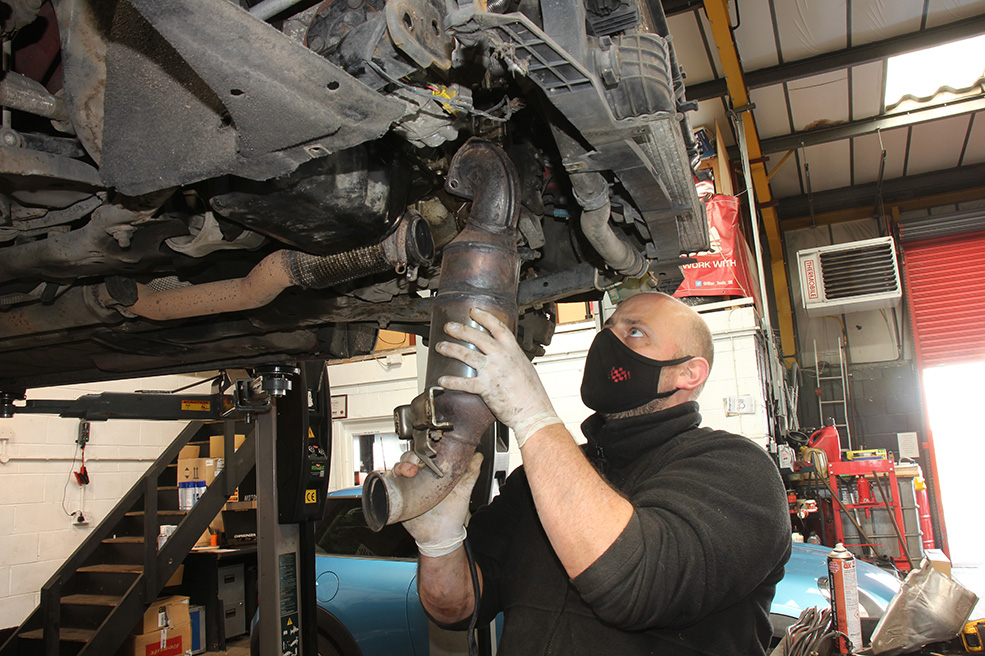
The end of the cat is secured to an exhaust flexi-section with a clamp and 16mm nut. Rich recommended replacing it because the nut usually shears and it did. He then prised the clamp apart with vice grips and removed the cat.
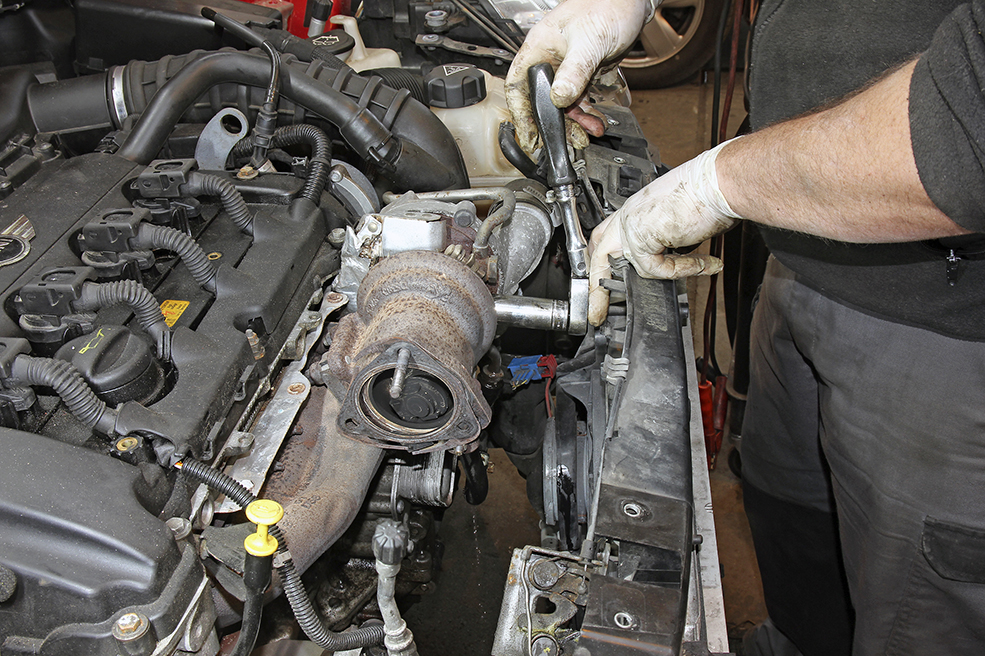
We could now see the oil filter housing, but there was a steady bar in the way that’s fitted between the engine block and turbo. It’s straightforward to remove by undoing a 10mm and 13mm bolt at either end of it, providing they are not seized. The last heatshield to remove is held to the engine block with a couple of 10mm bolts. We could now see all around the oil filter housing and realised it was definitely leaking engine oil. We also suspected some oil had been leaking from the sump.
The turbo’s oil drainpipe needs to be detached from the turbo as it’s connected to the oil filter housing and will be removed with it. It’s secured with one 8mm bolt on the underside of the turbo.
Join us for the next update as we continue the process!
Oil leak and timing chain investigation
Progress was looking promising at mad4mini when we started to dismantle the front end of our Cooper S Clubman to tackle the oil leaks, inspect the timing chain assembly and de-coke the inlet ports.
As you’ll see from the photographs the oil leaks were typical for this PSA engine, with the gaskets for the oil filter housing and its oil cooler to blame, along with the sump that needed resealing. We quickly moved on to checking the timing chain and discovered that the guides didn’t look that old, despite finding the remains of older guides inside the sump and strainer.
The turbo is cooled with engine coolant that is fed through it via its own electric pump. We disconnected the wiring plug and released a 19mm banjo bolt. Coolant started to leak out, so we collected it in a drip tray.
After undoing the four 8mm bolts that secure the oil filter housing to the engine block, the entire assembly was removed. The seals for the oil filter housing have perished and broken up, which is why oil has leaked past them. We ordered new seals and return to the Clubman’s engine bay. Mad4mini has found that the standard oil feed pipe for the turbo can leak oil, so it’s worthwhile replacing it with a braided hose. We removed the old one by undoing the 17mm banjo bolts at each end.
We may need to replace the timing chain, especially if the guides are brittle or broken. These parts can be inspected by removing the rocker cover, so first, a vacuum pipe was removed, followed by the air filter housing. The rocker cover has several components attached to it that need detaching, including the HT leads, an earth wire for the coil pack, a CPS plug, wiring for the turbo boost pressure sensor and a breather.
The rocker cover is secured with 11 10mm bolts. Upon prising the cover up, we couldn’t believe our luck. The timing chain guides didn’t look that old. New ones are almost translucent and old ones turn a dark brown. We may not need to replace the timing chain and guides, but needed to confirm the timing is correct. Then, using an 18mm socket, we turned the crankshaft pulley while a second helper located a locking tool into the flywheel from underneath the engine. This ensured all four pistons are level and allows timing tools to be fitted onto the camshafts.
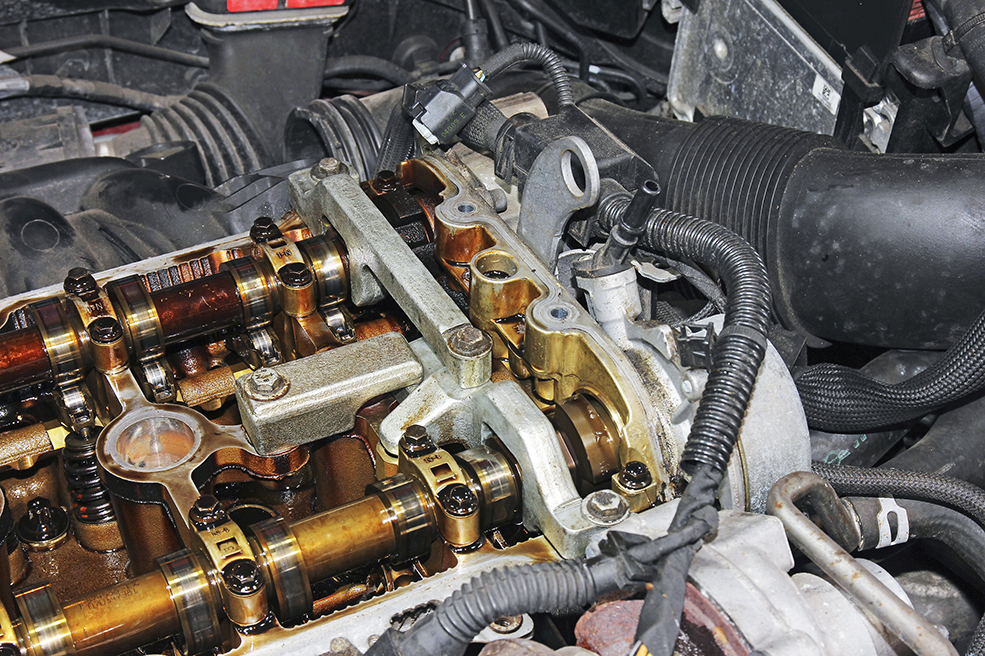
With the crankshaft locked, three camshaft locking tools were fitted, starting with the tool for the exhaust cam (the inlet cam has some adjustment). If they can be fitted, then the engine timing is correct – luck was on our side again! We shone a torch down the vertical timing chain guides and used a screwdriver to check the ends of them hadn’t broken off. This can happen if they are brittle, but ours were in good condition. We concluded there’s no need to replace the timing chain assembly.
So a new timing chain wasn’t needed, which meant we could move on to investigating the noise when switching off the engine. This was correctly identified as being the vacuum actuator, located underneath the inlet manifold, which meant it had to be removed. However, this meant we could conduct a de-coke of the inlet ports, a worthwhile exercise because carbon deposits can build-up inside here, resulting in choked valves that struggle to fully open or close and consequently performance delivery problems.
We managed to tick off several jobs at mad4mini, but soon realised there were a few more ready and waiting. Whilst running the engine with diagnostic equipment connected, it hesitated and raised a high-pressure fuel pump problem, showing there was only 10-bar of pressure when it should be around 50.
The diagnostics also revealed the battery wasn’t recharging properly and we’d had to recharge it a couple of times. It’s a 70Ah lead-acid type, but should be an AGM, so we’ll have to change it to ensure the stop-start system can be operated. The problems keep on coming, but we’re determined to not let them get the better of us.
Stay tuned for more in our next update!
Leaky sunroof fix
Our MINI Clubman has been plagued with a number of leaks – not exactly something you’d expect on such a modern vehicle. The latest was coming from the sunroof – so our man Rob Hawkins got stuck in to fix it.
Following the snow in February, Rob discovered he couldn’t operate the Clubman’s central locking, so had to extract the key inside the fob and manually unlock the driver’s door to get inside the car.
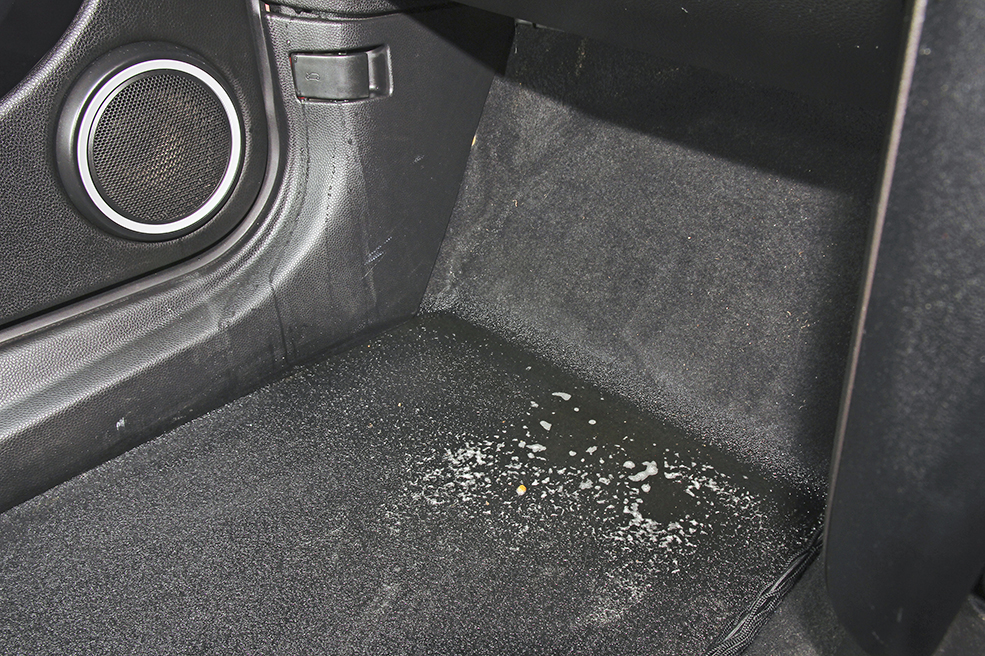 Reaching over to release the bonnet, Rob noticed the passenger front footwell was full of water. He tried starting the engine, but the battery was flat, so it was recharged, then he started to mop up the water.
Once the battery had recharged, the engine started, but there were no dashboard readings. Was the body control unit (BCU) inside the passenger footwell damaged? Rob detached the trim around it.

The carpet and sponge underside in the footwell were soaked, so Rob released a drain plug and let the water run out, then switched on a heater and a heat gun on a low setting, hoping to dry out the carpet and the BCU.
We spoke to mad4mini about the flooded footwell and they suspected it was caused by a blocked drain for the sunroof. Our only problem was the sunroof only opened as much as this photograph shows, so we couldn’t unblock it.
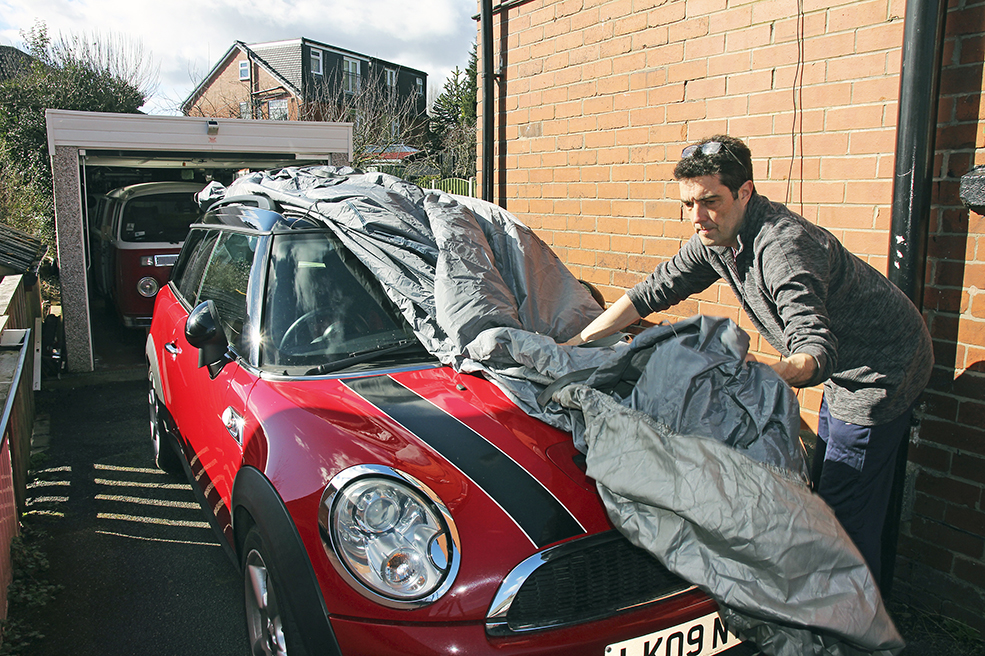
Running out of daylight, Rob used the car cover for his VW camper to protect the Clubman. It wasn’t tight fitting, so it ballooned in the wind, but at least it kept the rainwater away from the sunroof.
After speaking to MJR Minimatt, they recommended slackening the Torx T25 bolts along the inner sides of each sunroof to help with opening it. The sunroof can become buckled, so there’s too much resistance.
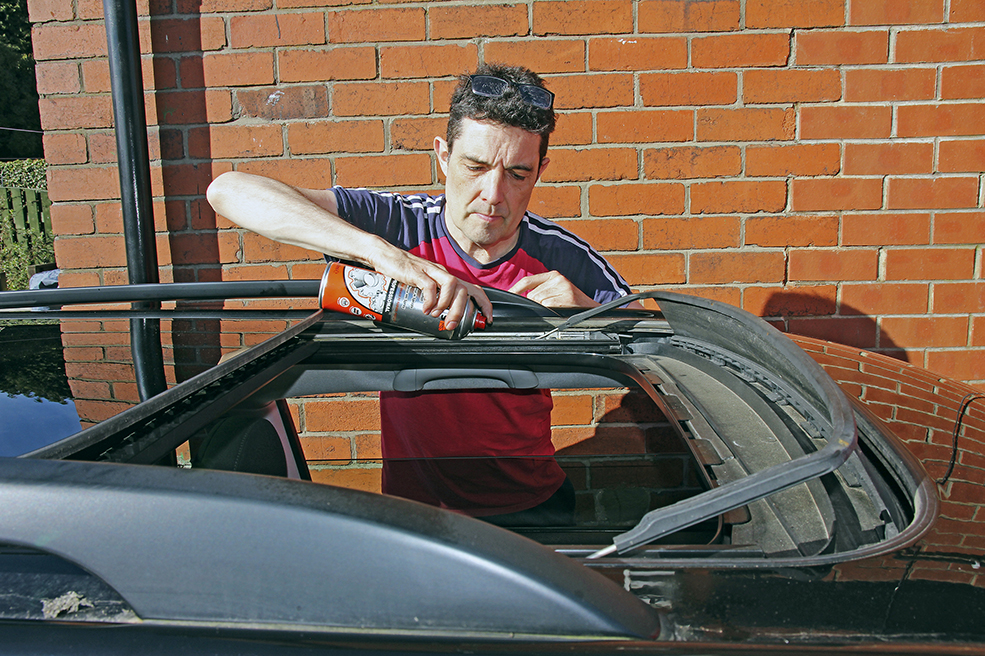
The advice from MJR Minimatt worked and the sunroof opened. Rob reached for a can of spray grease and applied it along the channels to make sure it was adequately lubricated.
Armed with some Meguiar’s degreaser and a thin metal rod, Rob squirted the cleaning liquid down both front drain holes. Liquid dripped out of the offside at the front of the sill, but not the nearside, so he carefully poked the rod down it.
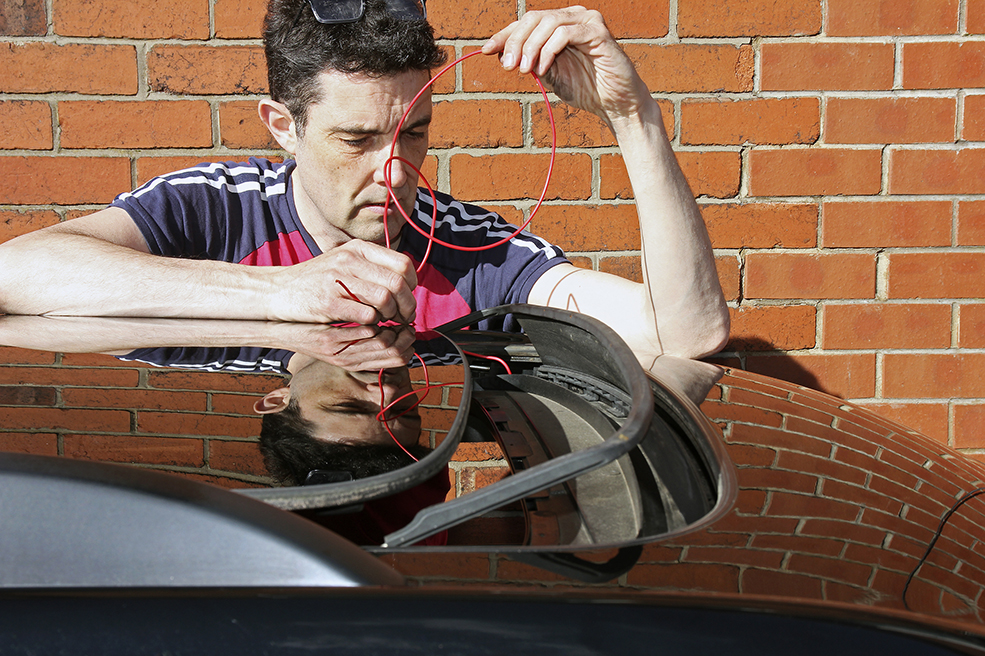
Next, he tried feeding an insulated wire down in the hope it would stir any dirt that was inside. It didn’t, but it did become stuck! Daylight was running out, so Rob managed to close the sunroof.
Instead of refitting the car cover, a sheet of plastic was cut to size and secured to the Clubman’s roof with masking tape. This was just as effective at protecting the leaking sunroof.
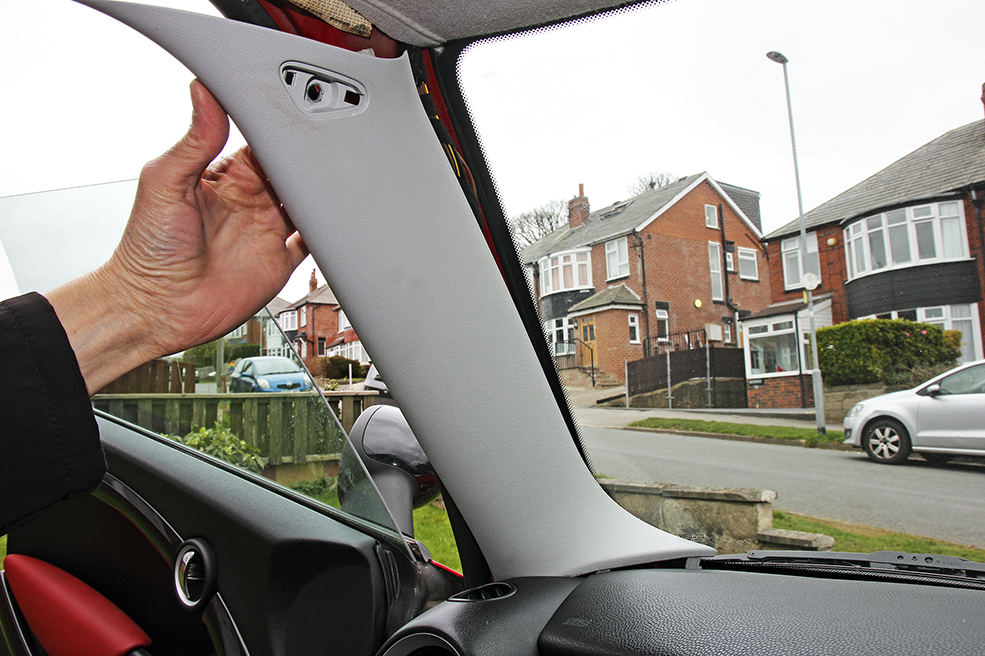
After speaking with mad4mini, they advised to drop the headlining to be able to retrieve the stuck wire and see why the nearside sunroof drain was blocked. First, Rob removed the trim panel inside the A-pillar, secured with a Torx T20 screw.
The Meguiar’s degreaser had dripped down the inside of the nearside A-pillar. The door seal was peeled off to help dry this area and also release the headlining above. The sunroof drain is routed inside this pillar.
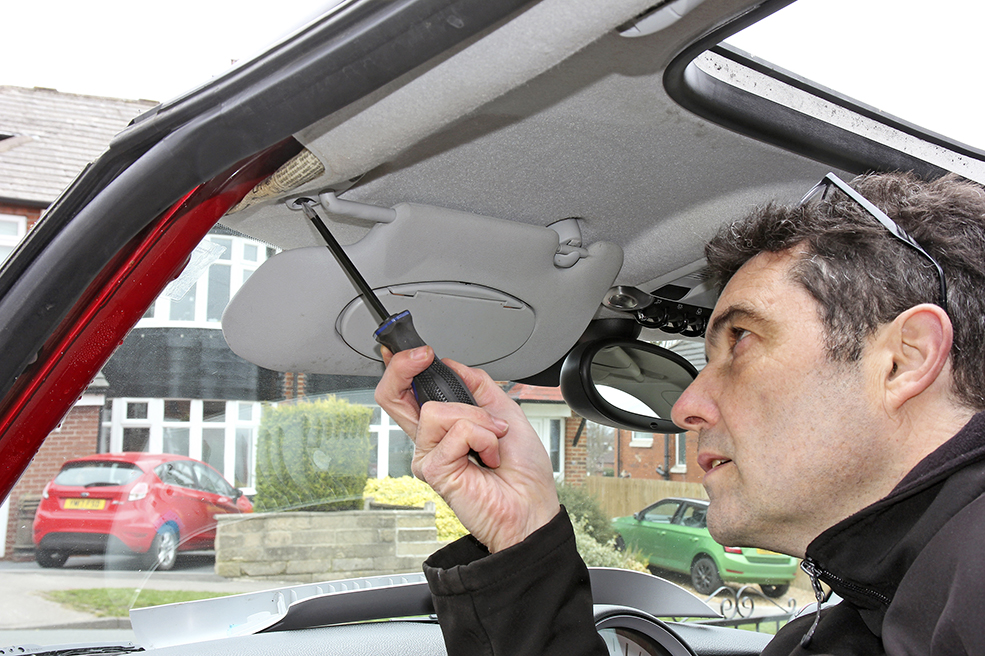
The final item to remove was the passenger sun visor, secured with a couple of crosshead screws that were concealed by plastic covers. The wiring for the sun visor’s vanity mirror lighting had to be disconnected.
Pulling the headlining down a few inches revealed the insulated wire that hadn’t gone down the drain tube. Rob felt inside the headlining and found there was a section of the drain tube missing.
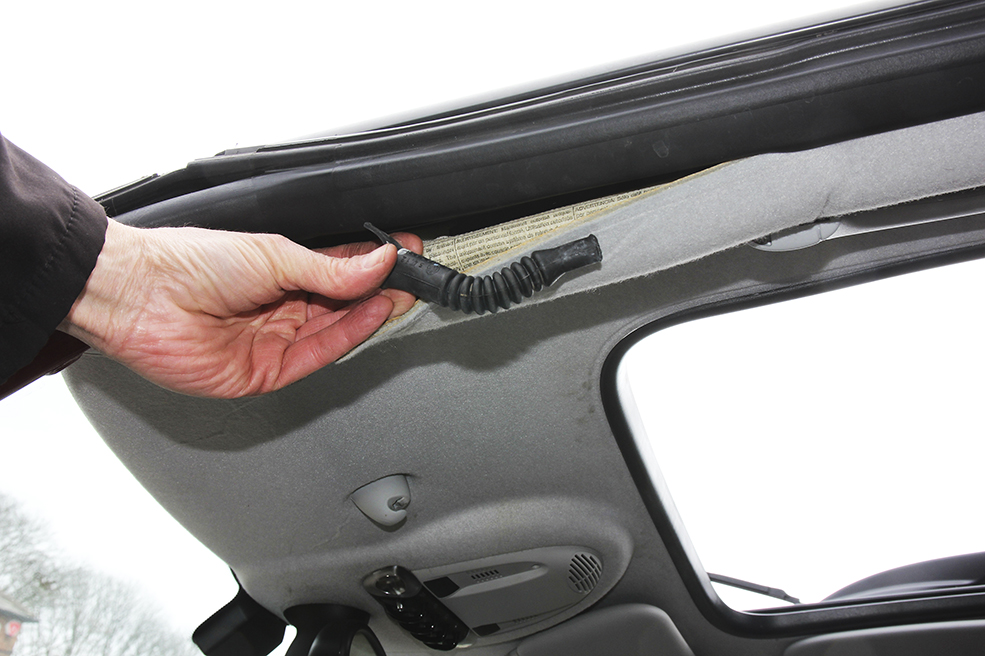
Eventually he found the missing piece of drain tube. This rubber flexi-section sits inside the headlining and joins the short drain tube from the sunroof to the longer one that’s routed inside the A-pillar. Rob refitted it.
Pouring a small amount of hot water down the nearside sunroof drain, Rob crossed his fingers, then cheered when he saw liquid dripping out below. The drain was working again.
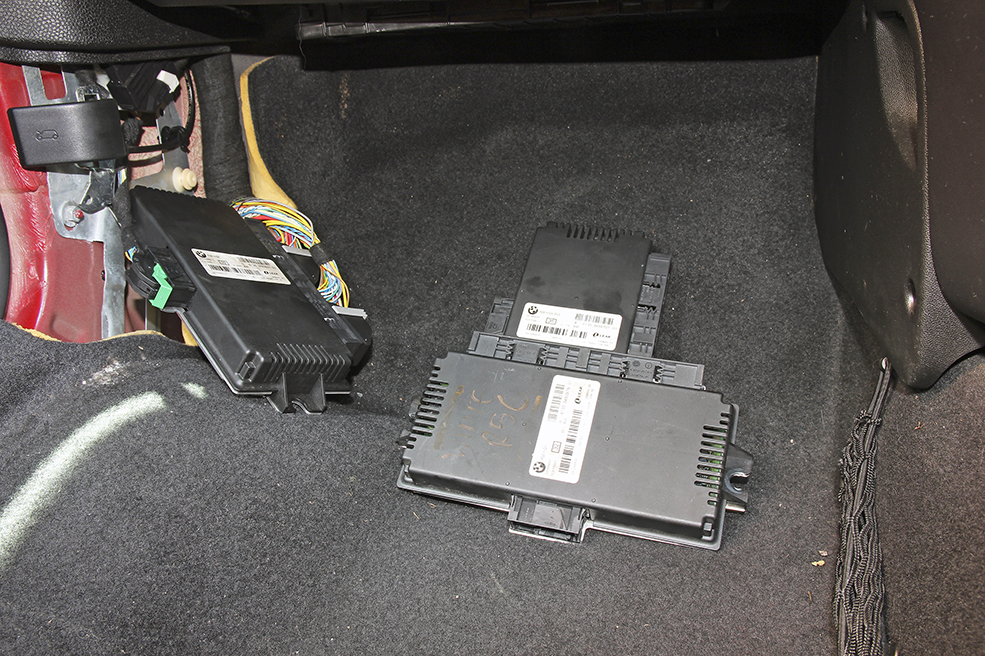
The wet carpet had dried out, but the BCU was damaged. Mad4mini lent us a couple of replacements, but they resulted in the electric windows working in the opposite direction (flick the switch up to drop the glass), so we’ve asked MJR Minimatt to send us one when it’s in stock.