

Is a more modern Saab 9-3 just a posh Vauxhall – and are they a good ownership proposition for the DIY enthusiast? We find out
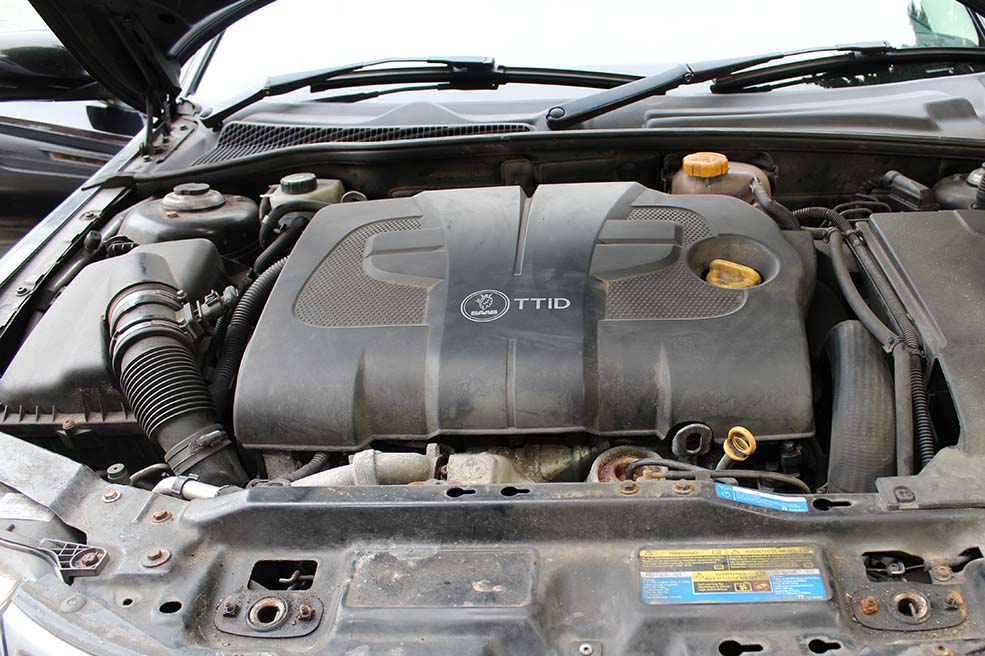
Our newest project car is a 2008 Saab 9-3 TTiD SportWagon in black, bought for £1000 plus fees (a grand total of £1224) at auction with a full history and 152,000 miles on the clock.
The car is set to be rejuvenated at the hands of our colleagues from Car Mechanics magazine: you can follow the progress each month here, or in more exacting detail in print.
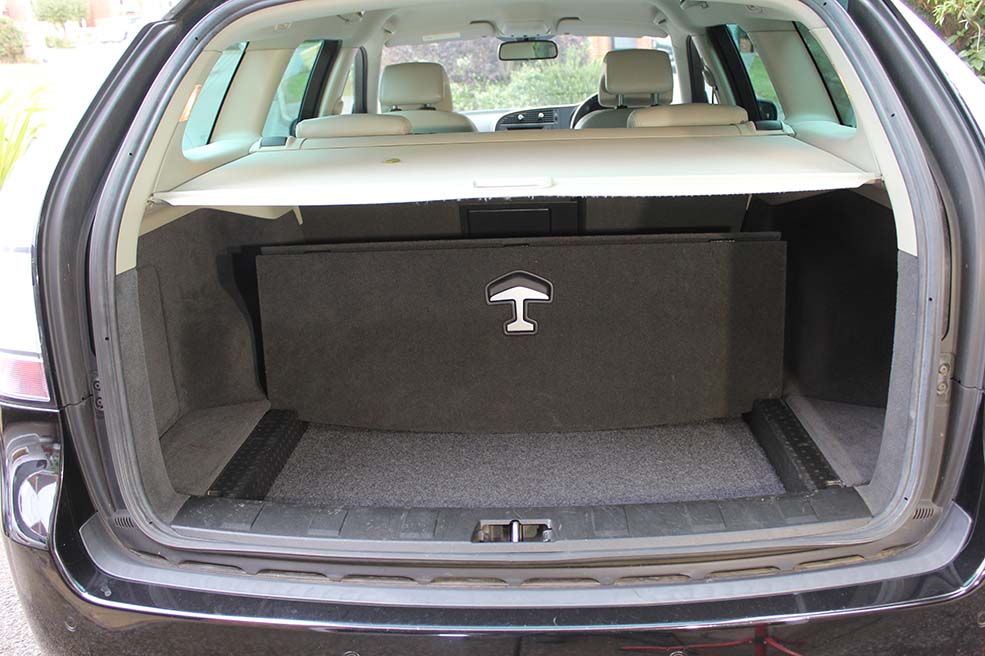
It may not be a bona fide classic car yet, but we reckon the facelifted 9-3 in estate form is a handsome and practical proposition with plenty of quirky Saab touches to keep it interesting – and potentially earmark it as a future modern-classic in years to come.
This generation 9-3 arrived in 2003 and was the second GM car to use the all new Epsilon platform, which underpinned the 2001 Vauxhall Vectra C. Before this came the original 9-3, itself a rebadged facelift of the Cavalier-based Saab 900, launched in 1993.
Assessment
WJ08 OUE is a two-owner 9-3 Aero Sportwagon with a six-speed manual gearbox. It was first registered on April 30 2008 by Astley Saab in Yeovil, who sold the car to its one private owner in 2009.
Since then, OUE has covered 151,915 miles with regular servicing, a lot of which was done at Saab in the earlier days. A cambelt change was carried out in 2016 at 107,000 miles – but did they change the water pump as well? Most garages would know to do this, but at the very least we need to remove the top belt cover and have a look. We plan to change the belt anyway – without an invoice you can never be too careful.
Condition wise, it’s basically an twelve-year-old £1200 diesel estate with 150,000 miles; that means small scratches, marks, wear on the drivers seat bolster and a few mechanical bits that need attention.
Starting from cold, there is a definite shake from the engine that results in the exhaust hitting the underside somewhere – a bad injector, failed engine mount, or perhaps exhaust hanger broken? We’ll soon find out.
Saab 9-3: what can go wrong?
The Saab 9-3 is a fairly robust old thing, and being an older GM-based design means it’s quite well-known. The TiD engine is reckoned to be more reliable than the later 2.0 CDTi engine used in the Vauxhall Insignia. The M32 gearbox is well-known for bearings failing; how ours has survived with 180bhp and a load of torque remains to be seen.
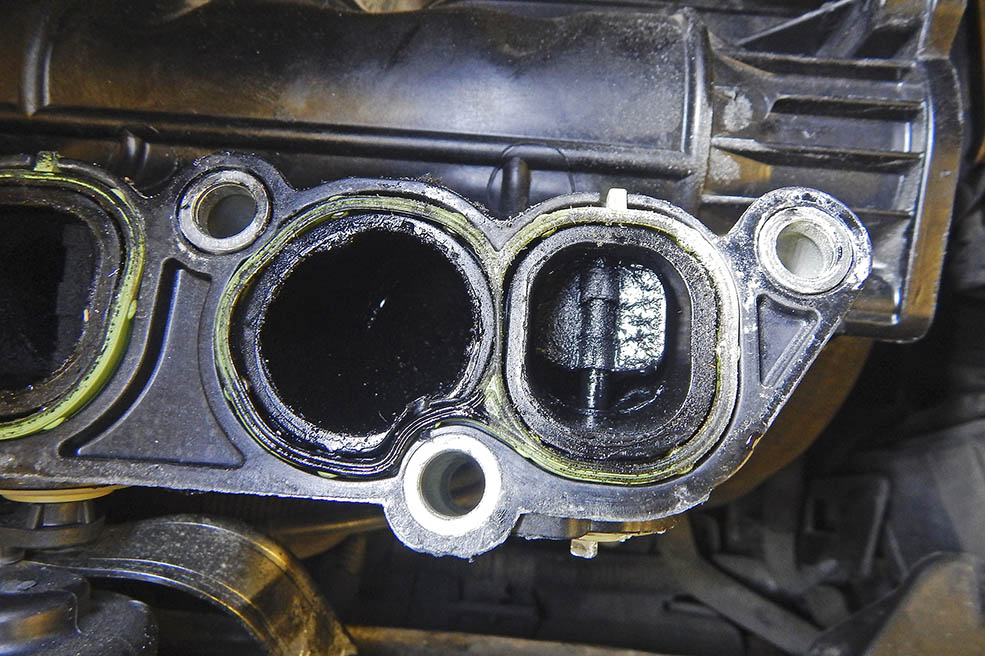
The TiD engine is also famous for EGR problems, as well as swirl flaps in the intake manifold clogging up as a result. EGR faults manifest themselves with assorted symptoms – black smoke, engine management lights, low power at lower revs – although a lot of these can be due to other problems such as a split intercooler, faulty MAF our MAP (manifold pressure) sensor or even a duff injector or two.
Officially, the cambelt needs changing every 90,000 miles, and most TiD cars have a DPF that will need a weekly run to keep working. Also, the inlet manifold will eventually clog up and need to be removed and cleaned out – we’ll be doing this on ours, as well as checking the swirl flap operation.
Broken front coils springs are another common 9-3 issue and you’ll hear a weird noise from the front end as well as the car feeling odd to drive. Strut top mounts and bearings can also dry out and cause similar groaning noises.
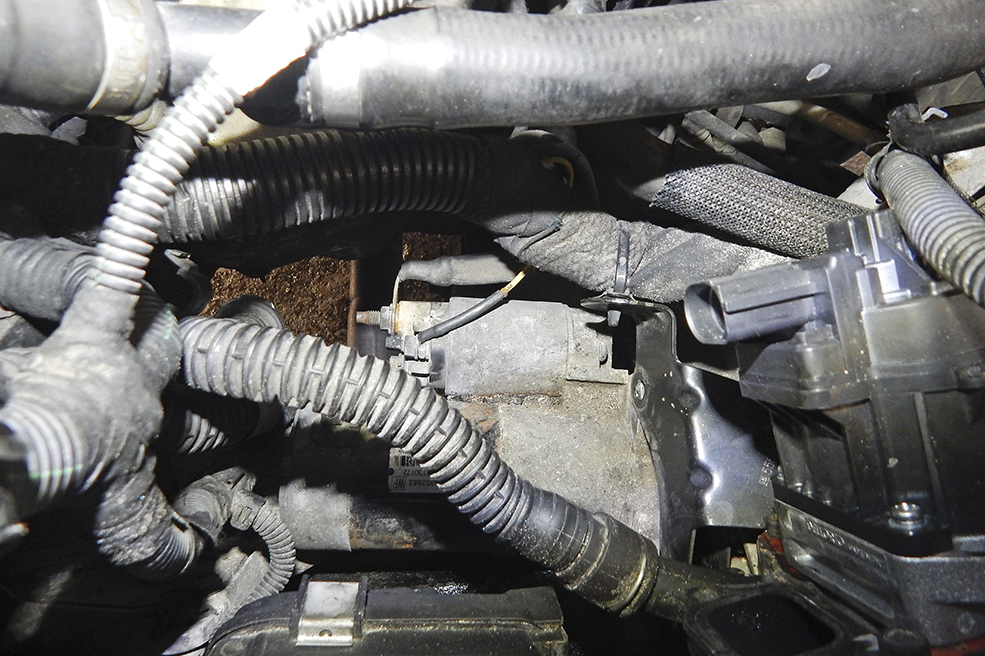
Inside the car, the famous floor-mounted ignition switch can play-up. This is actually a module, and as soon as a warning comes up on the dash it’s worth getting fixed ASAP. If left too long, you may find the car won’t start anymore. A bad battery can also cause problems here – the joy of ageing modern cars!
The clutch pedal helper spring can break resulting in a pedal that won’t come back up, and a faulty door lock is fairly common – you’ll need to replace the lock unit in the door with either a new or good used one, noting that the design changed in 2005.
Finally, rust – and yes they do. This is generally cosmetic around the rear arches and the rear sill edges due to mud trapped behind the arch liner, but we’ve seen some early ones with rot in the front wing just ahead of the arch itself. Nothing that can’t be fixed on the cheap with a budget car but it’s worth cleaning the arches regularly and maybe removing the front arch liners and brushing some anti-rust wax in there.
Swirl flap issues
It was probably the moment when the realisation hit that the inlet manifold could not be removed without taking the cylinder-head off – or hours more dismantling – that we remembered how difficult working on cars can be. It’s particularly true when cars are designed in such a way that repair is impossible without lots of dismantling.
The 1.9-litre GM diesel engine isn’t a bad one but many suffer from swirl flap failures as the engine gets older. Our 9-3 puffs out a bit of smoke occasionally, as it might if a flap was acting independently of the others, so we ordered a set of four blanks with screws and set to.
The TTiD engine combines the old 1.9-litre diesel capacity with 2.0 CDTi (Vauxhall Insignia) engine bits – including the later-type all-plastic manifold with swirl flaps – and, unfortunately, that awful oil pick-up O-ring that has finished off many a 2.0-litre CDTi Vauxhall.

Unlike the Saab TiD (just a Astra/Vectra engine), the TTiD is the old 1.9 unit (therefore avoiding the 2.0 oil pick-up O-ring dramas), but with later 2.0 CDTi ancillaries. Finding parts can be difficult.
It’s also obvious that the cylinder head is fitted with the manifold and lowered onto the block during the manufacturing process: there’s no way to get the manifold off with the head fitted. This is because the number-four swirl flap actuator rod fouls the alloy side casting where the EGR pipe bolts on.
In the end, the manifold was removed by brutally cutting the lower swirl flap actuating rod off in situ with an air saw, then grinding 3mm from the alloy block protrusion so that the manifold would just squeak past.
This was not the end of the trouble: the eBay-sourced blanking plate kit was near enough useless. The plates fitted – albeit very tightly – after the old flaps had been removed, and this itself was very hard work.
Number one swirl flap had started to break-up and these are the steel ones, not plastic. The £25 eBay blanking plate kit just wasn’t up to scratch because the screws wouldn’t bite enough. We stopped here and considered the options.
Two of the screws broke off: bad news as you just cannot drill an old steel screw from a plastic manifold. The plastic pivots for the flap shafts are incredibly tight and hard to remove, while the new blanking plate screw holes in the manifold were too short to afford any meaningful grip. Drilling these deeper and trying to fit some proper screws meant that the screw ends were digging into the rubber manifold gaskets.
GM did make a 2.0-litre CDTi on certain Vauxhall Insignia, Astra and Zafira models without swirl flaps, and one of those manifolds was probably is probably the best idea. It would fit straight on, avoiding the block-fouling problems, and with the actuator motor still bolted on and connected up, there would be no EML.
Of course, a manifold will cost anything from £50 second-hand to £150 new on eBay – it’s just such a nicer solution than fitting blanks that may just leak or even blow out under boost.
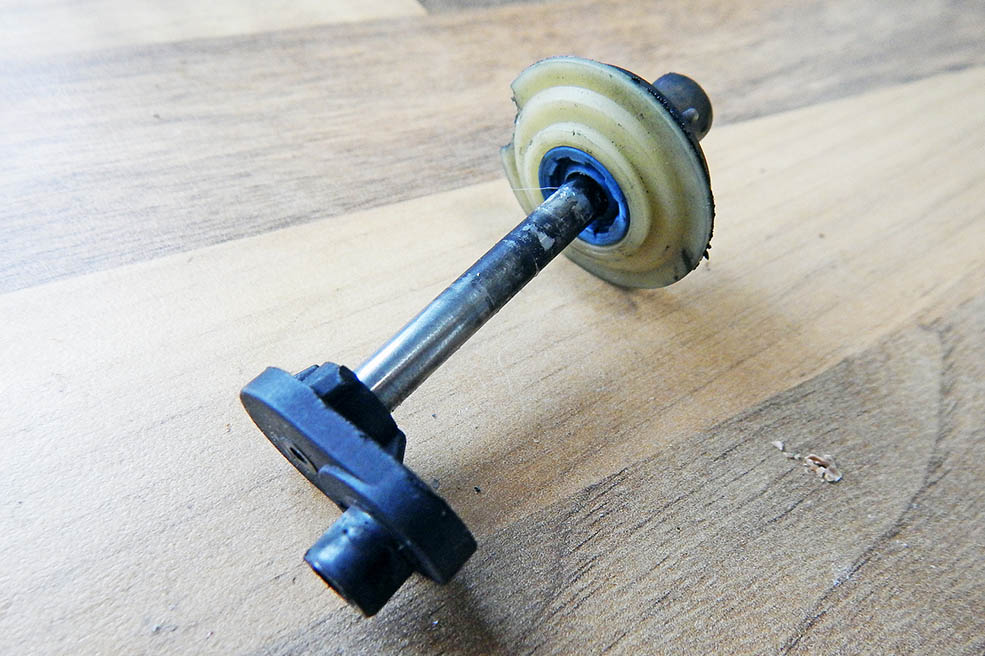
Here is the swirl flap steel shaft and the plastic bearing that is such a tight fit in the manifold – they are hard to get out intact without marking the plastic manifold itself.
The other option, of course, is to fit a new manifold with flaps. This would mean removing all the manifold studs, lowering the manifold into position and then somehow refitting the studs, probably with a tight-fitting nut (squeezed slightly in the vice) and some thread-lock on the cylinder head end – but we’d be back to square one.
One flap on our car had already started to break up so we caught it in time, but the whole experience does make us question modern diesel engines and the ‘improvements’ manufacturers make to replace a good strong diesel engine with one that is marginal: BMW, Mercedes, Volkswagen and GM have all done it. Still, it’s nice to have a challenge in the workshop from time to time!
Inlet manifold, thermostat and EGR valve replacement
Instead of messing with replacement flaps, we obtained a non-flap manifold on eBay having found out that the actual GM part number is 55565592 and not what is stamped on the manifold itself. The number PA 66 GF 35 means nothing and was present on both old and new manifolds.
The replacement cost £65 and came from a 2014 Vauxhall Insignia. It was in superb condition and looked almost new. Being the factory non-swirl flap version, it has the casting lugs for the swirl flaps that are undrilled.
We could have bought a new inlet manifold for not much more but what we didn’t want to find it didn’t fit. We compared the original manifold and throttle body to the replacement (using online images) and confirmed that the ports were the same as was the throttle body mounting flange.
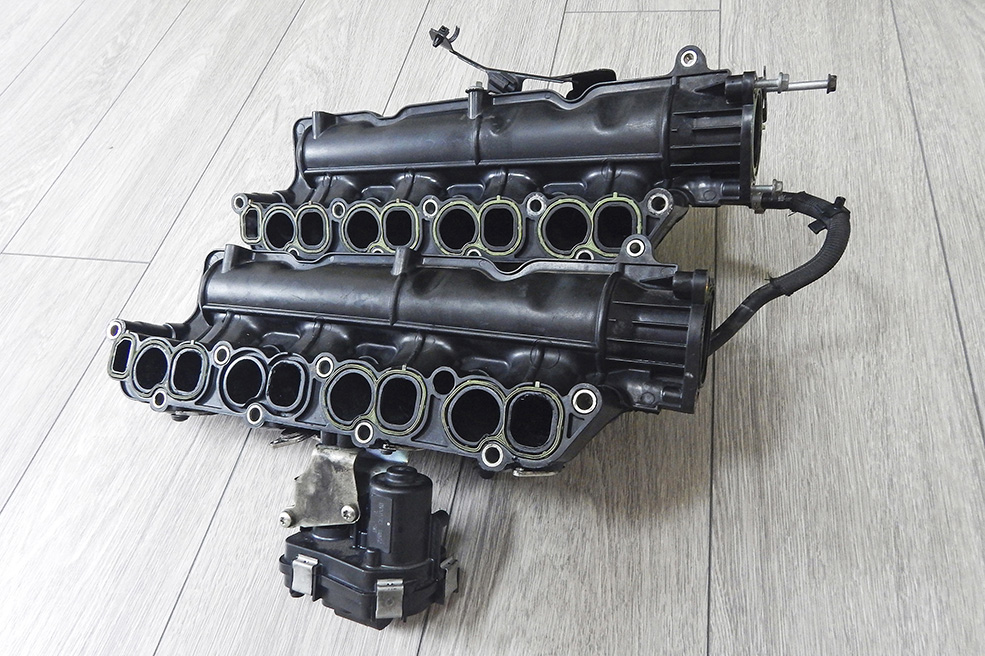
Here are our two manifolds, with the Vauxhall item at the top. There are a number of small differences but once stripped down there is very little to set them apart.
The swirl flap motor bolts on in two places, both onto the middle lower two inlet manifold studs and also into a couple of threaded lugs cast into the manifold. The Vauxhall manifold doesn’t have these lugs but we don’t care – the motor will be plugged-in and operating to keep the ECU happy.
As there are no flaps to operate now, we threadlocked the manifold studs so that it won’t vibrate loose. The steel sleeves in the manifold are longer on some original swirl flap manifolds in order to locate the motor bracket so we will swap those over.
The other advantage of not using those lower bolts – impossible to access with the manifold fitted – is that the manifold should be a lot easier to fit. By lowering the motor into the engine bay and connecting it first, the manifold can follow it after – and the motor secured only by the two manifold studs.
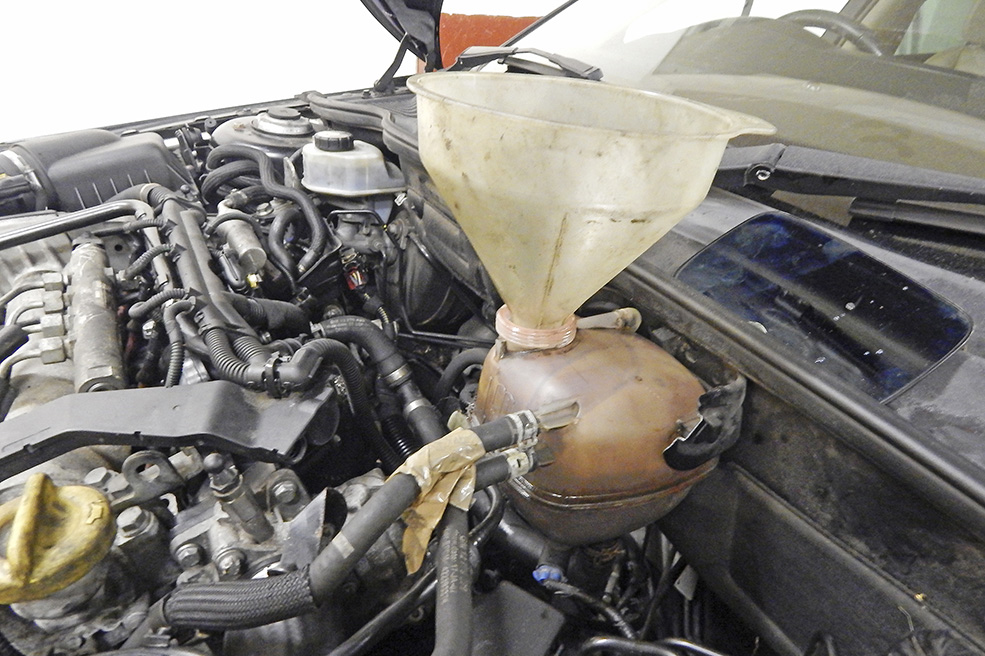
If like us you did a complete drain down of the cooling system, it’s a good idea to drain it into a clean bucket and reuse it as we did if it’s still showing as ‘good’ with an antifreeze tester. If you don’t lose much you can decant it back into the expansion bottle.
Finally, we replaced the coolant thermostat and troublesome EGR valve. Our car puffed out a bit of smoke occasionally as if the DPF was trying to regenerate; we hope a new thermostat will help. A new EGR valve after 152,000 miles is a good idea too.
On reassembly and fire-up, the engine management light was glowing and we found fault code P40450, which relates to the EGR valve. This was cleared and hasn’t come back.
Cambelt change
In most respects the Saab, Fiat and GM 1.9- and 2.0-litre diesel cambelt change is a fairly simple one: cambelt cover off, offside engine mounting out, auxiliary belt off and finally the lower alloy cover to expose everything.
Even then, the job is tricky – the lower belt cover will not come off unless the auxiliary belt tensioner is fully retracted and locked in place with a suitable pin. We used a small Allen key.
Do not try to do this job without a locking toolkit. Also, while the belt must be fitted with the direction arrows pointing forwards (so running clockwise), don’t get too hung-up on getting the white lines on some belts lined-up with the timing marks – it really doesn’t matter. Our belt didn’t have them, some do. Always ensure the cam and crank pulleys are in position before slipping the old belt off.
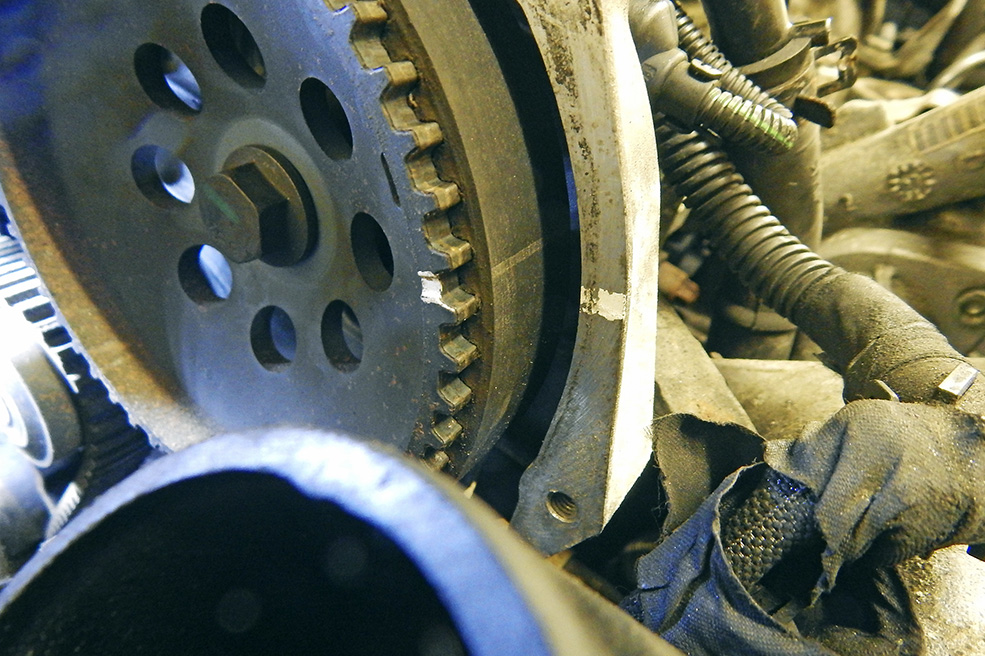
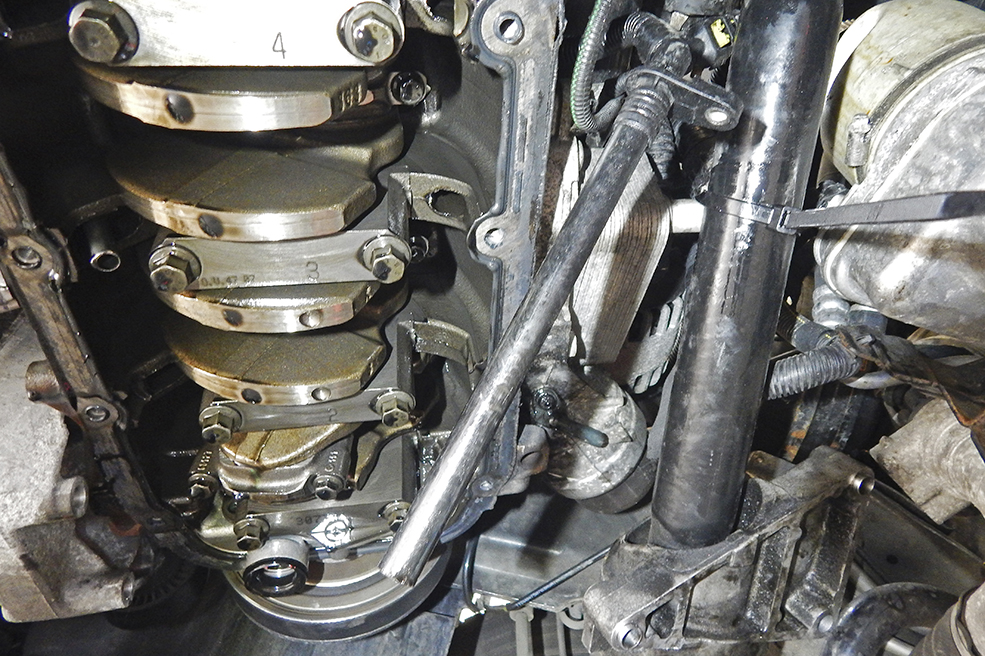
On our car, the belt had already been replaced about 50,000 miles beforehand and was still in good order with no signs of wear of damage – no oil leaks either. You can see here the white timing belt alignment mark, but as we said, it’s nice to line them up but it’s not essential.
As ever, patience is the key and a few tips you won’t find in the manuals. We find it helps to press a bit of paper towel or similar into the gap between the cambelt and the lower timing cover when fitted to the crank sprocket.
This presses the belt into the sprocket teeth and keeps it in position whilst you feed the belt around the rest of the sprockets. It took us at least three goes to get the belt timing correct – the diesel pump isn’t ‘timed’ and can go on any way.
Belt fitted, timed-up and the locking tools removed. The crank pulley was bolted on with two bolts for now but isn’t needed for the initial turning over by hand. Turn it three or four times to settle the belt before rechecking the belt timing and tension tension.
All-in-all, the cambelt change is not a horrendous job but it is slightly frustrating. For instance, the 13mm bolt and captive nut for the belt tensioner really doesn’t look like it’s up to the job.
Be aware that there are few belt run diagrams for the timing belt or the auxiliary belt, so it pays to take plenty of photos and draw a detailed belt rub diagram for each.
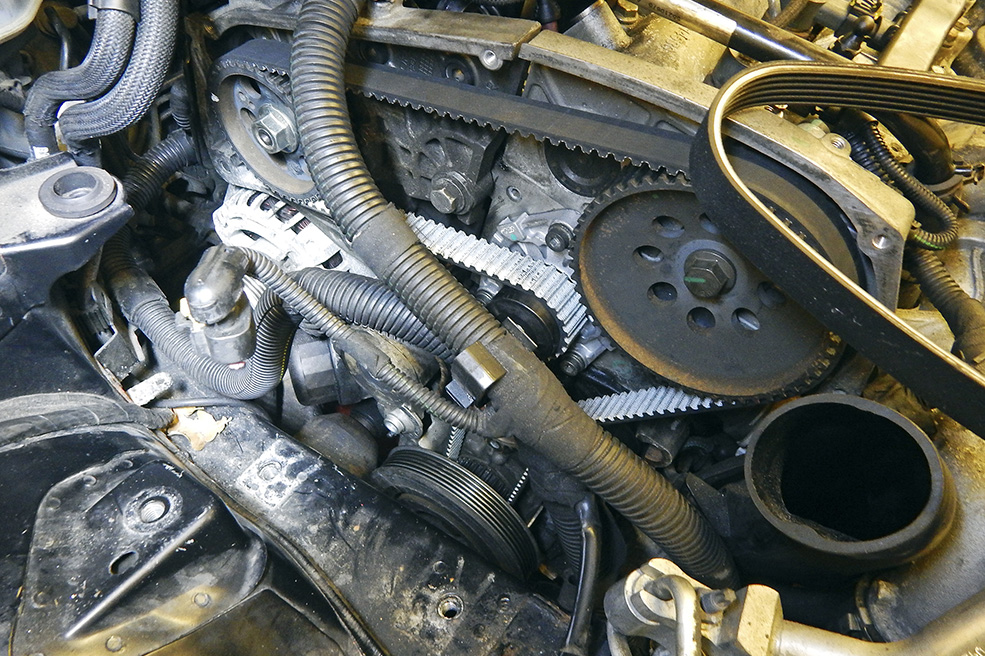
Here, the upper cover has been refitted and the auxiliary belt as well. The 9-3 now starts and runs with no warning lights on. If you wanted to run it for five or ten minutes and recheck everything you can – but we’ll carry on refitting the engine mounts and completing the job.
Sump to oil pump O-ring replacement
Tackling the sump removal job to renew the infamous sump to oil pump O-ring is an involved process best left to the pros – even on a ramp, it can be a long and frustrating job. There are, of course, various YouTube guides that make the job seem easy – but do not underestimate it.
The TTiD Saab engine is in fact a 1910cc version of the Vauxhall/Opel CDTi engine as found in the 2.0 diesel Astra and Insignia – easily spotted by its plastic inlet manifold. This Fiat-designed unit (FPT is cast on the unit – Fiat Power Train) in its original form was first used in 1997 in the Alfa 156 JTD and was the worlds’ first common-rail diesel.
Found in the Vauxhall Vectra C, Saab TiD and Alfa 156, GT and 159 as well as various Fiats, it had a very effective oil pick-up. A strainer on a pick-up tube was bolted to the oil pump and it dangled down into the sump. It never gave a moments trouble and that’s a red light for a car manufacturer to improve it.
Starting in 2008 with the revised ‘Multijet II’ engine, GM and Fiat deleted the bolt on strainer pipe and just mated the sump directly to the oil pump with a rubber O-ring seal in between. The sump was recast with the oil pick-up built-in. So far so bad, but to add insult to injury, these geniuses put the O-ring seal above the level of the oil. The O-ring goes hard with age and engine heat and as they’re above the oil level in the sump, the pump draws in air, the oil light comes on and within a few seconds, the crank is reduced to scrap.
Look on eBay and see how many of these cars are now advertised as spares or repair requiring a new engine. A fairly common swap is with the vastly cheaper 1.9-litre unit from a Vauxhall Vectra: the old 1.9 can be fitted with the manifolds, loom, sensors and ancillaries from a dead 2.0 CDTi and it’ll run like a charm.
Our 9-3 hadn’t yet displayed a low oil pressure warning but it was just a matter of time. On a Vauxhall Insignia this job isn’t too horrific but on the Saab 9-3 with its Vectra C subframe, it’s much harder – the result of fitting a later engine into an older car. Because the Vectra rarely needed its sump removed, it wasn’t a problem.
O-ring replacement: the process
Before you begin the process it’s important to pull the dipstick up. That’s because it’s entirely possible for it to get trapped when refitting the sump – imagine having to do this job twice! While you’re up there, disconnect the battery negative terminal as we’ll be working on the starter motor.
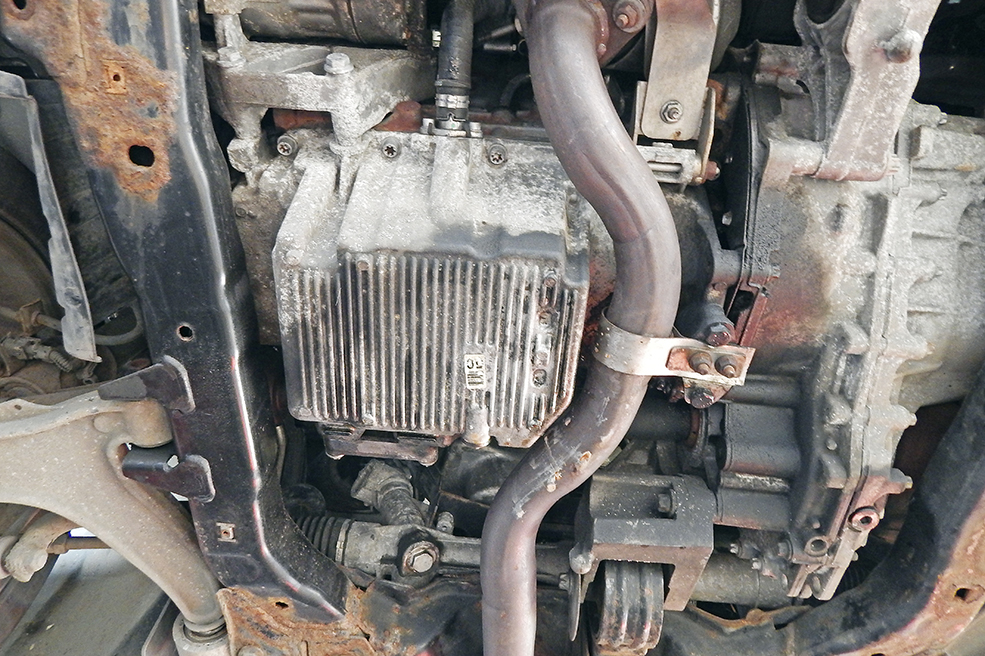
The front exhaust downpipe has to come off first, but this is pretty easy – we had removed it recently in order to adjust the fit and prevent the annoying exhaust to body knocking on start-up. There is a triangular joint gasket here but no probe wiring that needs disconnecting.
At the front, the downpipe joins the exhaust manifold with three more studs and nuts that are easy to remove. There’s also the stainless steel support bracket as seen here but you shouldn’t have to remove that. Clean any penetrating fluid before refitting or it’ll stink on start-up.
This (above) is the turbo oil return pipe that goes from the turbo down into the sump. It’s secured by a pair of easily accessible 5mm Allen bolts. There is a gasket here so make sure that you refit it on reassembly to avoid an annoying leak. Our gasket was the reusable metal type.
You can remove the two lower air-conditioning compressor bracket 16mm bolts before or after the turbo oil drain back pipe. It’s not dowelled to the sump and you don’t have to remove the bracket or the crank pulley despite what the manuals might say. The bolts are 50Nm.
Next, remove the E18 Torx bolts that secure the driveshaft centre support to the sump. They are torqued to 20Nm on reassembly with a dab of threadlock. With the support unbolted from the sump, the driveshaft flexes – almost enough – to allow sump removal. Sadly not quite though.
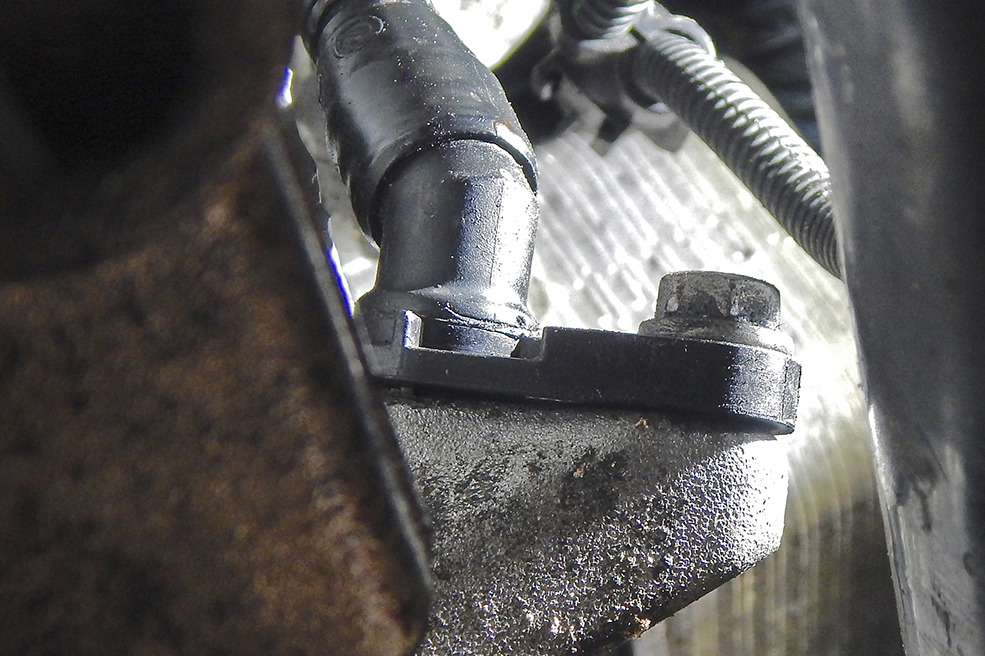
On the back of the sump you will find the breather catch tank drain back pipe. While you are in there, disconnect the crank sensor as well as the oil level sensor that is fitted to the back off the sump – simple connectors.
This bracket (above) now needs to be removed in order to access the two 10mm bolts that secure the flywheel side cover to the gearbox. Like the annoying inlet manifold swap, this is one of those jobs where there seems to be a never-ending series of small things to disconnect.
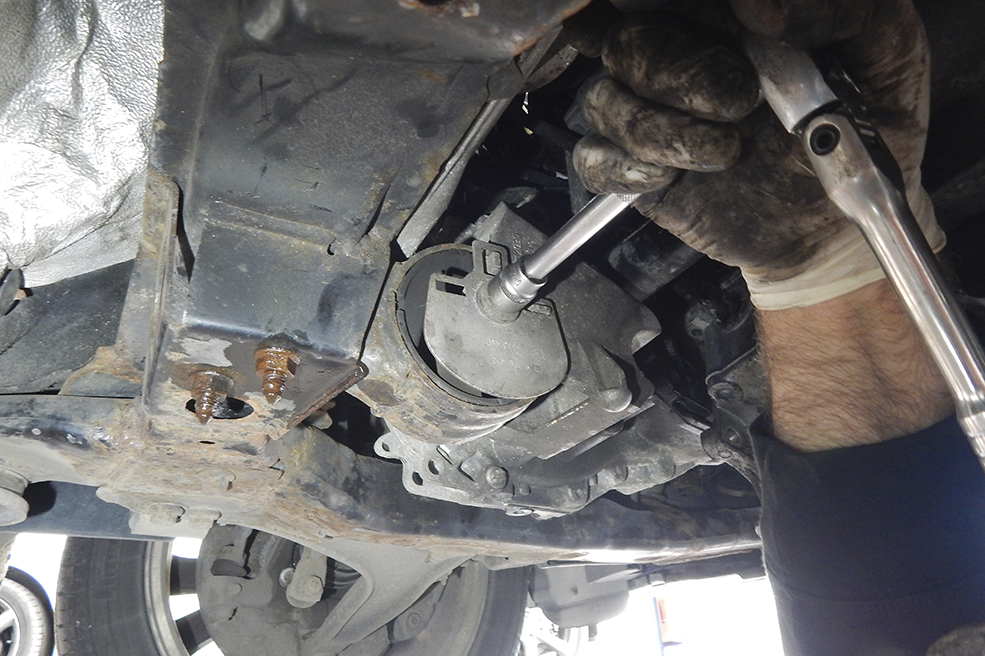
Now remove the E18 Torx bolts (40Nm) that secure the gearbox bellhousing to the alloy sump. Our gearbox is the F40 unit as opposed to the troublesome M32 fitted to many lower powered Vauxhalls and Saabs. The ‘notorious’ rear sump bolts are easy to remove.
Next, drain the oil. The sump plug undoes and as it comes out it exposes a drain hole in the side of the hollow bolt. This allows the oil to drain out slowly. This oil is only 1000 miles old so it was drained into a clean container to be used again sometime – we can’t waste it.
We mentioned notorious sump bolts: on some cars – mainly those with the M32 gearbox – you just cannot access the rear sump bolts behind the flywheel. On the F40 box they are easily removed with a T40 Torx driver. On some you have to drill two holes in the bellhousing! The rest of the sump bolts are very easy to access and they are a mixture of T45 bolts on the sides and more T40’s at the crankshaft pulley end. One good thing about our engine is that despite its 12 years and 152,000 miles, it’s remarkably clean and dry with very few oil leaks.
With the bolts removed, the sump will now need clouting to break the seal between sump and block. There is no paper gasket on these, just very tough black factory applied sealer. On Astra H and Insignia cars, the subframe is wider with more room to manoeuvre the sump.
But try as we might, the sump just will not come out one with the 9-3 with its Vectra C front subframe. The problem is that there is a long oil drain back pipe – it goes to the bottom of the sump and prevents the sump from being wiggled out. If it weren’t for that, we think it might be possible to remove the sump without removing the driveshaft – that would save some time. But, we cracked on to remove the shaft and started by removing this E18 Torx bolt and 17mm securing clamp nut from the lower balljoint.
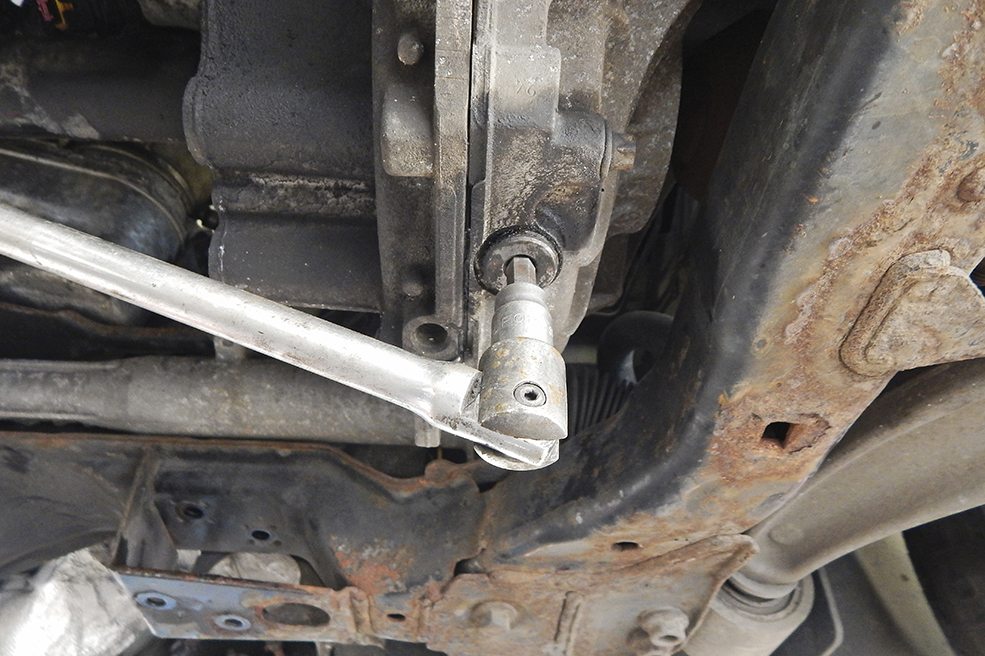
With the nut and bolt removed, the iron hub is spread slightly with a long thin cold chisel to relinquish its grip on the balljoint. The lower wishbone is then pulled down to release the balljoint from the hub and the inner driveshaft carefully ‘sprung’ from the gearbox. It may leak oil.
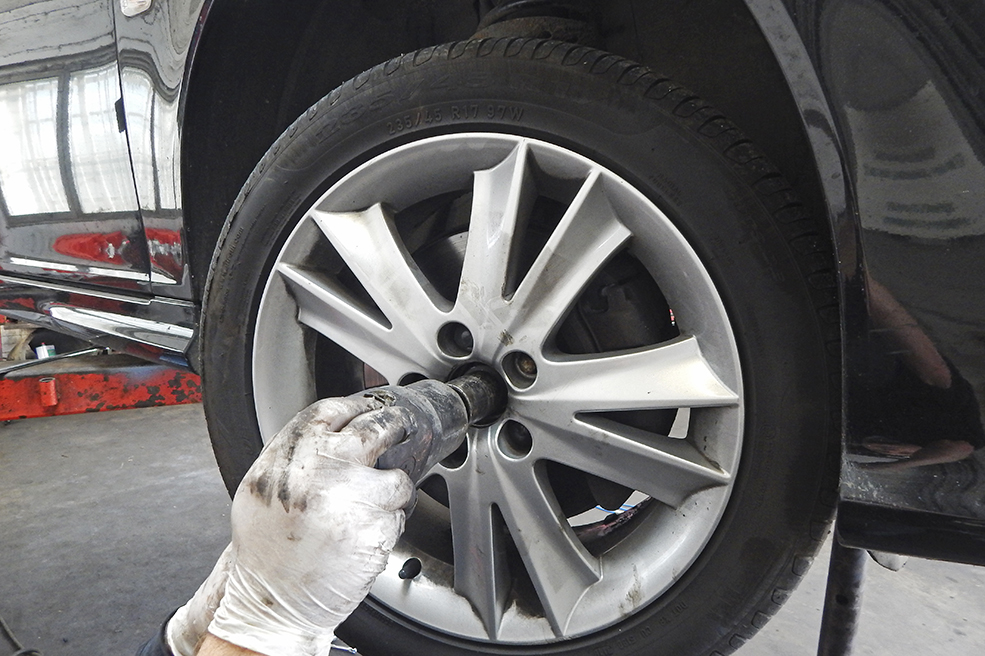
There’s no need to remove the road wheel but if you’re brave enough to tackle this job on axle stands then it’s worth removing it. There are various different driveshaft nut sizes on GM and Fiat/Saab cars and this one was a 32mm. It’s torqued up to 230Nm on reassembly.
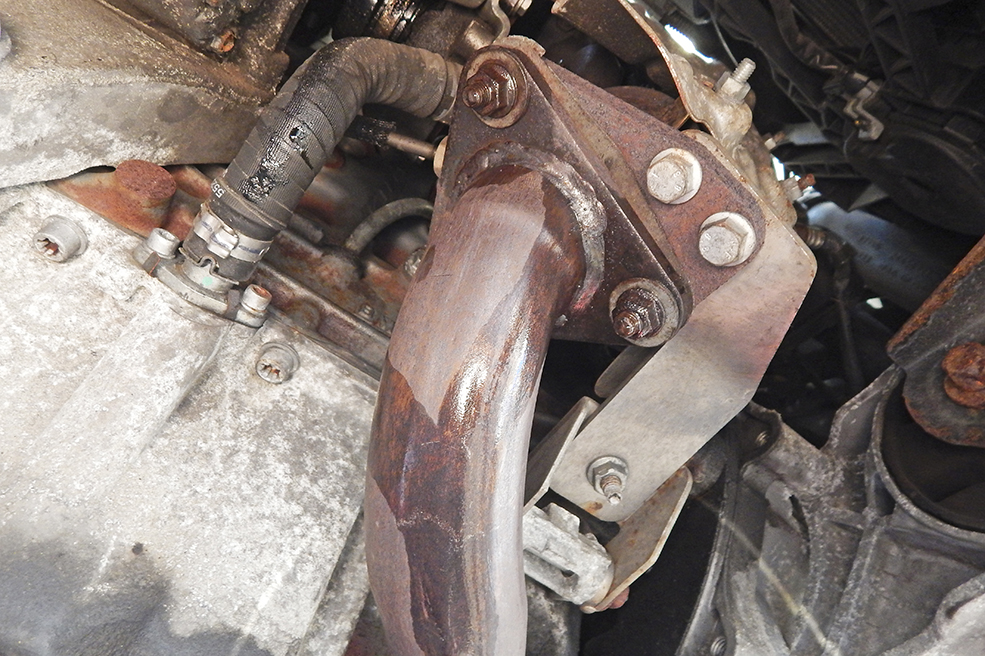
Of course, the CV joint was seized solid into the drive flange – the driveshaft was not coming out today. So, we needed to make room for the inner end so we could wangle the sump past it. This rear engine steady bracket needs to come off – start by removing these 16mm bolts.
Now remove or just slacken this centre bolt (above) that joins the front and rear parts of the mounting – they are all torqued to 55Nm. The rusty looking vertical nuts bolts to the left of the mounting also need to be removed and then the complete engine steady assembly comes off.
On some gearboxes, there will be oil loss when the inner driveshaft comes out, so catch it. You may want to change the gearbox oil with the car in bits.
Because the oil drain back pipe from the oil separator into the sump is so long, we need to unbolt it from the back of the block. There are two 10mm bolts that are virtually impossible to photograph and they secure the separator to the block – remove them and pull the unit away.
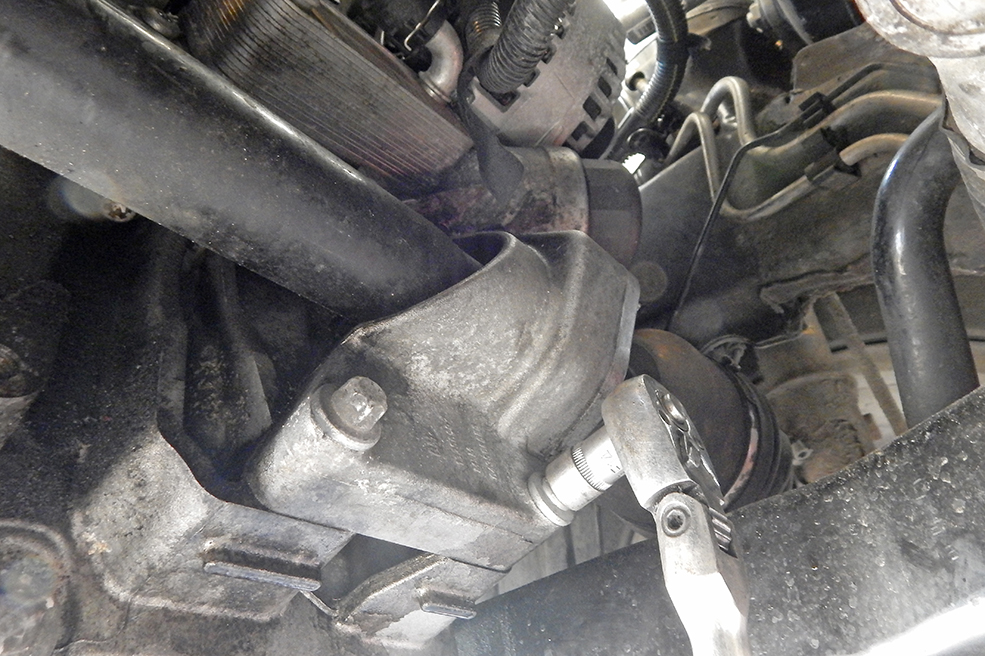
We wanted to get a bit more wiggle room to get the end of the sump past the subframe so we wanted to unbolt the driver’s side engine mounting from the chassis leg and lift that side of the engine. Start by unplugging and removing the air filter box with the MAF.
The engine mounting is very easy to disconnect – just undo and remove these three 16mm bolts as seen here (above). The engine won’t drop down – what you can do is lift the engine and place a block of wood between mount and chassis – three inches seemed to be about right.
With the car is up in the air, the was engine raised slightly with a tall stand under the air con compressor bracket. But no matter what was tried, the sump would not come out. Again, it was the oil separator pipe that was too long to pull out of the sump.
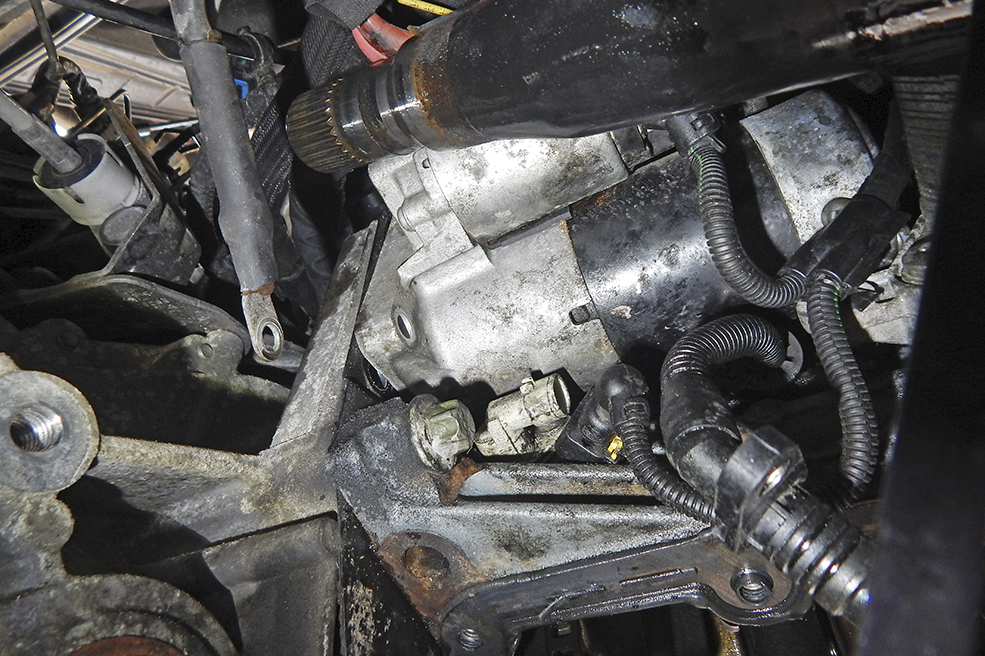
The oil separator pipe runs behind the starter motor and it will just not pull up and through the gap between the starter and the block. So there is no option now but to remove three fiddly bolts (above) and pull the starter off to give more clearance. With the plastic pipe able to be pulled from the sump, it can be wiggled out. It’s a tight fit and a real nightmare to refit due to lack of clearance in there.
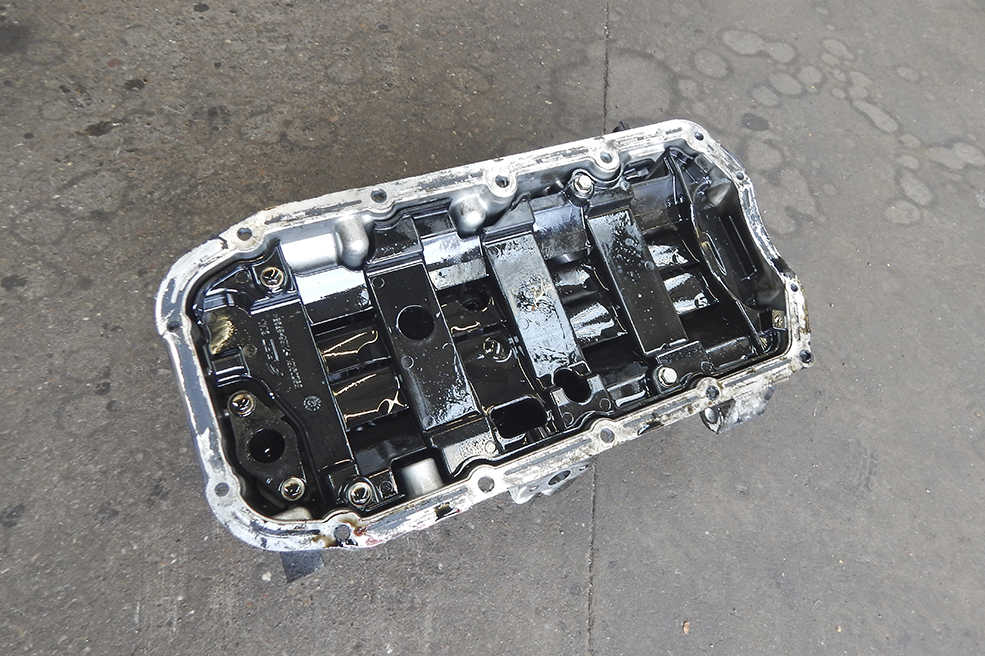
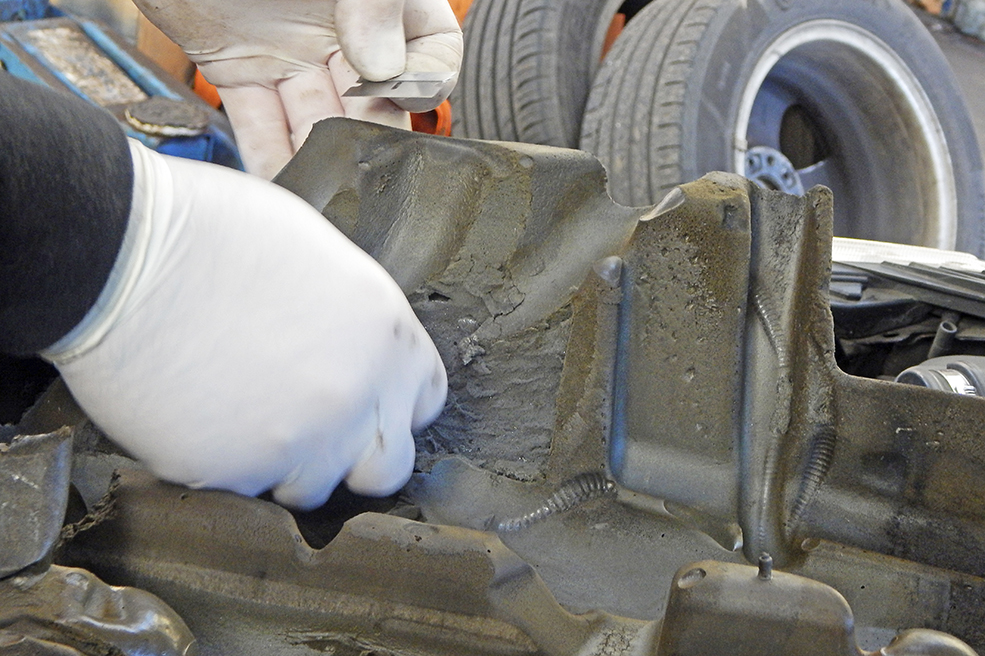
Here is the sump as removed (above). It’s remarkably clean inside and has obviously had plenty of oil changes. You can see in the lower left corner of the sump the oil pick-up that’s bolted into the sump with two 10mm bolts. The oil feed hole corresponds with the one in the oil pump.
The new oil seal was £14.77 from our local Vauxhall main dealer. They sell a lot of these apparently with quite a few going to taxi operators who, stung by engine failures, are dropping Insignia sumps for a bit of preventative maintenance. The part number is 55589549.
Our old oil seal wasn’t in bad condition and it still had a bit of flexibility left although it wasn’t as supple as the new one. It is a press-fit into the oil pump with no sealer required. You can also see how incredibly clean the inside of the block is as well – we expected black death here.

The new seal is fitted as shown (above) with the red fitting cap. You press the seal into the pump firmly until fully located, and then the red cap just flicks off. Here, the block to sump mating face has already been cleaned of old gasket sealer and just requires a wipe off before sump fitting.
The sump was cleaned inside and out with brake cleaner and the gasket face cleaned thoroughly. A neat bead of Elring sealer was applied and the sump refitted – that’s a very tricky job on the 9-3 so be really careful. Now, you just need reassemble it all – a solid day’s work!
Crankshaft breather replacement
So, we now know why the previous owner of our Saab TTiD estate sold it! When we collected the car last year, we noticed how it was intermittently smoking from both exhausts tailpipes – and then stopped.
Since then, it’s done the same party trick another five or six times randomly and the last time but one, we checked the oil level and found it to be way over maximum. This meant we had to do an emergency oil drain to prevent it from running-on and blowing itself up. We drained nearly a litre out to bring the level down to between MIN and MAX. The car was then given another oil and filter change but we found that with the specified 4.25 litres of oil, the dipstick reading was too high – about 3/4 of a litre was drained out to bring it to 2mm below the MAX.
With that done, we needed to do a longish trip to see if the oil level would rise again. We took a trip down to Wolverhampton (about 65 miles from me) and it drove just fine without any smoking episodes. The journey back however…
We were about 10 or 15 miles into the drive back when the ‘reduced performance’ message flagged up. We pulled in, switched-off and had a quick look under the bonnet – nothing falling off but the oil now at ‘MAX’.
We pulled out onto the A38 and got up to speed before engaging the cruise control but a few miles on it was obvious all was not well. The car had gone into full limp-home mode, and indeed it was limping with no turbo boost whatsoever.
This state of affairs continued until we were four miles from home – a precarious journey dicing with HGVs whilst trying to maintain 50mph uphill. When the turbos made a comeback close to home, we decided to run down to a local Saab specialist who scanned it with the proper GM Tech 2 software.
This told us that the DPF had fully regenerated six miles previously, tying-in with the return of the boost. But why had it gone into limp-home mode? Further scanning revealed that our 9-3 had the revised software to stop the injectors erroneously pumping diesel in to force a regen, but something was happening.
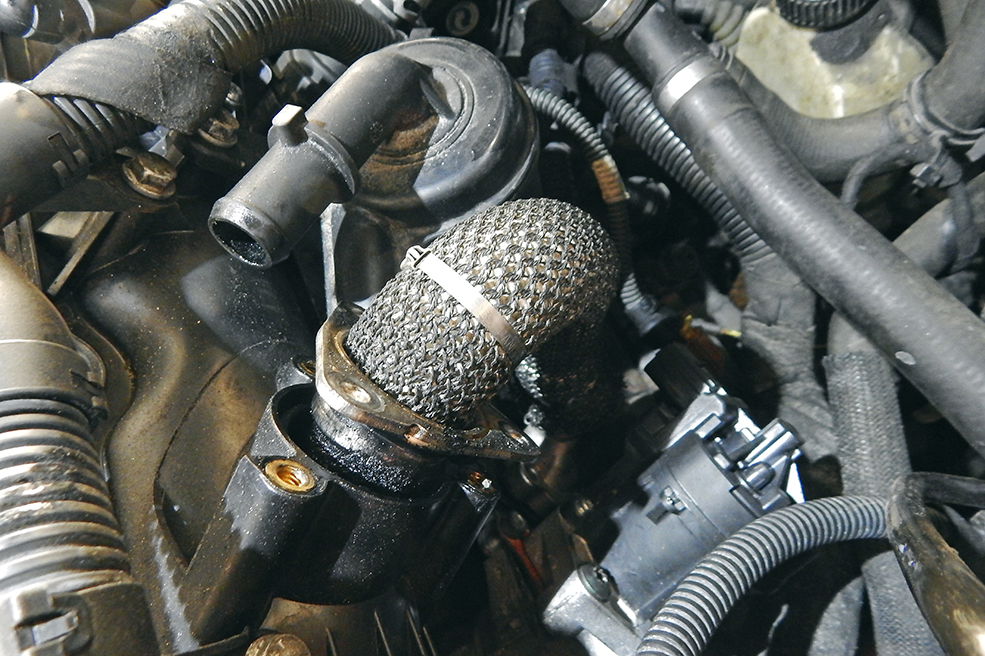
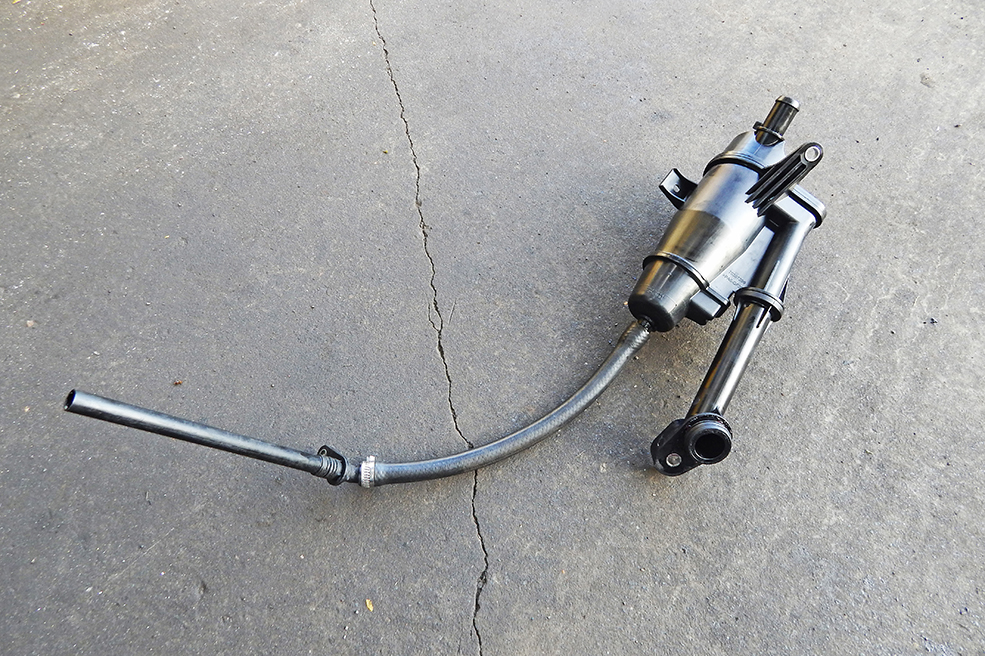
Meanwhile, we had a new breather to fit – a split diaphragm can cause oil to be drawn into the manifold and burnt off, hence the smoke. There is no valid part number for the unique TTiD breather that looks like a Vauxhall Insignia one, but isn’t.
The Insignia type breather that you think should fit a TTiD will not fit without extensive modification. In the end we had to replace the return pipe with 10mm fuel hose, reuse the pipe to sump flange and make up an upper breather hose. It took Parkside Garage three hours of messing around on a ramp (you have to unbolt the starter motor). And on the way home, it blew a load of smoke out.
A dipstick check revealed that the oil level had shot-up, so it was drained of three litres and two new litres added to bring it back up to halfway. And so far, it’s behaving.
We also replaced the original shock absorbers and derusted the rot prone front subframe. That was the easy bit! We didn’t get time or have the room to outline removing the arch liners but we touched in the tiny bit of rust on the arch.
Crankshaft breather replacement: the process
The breather capsule on the back of the engine is unique to the TTiD and appears to be unavailable. There is no part number on the unit anywhere – and of course no Saab dealer. The GM part number 55575980 is for the Vauxhall CDTi breather that doesn’t fit.
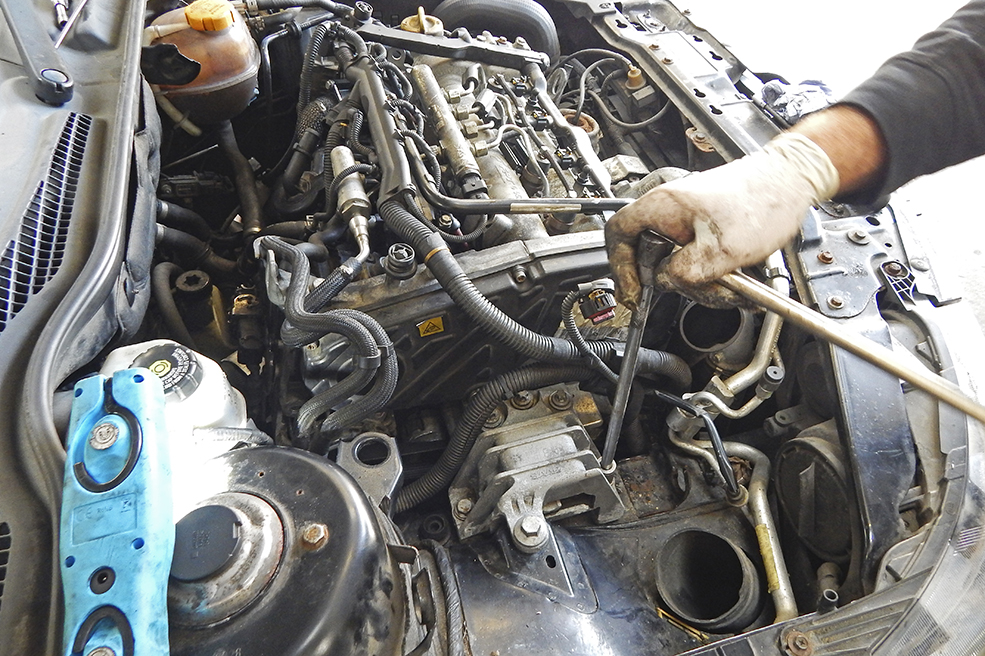
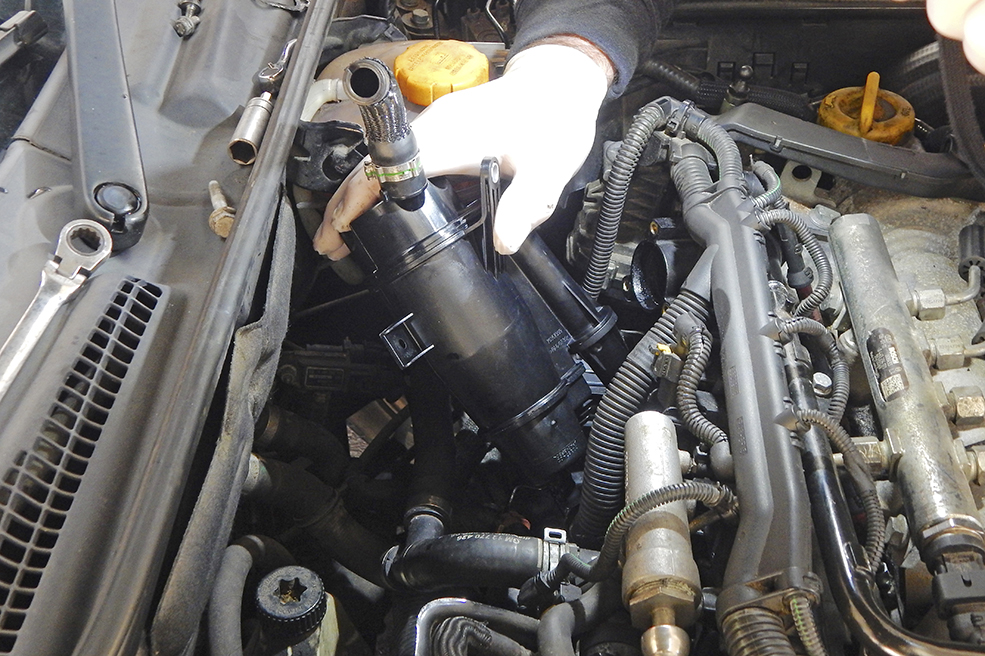
Here, we have pulled the top breather hose off the capsule and unbolted the EGR pipe from the inlet manifold to gain access – the pipe pulls out of the manifold and the lower part of the pipe is bolted to the EGR housing with a steel gasket. You can reuse the old one just fine.
This is where the breather oil separator return pipe bolts to the sump. On the CDTi type breather, the flange is at the wrong angle and will not bolt on. We only discovered this when the pipe was fed down the back of the starter. This is where we had to start getting creative.
The starter motor has to be unbolted from the engine in order to allow the stiff plastic oil return pipe to fit behind it, a superb bit of design. It is secured by three T14 Torx bolts and you really need a lift to do this job although it’s possible by lying on your back and swearing.

After some interesting language, the old breather/oil separator was out – the red squares show there the two capsule 10mm retaining bolts are. Next to is is the CDTi breather and you can see that not only is the return pipe different, but the angle of the upper breather hose stub is wrong.

We started to modify the breather by removing the return pipe from the new one and getting the return pipe flange from the old one. A heat gun was used to get the plastic decently hot so that the plastic pipes could be separated from the new and used bits our hybrid required.
We then found a length of new 10mm fuel hose that was the correct diameter. This was warmed up and pressed onto the new breather housing and the return pipe flange pressed into this and a suitable new hose clip added. Fuel hose should be durable enough for this.
The breather assembly was now fed down into the correct area and the return hose fed behind the starter. It took a couple of goes to get the sump flange in the right position but it was fitted and bolted to the sump and block before long – this is where a ramp is so useful.

This photo shows how we got past the incorrectly angled upper breather stub. The red dot shows two things – firstly it’s the new hose that fits to the steel breather tube and secondly the need for a locating slot to be cut into the rubber. The other hose is the original Saab part.
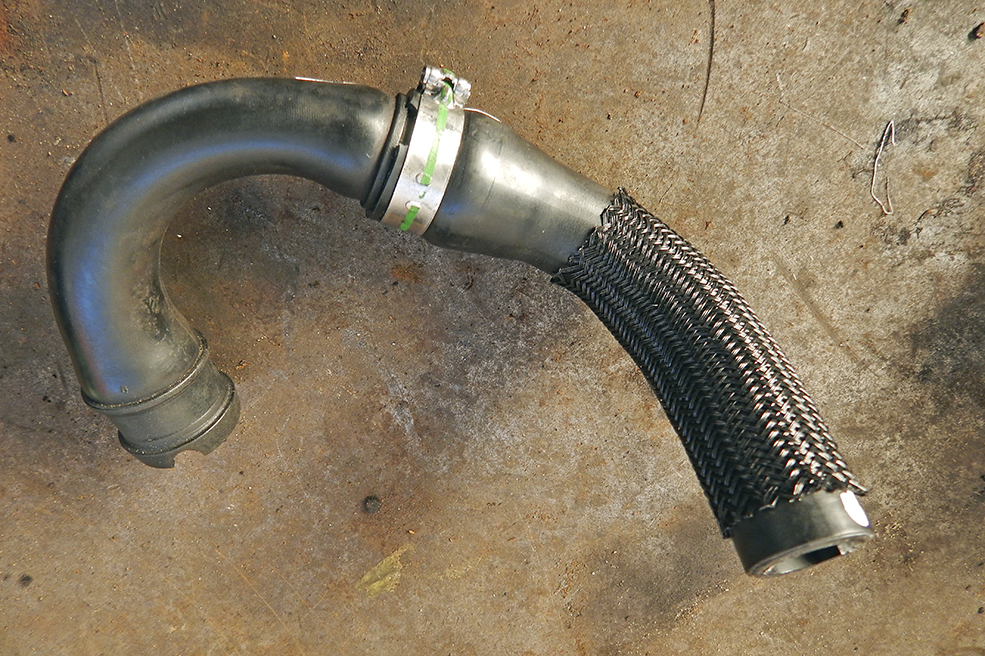
This is a better view of our hybrid hose. We reused the new clip to give it a factory look. We used a one-inch section small bore steel tube inside the left hand (original) pipe to make the joint suitably strong and trial fitted the pipe before cutting the locating slot and fitting the clips.

With the breather assembly finally fitted and the engine started to ensure all was well, we needed to modify the foam sound deadening fitted to the inside of the engine acoustic cover. We had to cut a small section of the foam out to clear the modified upper breather hose.
Oil pick-up O-ring replacement
After the fight to the death with the inlet manifold to eradicate the swirl flaps and then the cambelt (not that bad a job to be fair), I really didn’t fancy tackling the sump removal job to renew the infamous sump to oil pump O-ring. On a ramp, it turned out to be a long and frustrating job. There are, of course, various YouTube guides that make the job seem easy – maybe it is on an Insignia, but do not underestimate it.
As we’ve already found out, the TTiD Saab engine is in fact a 1910cc version of the Vauxhall/Opel CDTi engine as found in the 2.0 diesel Astra and Insignia, easily spotted by its plastic inlet manifold. This Fiat-designed unit (FPT is cast on the unit – Fiat Power Train) in its original form was first used in 1997 in the Alfa 156 JTD and was the worlds’ first common-rail diesel. Found in the Vectra C, Saab TiD and Alfas 156, GT and 159 as well as various Fiats, it had a very effective oil pick-up. A strainer on a pick-up tube was bolted to the oil pump and it dangled down into the sump. It never gave a moments trouble and that’s a red light for a car manufacturer to improve it.
Starting in 2008 with the revised ‘Multijet II’ engine, GM and Fiat deleted the bolt on strainer pipe and just mated the sump directly to the oil pump with a rubber O-ring seal in between. The sump was recast with the oil pick-up built-in. So far so bad, but to add insult to injury, these geniuses put the O-ring seal above the level of the oil.
Think back a couple of years to our never-ending CM Insignia CDTi project with the knackered engine and that was undoubtedly caused by the O-ring failing. The O-ring goes hard with age and engine heat and as they’re above the oil level in the sump, the pump draws in air, the oil light comes on and within a few seconds, the crank is reduced to scrap. Look on eBay and see how many of these cars are now advertised as spares or repair requiring a new engine. Someone I vaguely know was buying these cars up cheap, replacing the 2.0 engine (expensive) with the vastly cheaper 1.9 from a Vectra and having a nice sideline. Fact is, the old 1.9 can be fitted with the manifolds, loom, sensors and ancillaries from a dead 2.0 CDTi and it’ll run like a charm.
Our 9-3 hadn’t yet displayed a low oil pressure warning but it was just a matter of time. On the Insignia this job isn’t too horrific – but on the Saab 9-3 with its Vectra C subframe, it was a complete swine – the result of fitting a later engine into an older car. Because the Vectra rarely needed its sump removed, it wasn’t a problem.
Topping-up the gearbox was fun – the refill plug is only just visible but it’s on top of the box under the battery tray – we used a length of garden hose and funnel to slowly add the oil.
Oil pick-up O-ring replacement: the process
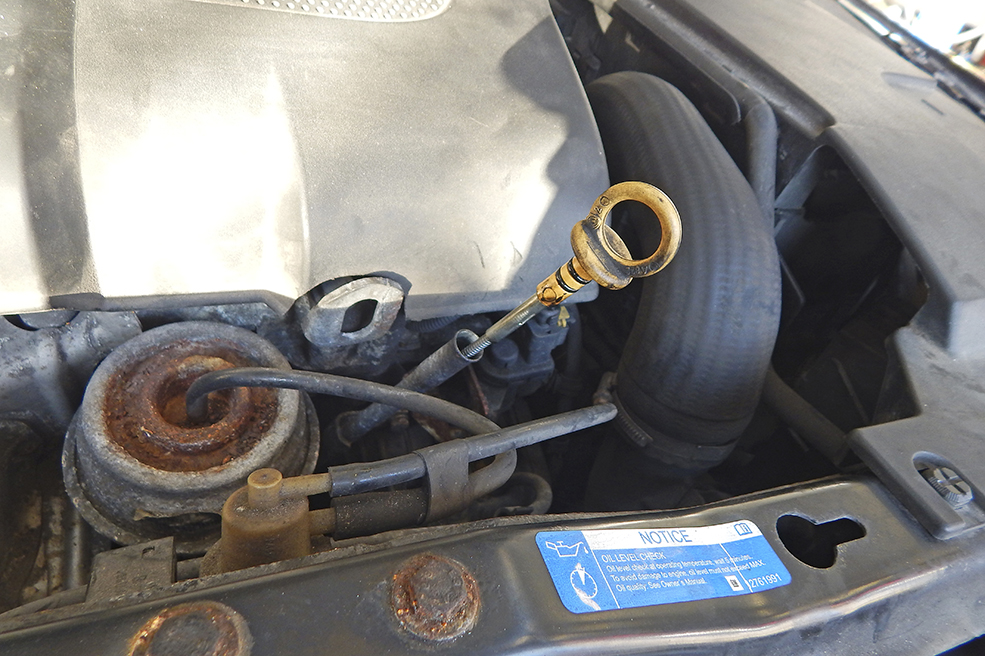
It sounds daft, but it’s important to pull the dipstick up. That’s because it’s entirely possible for it to get trapped when refitting the sump – imagine having to do this job twice! Whilst you’re up there, disconnect the battery negative terminal as we’ll be working on the starter motor.
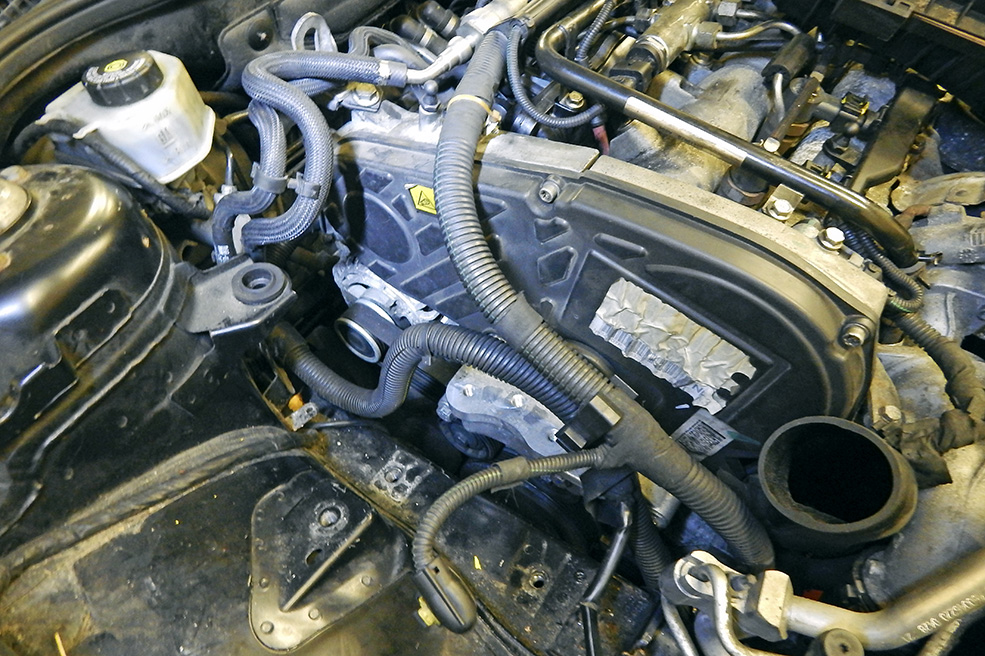
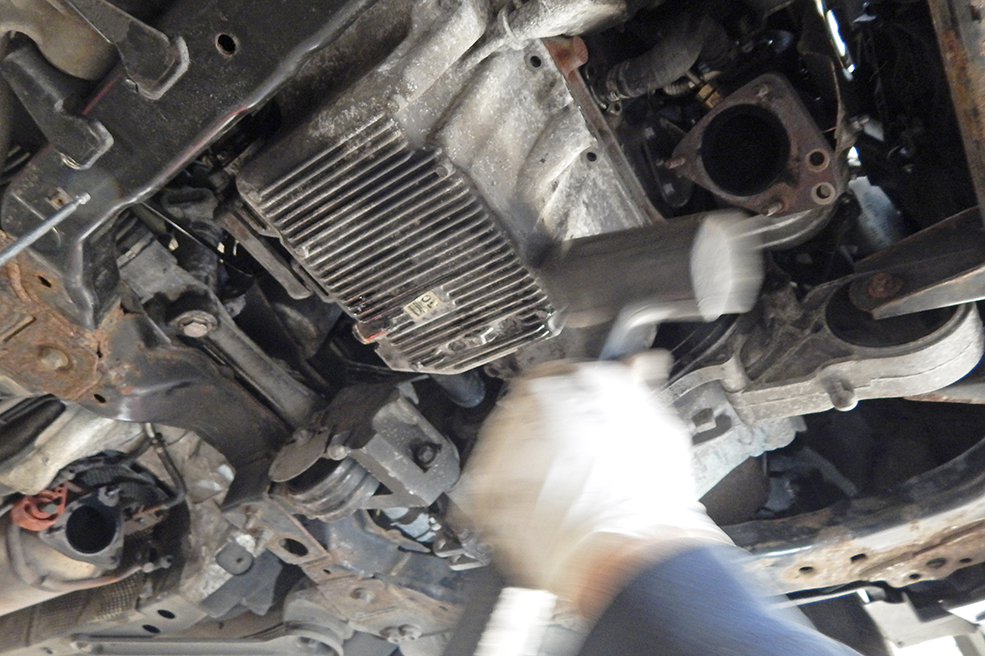
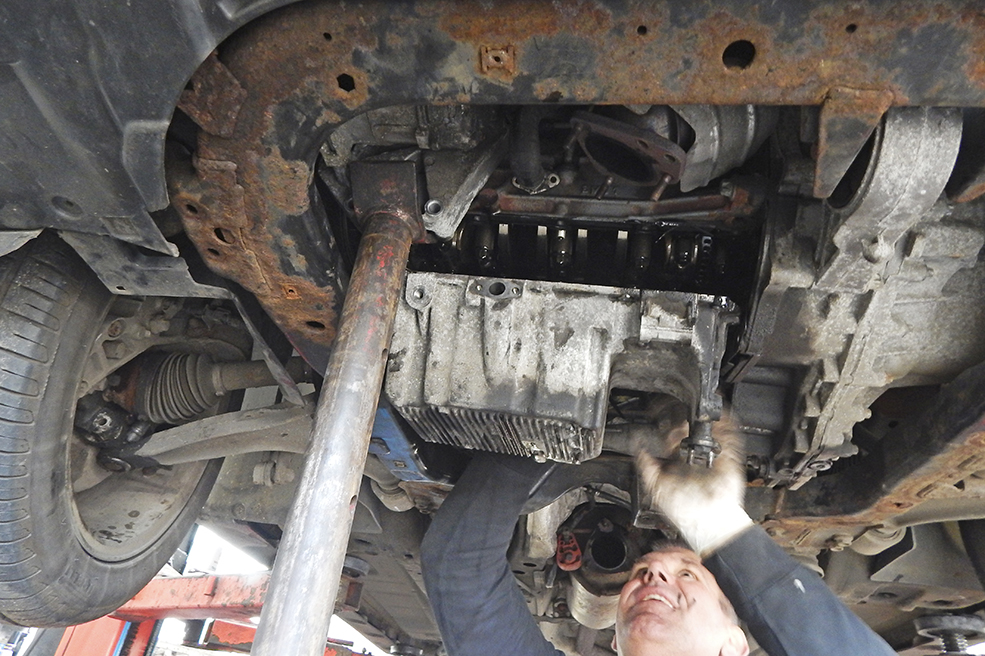
This is the view of the engine once the plastic under tray has been removed – on our car the fixings were all tired, so we drilled new holes and fitted new bolts. The sump looks pretty accessible, though looks can be very deceptive. We found it surprisingly difficult to remove.
The front exhaust downpipe has to come off first, but this is pretty easy – I had removed it recently in order to adjust the fit and prevent the annoying exhaust to body knocking on start-up. There is a triangular joint gasket here but no probe wiring that needs disconnecting.
At the front, the downpipe joins the exhaust manifold with three more studs and nuts that are easy to remove. There’s also the stainless steel support bracket as seen here but you shouldn’t have to remove that. Clean any penetrating fluid before refitting or it’ll stink on start-up.

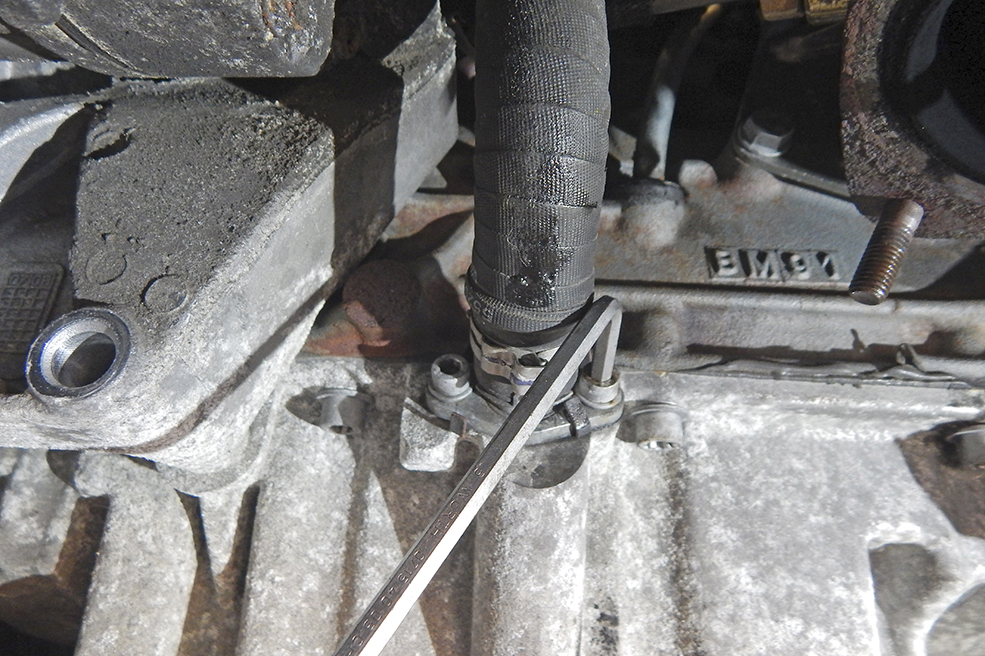
This is the turbo oil return pipe that goes from the turbo down into the sump. It’s secured by a pair of easily accessible 5mm Allen bolts. There is a gasket here so make sure that you refit it on reassembly to avoid an annoying leak. Our gasket was the reusable metal type.
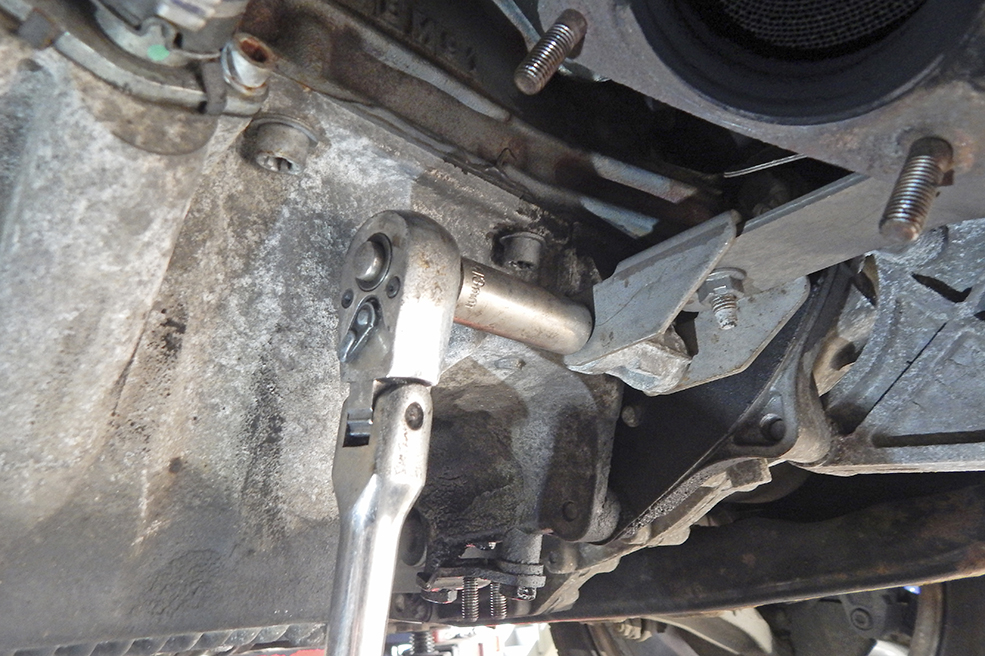
You can remove the two lower air-conditioning compressor bracket 16mm bolts before or after the turbo oil drain back pipe. It’s not dowelled to the sump and you don’t have to remove the bracket or the crank pulley despite what the manuals might say. The bolts are 50Nm.
Remove the E18 Torx bolts that secure the driveshaft centre support to the sump. They are torqued to 20Nm on reassembly with a dab of threadlock. With the support unbolted from the sump, the driveshaft flexes – almost enough – to allow sump removal. Sadly not quite though.
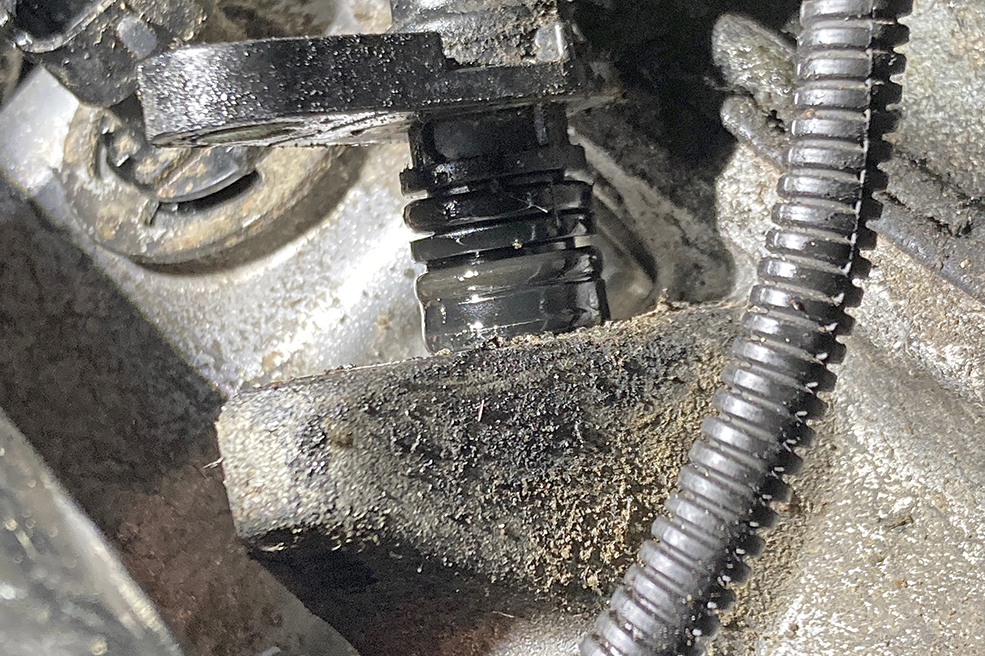
On the back of the sump you will find this, the breather catch tank drain back pipe – a fantastic bit of car design as we’ll discover later. Whilst you are in there, disconnect the crank sensor as well as the oil level sensor that is fitted to the back off the sump – simple connectors.

This bracket here now needs to be removed in order to access the two 10mm bolts that secure the flywheel side cover to the gearbox. Like the annoying inlet manifold swap, this is one of those jobs where there seems to be a never-ending series of small things to disconnect.
Next we need to remove the E18 Torx bolts (40Nm) that secure the gearbox bellhousing to the alloy sump. Our gearbox is the F40 unit as opposed to the troublesome M32 fitted to many lower powered Vauxhalls and Saabs. The ‘notorious’ rear sump bolts are easy to remove.
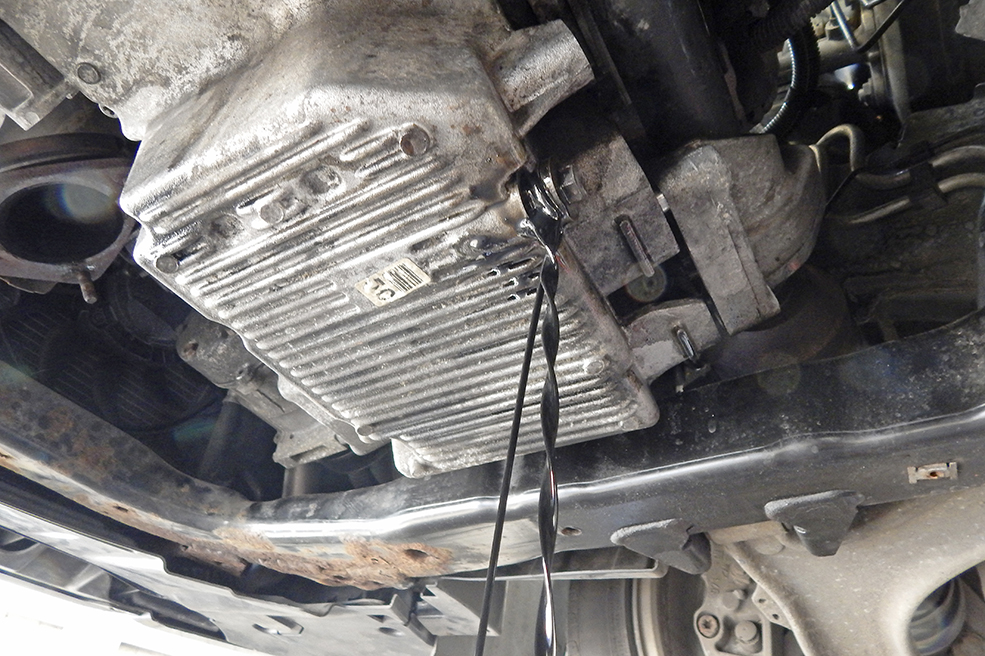
Now we’ll drain the oil. The sump plug undoes and as it comes out it exposes a drain hole in the side of the hollow bolt. This allows the oil to drain out slowly. This oil is only 1000 miles old so it was drained into a clean container to be used again sometime – we can’t waste it.
We mentioned notorious sump bolts a minute ago – on some cars – mainly those with the M32 gearbox, you just cannot access the rear sump bolts behind the flywheel. On the F40 box they are easily removed with a T40 Torx driver. On some you have to drill two holes in the bellhousing!
The rest of the sump bolts are very easy to access and they are a mixture of T45 bolts on the sides and more T40’s at the crankshaft pulley end. One good thing about our engine is that despite its 12 years and 152,000 miles, it’s remarkably clean and dry with very few oil leaks.
With the bolts removed, the sump will now need clouting to break the seal between sump and block. There is no paper gasket on these, just very tough black factory applied sealer. On Astra H and Insignia cars, the subframe is wider with more room to manoeuvre the sump.
But try as we might, the sump just will not come out one with the 9-3 with its Vectra C front subframe. The problem is that there is a stupidly long oil drain back pipe that we unbolted in earlier – it goes to the bottom of the sump and prevents the sump from being wiggled out – great.
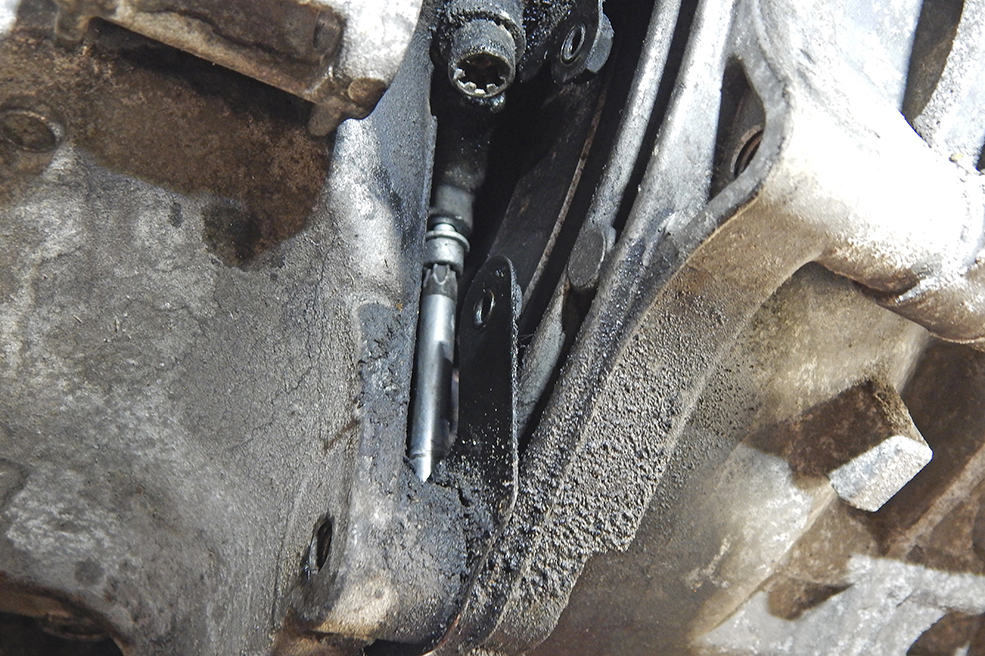
If it wasn’t for that, we think it might be possible to remove the sump without removing the driveshaft – that would save some time. But, we cracked on to remove the shaft and started by removing this E18 Torx bolt and 17mm securing clamp nut from the lower balljoint.
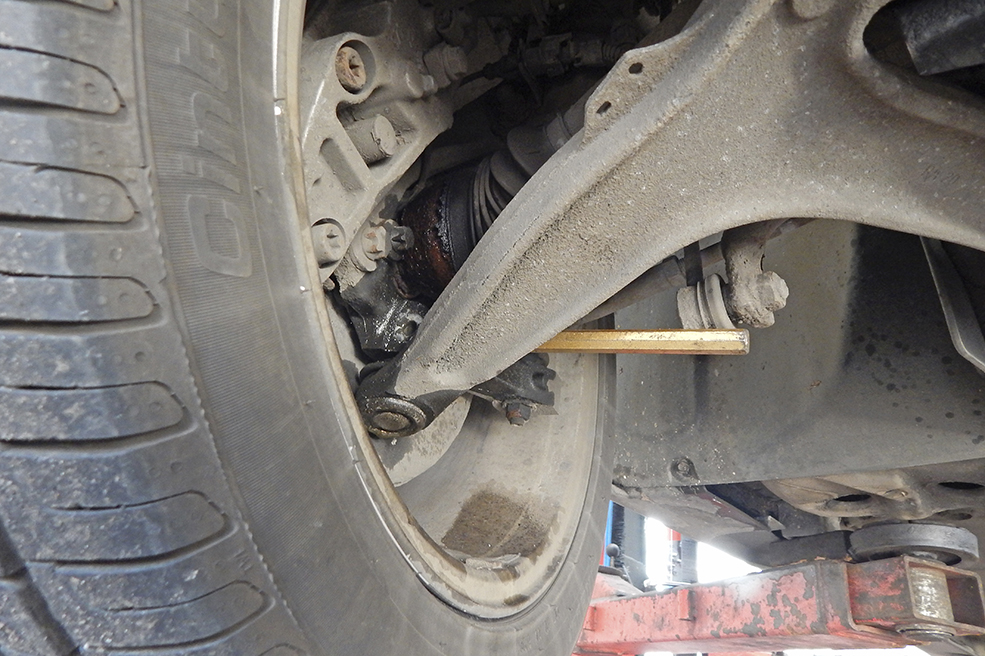
With the nut and bolt removed, the iron hub is spread slightly with a long thin cold chisel to relinquish its grip on the balljoint. The lower wishbone is then pulled down to release the balljoint from the hub and the inner driveshaft carefully ‘sprung’ from the gearbox. It may leak oil.
There’s no need to remove the road wheel but if you’re brave enough to tackle this job on axle stands then it’s worth removing it. There are various different driveshaft nut sizes on GM and Fiat/Saab cars and this one was a 32mm. It’s torqued up to 230Nm on reassembly.
Of course, the CV joint was seized solid into the drive flange – the driveshaft was not coming out today. So, we needed to make room for the inner end so we could wangle the sump past it. This rear engine steady bracket needs to come off – start by removing these 16mm bolts.
Now remove or just slacken the centre bolt that joins the front and rear parts of the mounting – they are all torqued to 55Nm. The vertical nuts bolts to the left of the mounting also need to be removed and then the complete engine steady assembly comes off.
On some gearboxes, there will be oil loss when the inner driveshaft comes out so catch it. You may want to change the gearbox oil with the car in bits and on the F40 gearbox this is where the oil drain plug is – the refill plug is in the same place on the other, upper side of the ’box.
Because the oil drain back pipe from the oil separator into the sump is so long, we need to unbolt it from the back of the block. There are two 10mm bolts that are virtually impossible to photograph and they secure the separator to the block – remove them and pull the unit away.
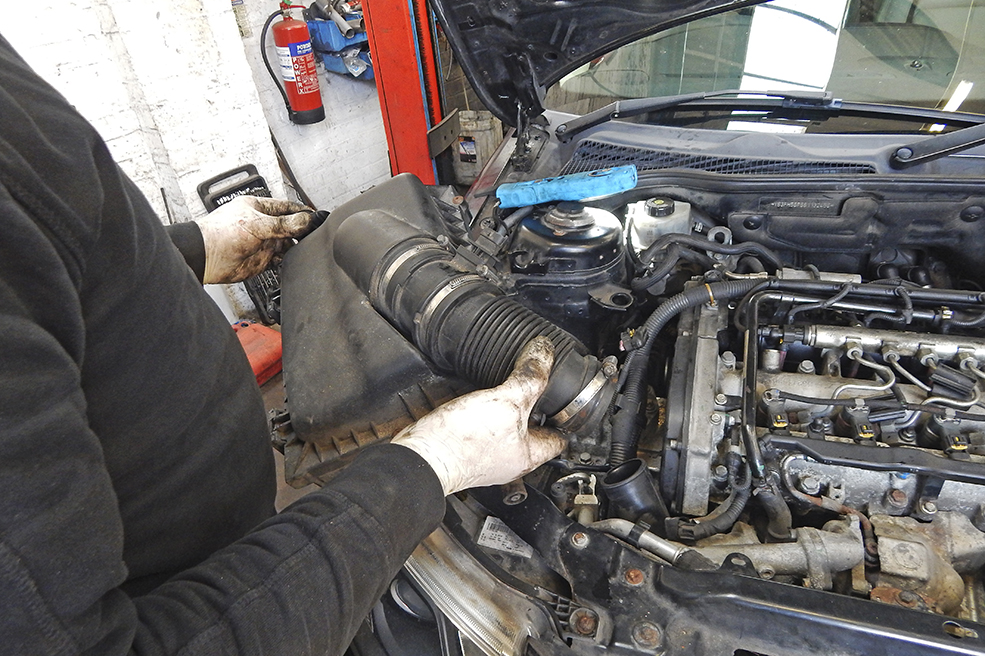
On the Saab we wanted to get a bit more wiggle room to get the end of the sump past the subframe so we are going to unbolt the driver’s side engine mounting from the chassis leg and lift that side of the engine. Start by unplugging and removing the air filter box with the MAF.

The engine mounting is very easy to disconnect – just undo and remove these three 16mm bolts as seen here. The engine won’t drop down – what you can do is lift the engine and place a block of wood between mount and chassis – three inches seemed to be about right.
Here, the car is up in the air and the engine has been raised slightly with a tall stand under the air con compressor bracket. But no matter what was tried, the sump just was not coming out. Again, it was that stupid oil separator pipe that was too long to pull out of the sump.
The oil separator pipe runs behind the starter motor and it will just not pull up and through the gap between the starter and the block. So there is no option now but to remove three fiddly bolts and pull the starter off to give more clearance.
Finally! With the plastic pipe able to be pulled from the sump, it could be wiggled out. It’s a tight fit and a real nightmare to refit due to lack of clearance in there. Here we can see the ridiculous length of the drain back pipe – if only it was a couple of inches shorter. Madness.

Here is the sump as removed. It’s remarkably clean inside and has obviously had plenty of oil changes. You can see in the lower left corner of the sump the oil pick-up that’s bolted into the sump with two 10mm bolts. The oil feed hole corresponds with the one in the oil pump.
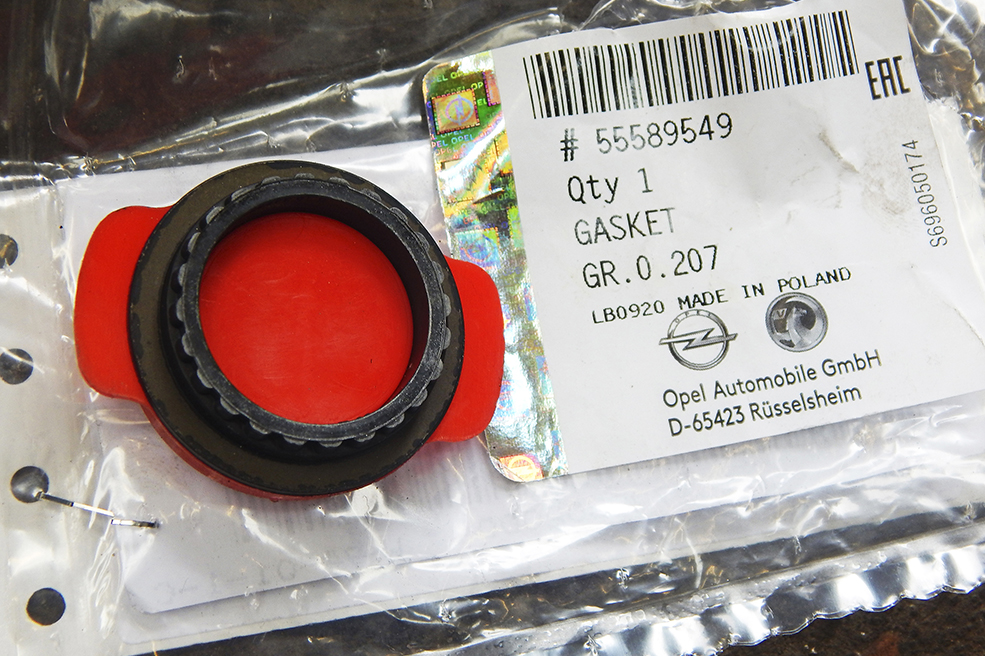
This is the new oil seal. £14.77 from my local Vauxhall main dealer. They sell a lot of these apparently with quite a few going to taxi operators who, stung by engine failures are dropping Insignia sumps for a bit of preventative maintenance. The part number is 55589549.
Our old oil seal wasn’t in bad condition and it still had a bit of flexibility left although it wasn’t as supple as the new one. It is a press-fit into the oil pump with no sealer required.
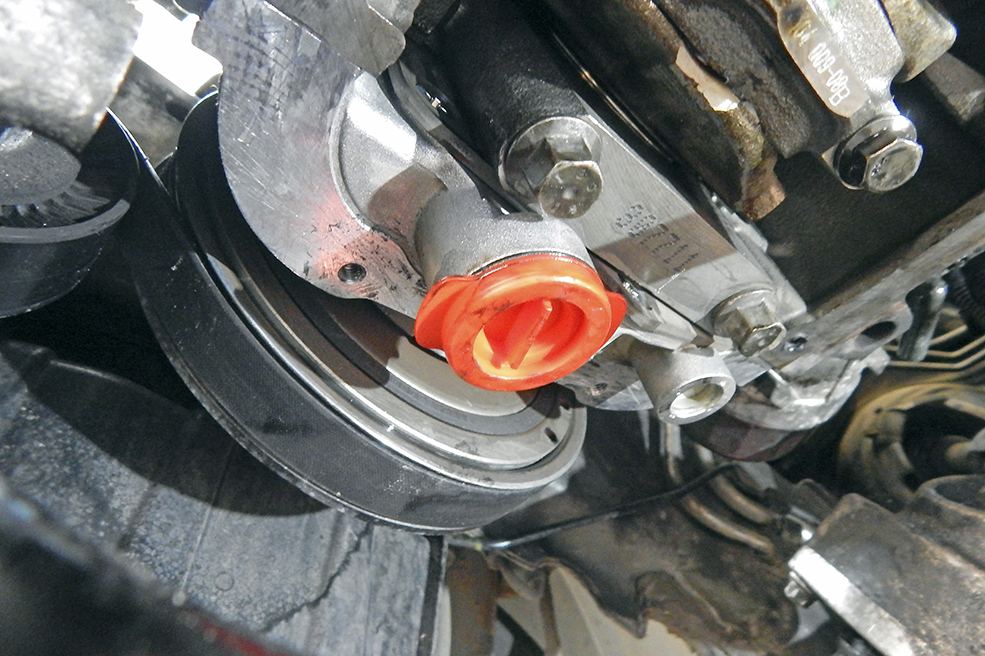
The new seal is fitted as shown with the red fitting cap. You press the seal into the pump firmly until fully located, and then the red cap just flicks off. Here, the block to sump mating face has already been cleaned of old gasket sealer and just requires a wipe off before sump fitting.
The sump was cleaned inside and out with brake cleaner and the gasket face cleaned thoroughly. A neat bead of Elring sealer was applied and the sump refitted – that’s a very tricky job on the 9-3 so be really careful. Now, you just need reassemble it all – a solid day’s work.
Crankshaft breather replacement
Our Saab 9-3 was in need of a new crankshaft breather. A split diaphragm can cause oil to be drawn into the manifold and burnt off, causing smoke from the exahust.
There is no valid part number for the unique TTiD breather that looks like a Vauxhall Insignia one, but isn’t. The Insignia-type breather that some say will fit a TTiD will not fit without extensive modification.
In the end we had to replace the return pipe with 10mm fuel hose, reuse the pipe to sump flange and make up an upper breather hose. It took our local garage three hours of messing around on a ramp (you have to unbolt the starter motor).
Crankshaft breather replacement: the process
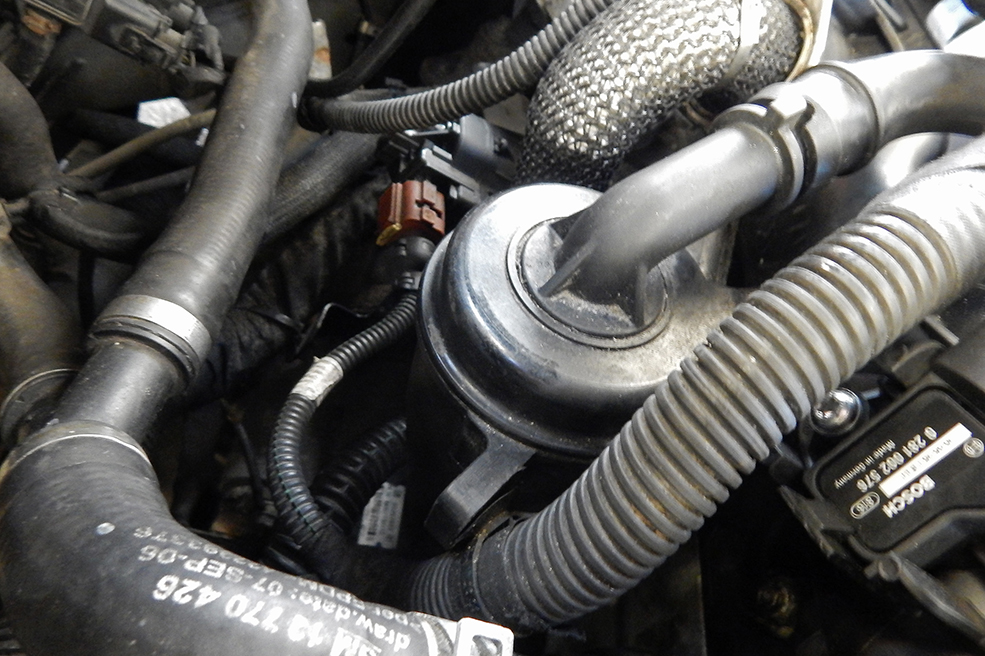
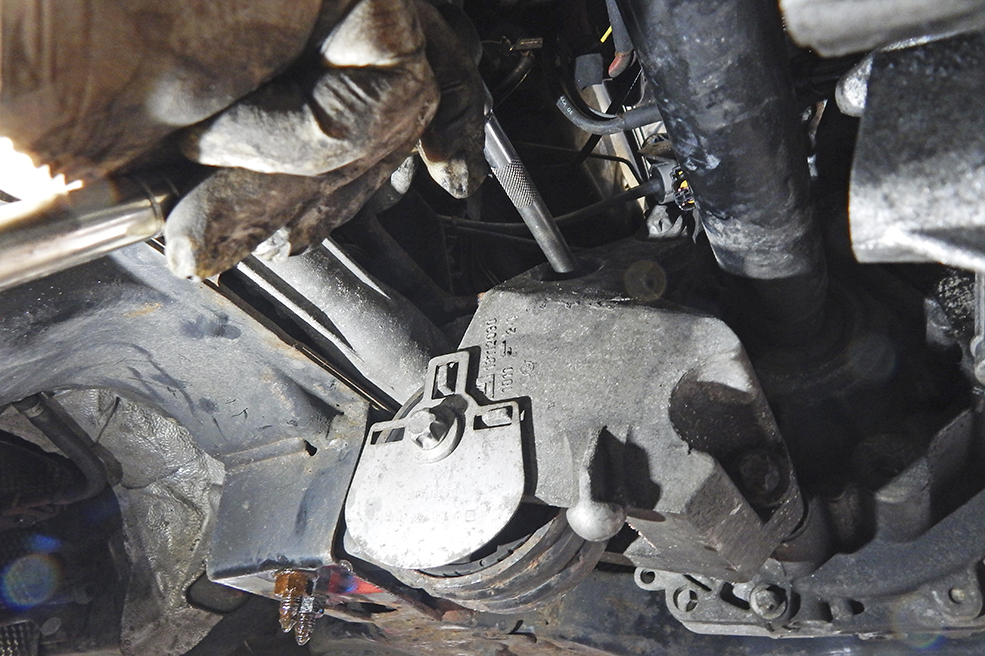
This is the breather capsule on the back of the engine. It is unique to the TTiD engine and appears to be unavailable. There is no part number on the unit anywhere and of course no Saab dealer. The GM part number 55575980 is for the Vauxhall CDTi breather that doesn’t fit.

Here, we have pulled the top breather hose off the capsule and unbolted the EGR pipe from the inlet manifold to gain access – the pipe pulls out of the manifold and the lower part of the pipe is bolted to the EGR housing with a steel gasket. You can reuse the old one just fine.

This is where the breather oil separator return pipe bolts to the sump. On the CDTi type breather, the flange is at the wrong angle and will not bolt on. We only discovered this when the pipe was fed down the back of the starter. This is where we had to start getting creative.
The starter motor has to be unbolted from the engine in order to allow the stiff plastic oil return pipe to fit behind it, a superb bit of design. It is secured by three T14 Torx bolts and you really need a lift to do this job although it’s possible by lying on your back and swearing.
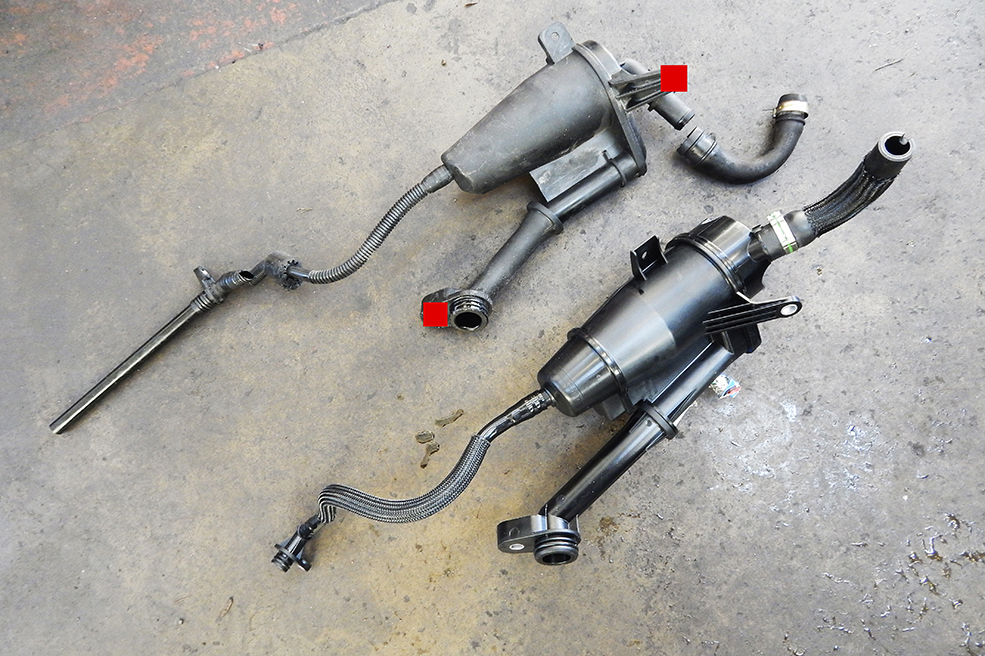
After some interesting language, the old breather/oil separator was out – the red squares show there the two capsule 10mm retaining bolts are. Next to is is the CDTi breather and you can see that not only is the return pipe different, but the angle of the upper breather hose stub is wrong.
We started to modify the breather by removing the return pipe from the new one and getting the return pipe flange from the old one. A heat gun was used to get the plastic decently hot so that the plastic pipes could be separated from the new and used bits our hybrid required.

We then found a length of new 10mm fuel hose that was the correct diameter. This was warmed up and pressed onto the new breather housing and the return pipe flange pressed into this and a suitable new hose clip added. Fuel hose should be durable enough for this.
The breather assembly was now fed down into the correct area and the return hose fed behind the starter. It took a couple of goes to get the sump flange in the right position but it was fitted and bolted to the sump and block before long – this is where a ramp is so useful.
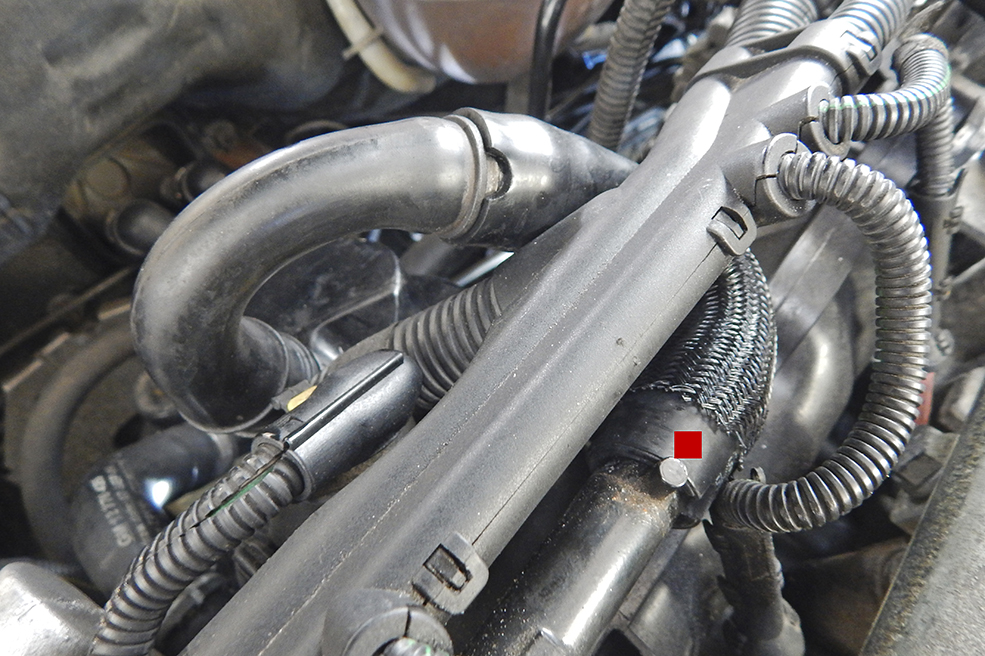
This photo shows how we got past the incorrectly angled upper breather stub. The red dot shows two things – firstly it’s the new hose that fits to the steel breather tube and secondly the need for a locating slot to be cut into the rubber. The other hose is the original Saab part.

This is a better view of our hybrid hose. We reused the new clip to give it a factory look. We used a one-inch section small bore steel tube inside the left hand (original) pipe to make the joint suitably strong and trial fitted the pipe before cutting the locating slot and fitting the clips.
With the breather assembly finally fitted and the engine started to ensure all was well, we needed to modify the foam sound deadening fitted to the inside of the engine acoustic cover. We had to cut a small section of the foam out to clear the modified upper breather hose.