The MG Midget is a perfect beginner classic – something we hope to prove with our very own 1970 example, in association with Teng Tools
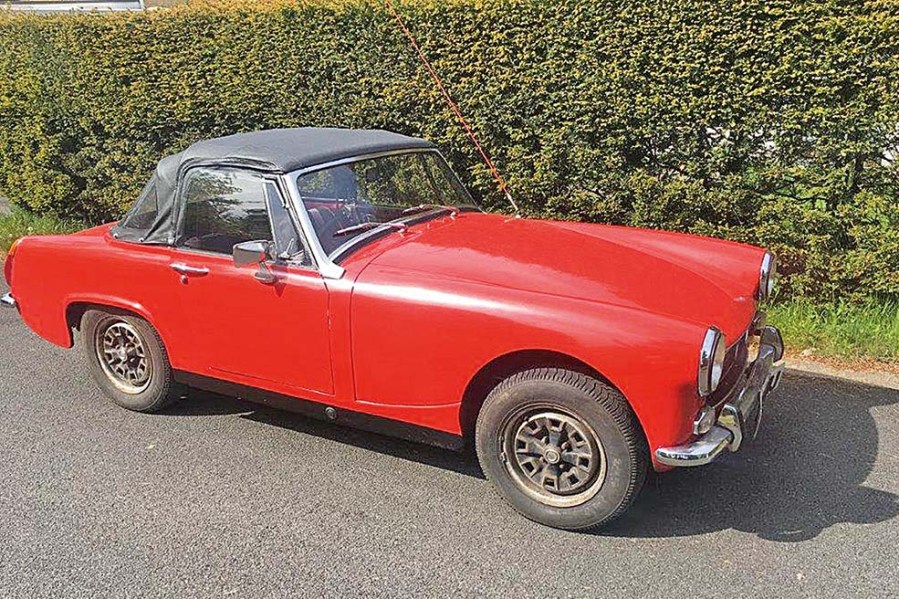
This is our 1970 MG Midget project car, owned by its previous keeper since 1975. At that time, the car had just 14,777 miles on the odometer. In 2019, Classics World took ownership and set about returning the little MG sports car to its former glory.
As an initial inspection and drive revealed, our car was largely mechanically sound but had quite a few underlying issues that would need sorting. Our next job was to try and draw up a provisional list of jobs to be done.
Here, we’ll chronical our experiences with our MG Midget project car. Stay tuned for updates!
Assessment
Our biggest concerns when viewing our potential MG Midget project were the previous repairs to the sills – it was not clear how far back the restorers had gone when doing this work, nor how many layers of steel, nor how much filler there was in the sills, arches and A-pillars. Certainly, there was a worrying amount of what looked like glassfibre in both front inner wheel arches where they closed off the sill panels.
Helpfully, the previous owner dug out some of his records. He told us that the last repair to the sills took place around 2001 or 2002, with the welder asked to remove the debris of what should have been an original and an over-welded sill, and replace them with new ones properly. Previous sill overplating happened in 1980 or so to achieve an MoT pass, along with a new gearbox.
There were no holes or obvious structural issues that the previous MoT inspection had missed, and from 10 yards away the Midget actually looked pretty sharp. Closer inspection reveals poor panel gaps around the bonnet, doors and bootlid; hardly surprising on an unrestored car fast approaching its 50th birthday.
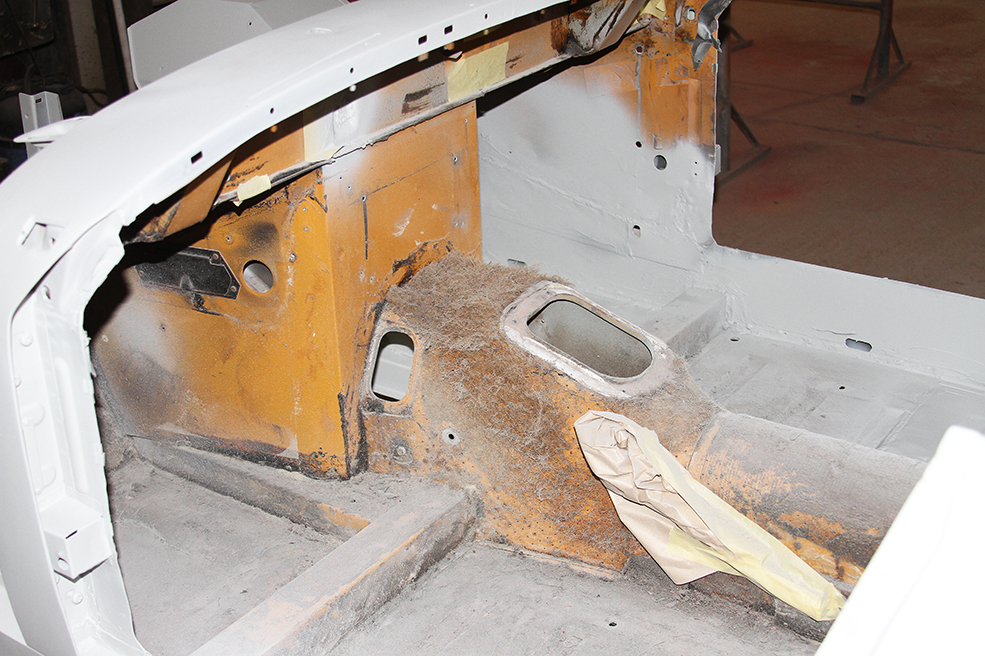
Upon opening the bonnet, what had looked like extensive surface rust on the inner wings and bulkhead in pictures was in fact the remains of the car’s original orange paint. Another plus was a 123 distributor fitted by the previous owner.
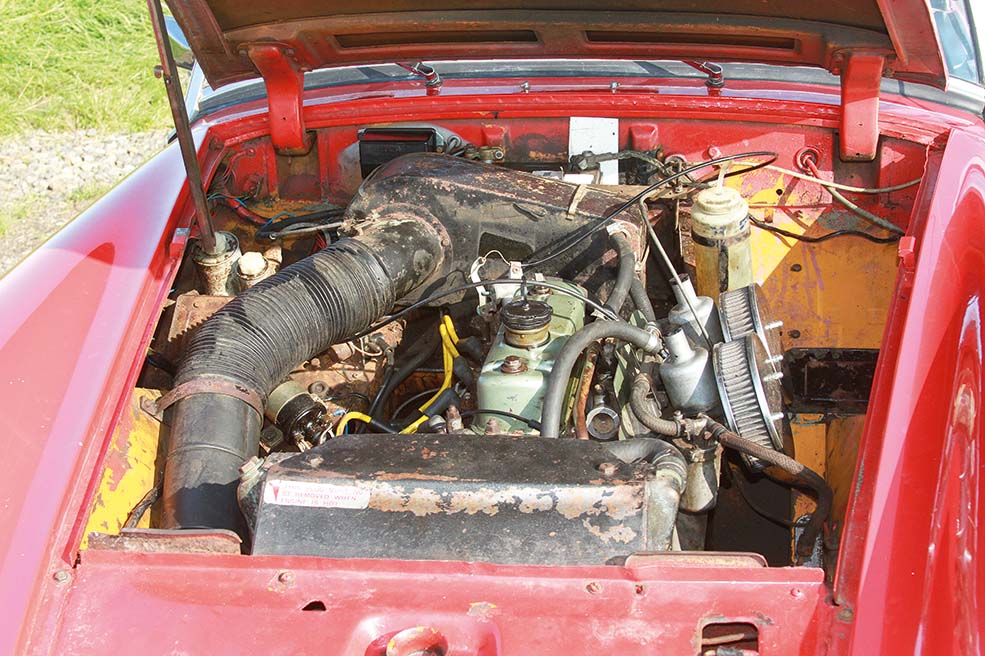
The slam panel had clearly taken a knock in the past and been beaten back into shape. As a result, the front wings had been tack-welded to it rather than bolted, and nothing lined up perfectly. We could live with this for a while but made a note to invest some time and money into this area.
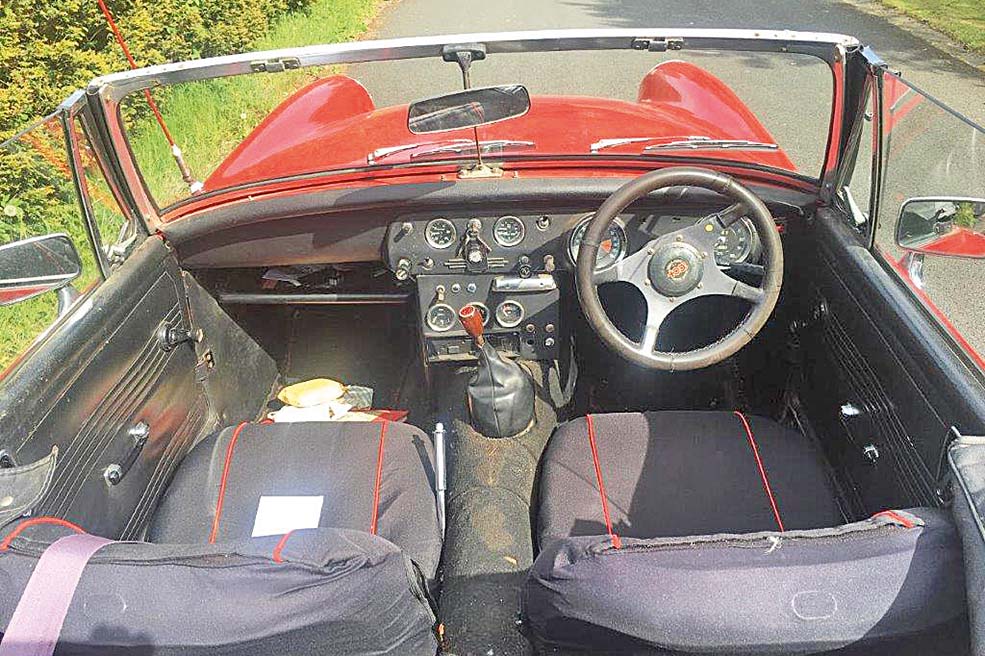
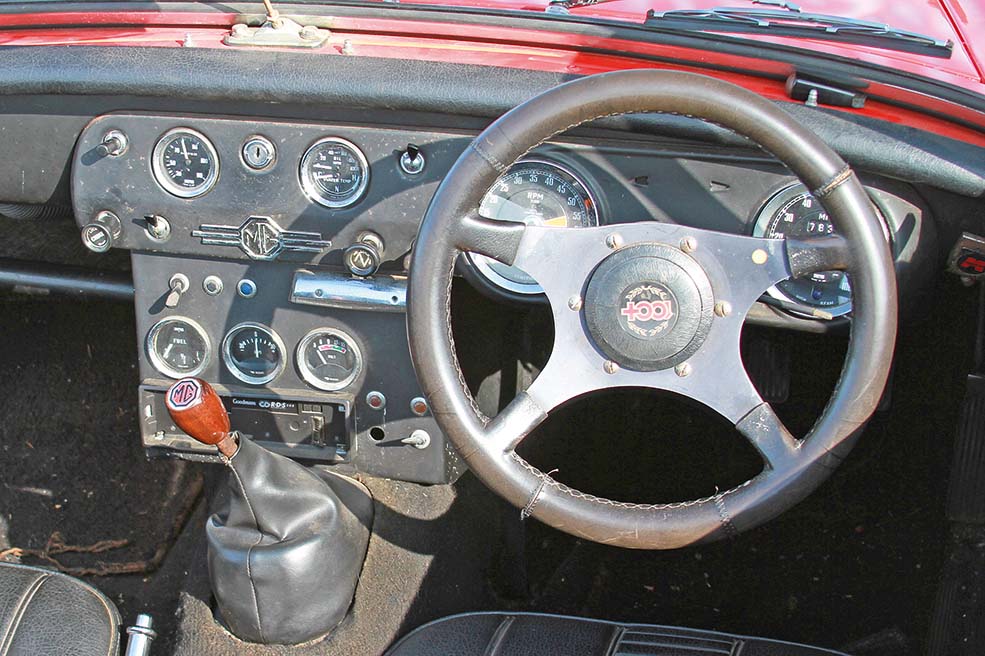
The interior was all present and correct, with a decent-enough vinyl roof. The original seats were okay, while the previous owner had fitted three extra gauges below the dash, along with a stereo. One of those gauges was a temperature gauge; a cheaper option than buying a replacement for the combined oil pressure/water temperature gauge as fitted by MG.
Having inspected the Midget carefully, the MG was taken out for a spin with the previous owner in the driver’s seat for insurance reasons. The run went really well, with a good turn of pace from the 1275cc engine, no crunches from the gearbox and a surprisingly crash-free ride.
A deal was done soon afterwards and an ambitious plan to drive the Midget 153 miles home to Lincolnshire kicked into action – further than it had been driven in the previous three years! The odds did seem stacked against us, with torrential rain forecast and the M6 closed for the night, but we made it.
Soon afterwards, we’d created a list of jobs to do – sorted by priority, with MoT requisites placed first and foremost:
Required for Mot
- Fix offside front sidelight
- Grease suspension and steering
- Service brakes
Fix before driving
- Investigate why headlights get brighter as engine revs rise.
- Stabilise idle speed.
- Replace indicator stalk
- Find and fit original steering wheel
- Fit LED bulbs to the instruments
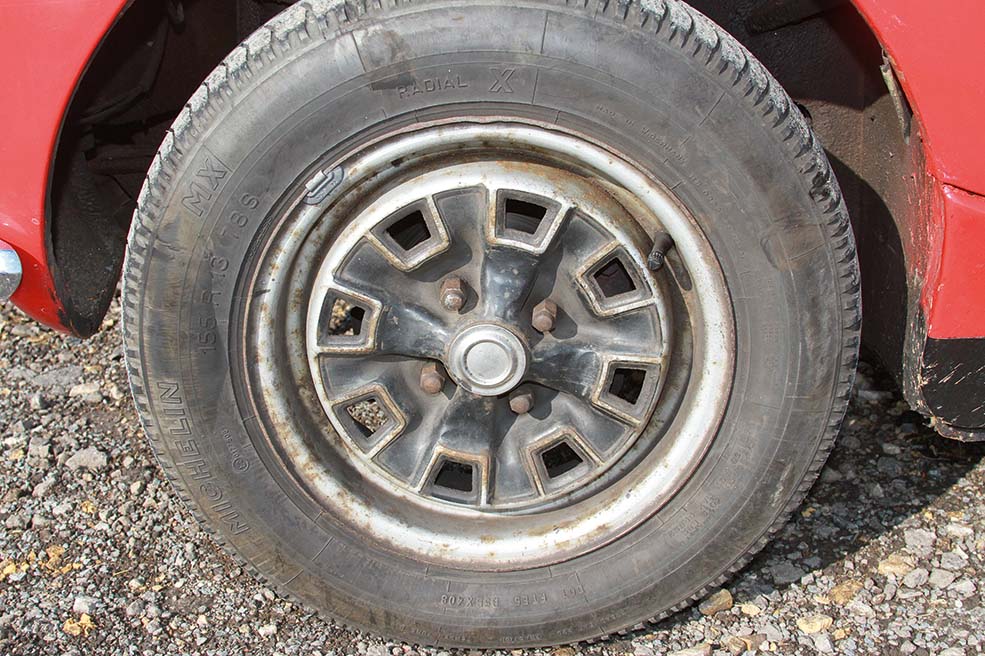
- Fit new tyres
- Dig around in sills and wheelarches to see what’s underneath
- Replace all coolant hoses
- Replace fuel lines with new ethanol-resistant pipes
- Investigate weep from radiator filler plug
- Sort out heater tap and cable
Less urgent
- Fit hazard warning lights
- Investigate rattle from gear stick
- Fix broken quarterlight bracket on driver’s door
- Refinish Rostyle wheels
- Rebuild seats
- Second set of keys for emergencies
- Fit new boot handle
- Investigate broken bolt on driver’s door handle
- Improve fit of front panels
- Paint engine bay
- Investigate rear light fitment
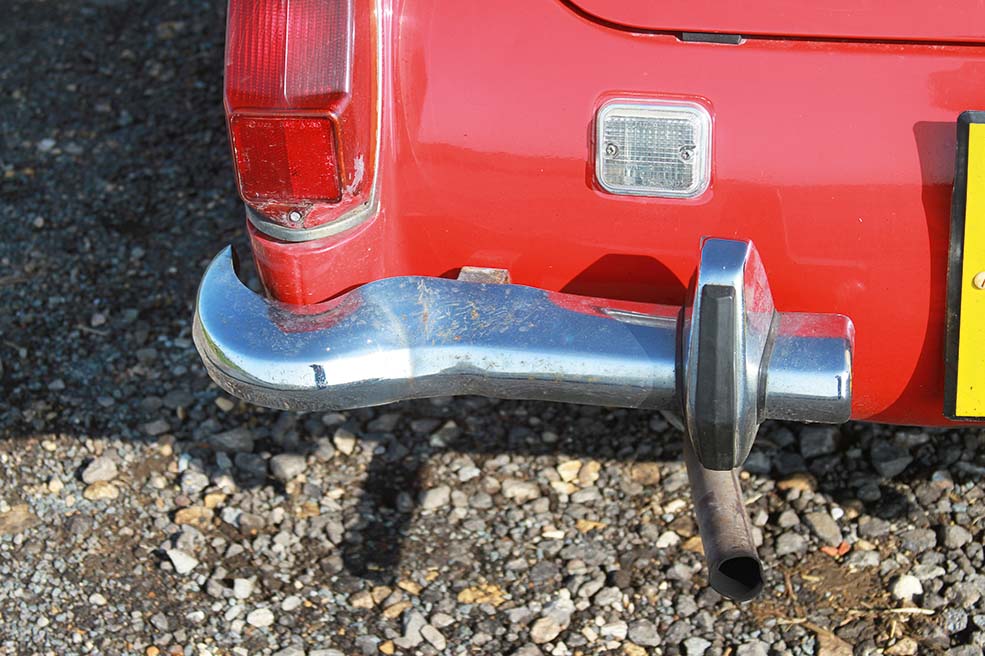
- Straighten or replace nearside rear bumper
- Straighten front number plate
- Fit audible warning for indicators
- Replace driver’s door seal
- Fit correct oil/water gauge
Even if we don’t end up addressing all of these jobs, it’s a great place to start with our MG Midget project. Of them all, it’s the bodywork investigation that has the potential to be the most arduous and expensive. However, there’s little point in fitting shiny new handles or fresh tyres to a rotten body, so we have decided to bite the bullet and tackle the metalwork first. Watch this space!
Bodywork
There is no point fitting shiny widgets to a rotten shell, so we started work on our 1970 Midget by delving into those suspect sills to see how much metal remains beneath.
As is usually the case with any classic car, potentially the biggest jobs in terms of both time and money concerned the bodywork. In particular, the sills were clearly standing proud of the front wings and so were probably over-panels hiding rust. There was also considerable filler in the A-posts and in the rear wings above the sills. None of this would have caused an MoT failure given that the areas in question were demonstrably solid, even if there was no way of telling exactly what was hiding underneath – such are the limitations of an MoT, or indeed any visual inspection of a car with shiny outer panels.
It little sense to invest serious time and money in addressing the more obvious issues if the basic structure was rotten, so the bodywork was chosen as the first item to be ticked off the list This meant a trip to Alan Denne’s workshop – Alan has been in the bodywork trade all his life and has helped us with a number of previous projects. He had also just finished restoring his own RWA Midget, so the scars of the model were still fresh in his mind. The images here show a lot of the main problems we discovered but there are some key takeaways here.
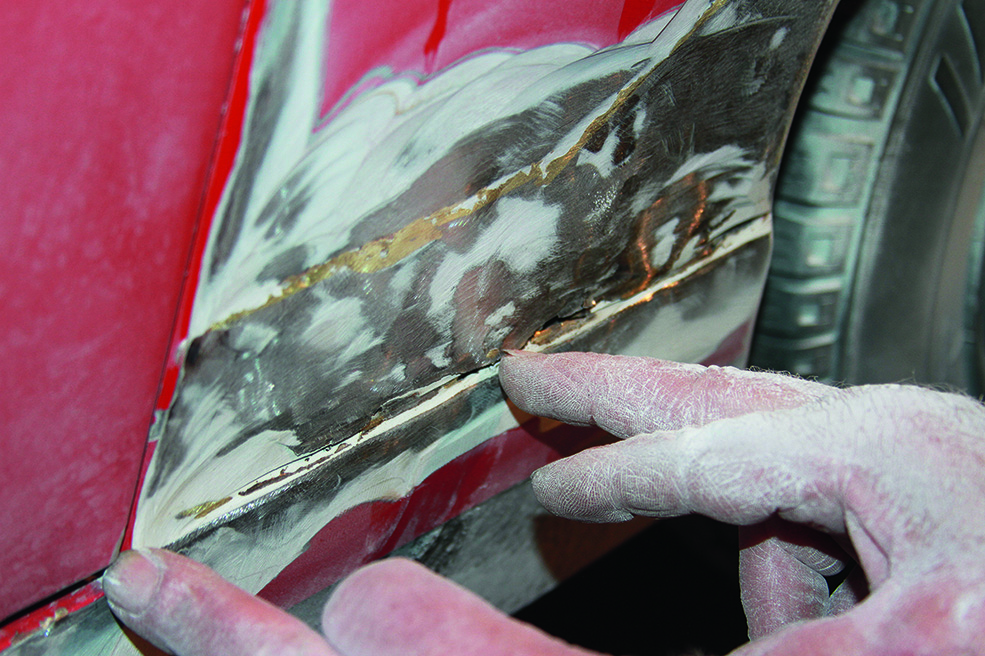
For one, you should not assume that excessive amounts of filler are always hiding rust. The nearside A-post’s outer skin was covered in filler and sanding this off could have revealed a real mess, but as it happened the amount of filler appeared to be completely over-the-top. The A-post itself was sound, and if only a thin skim had been used, it could have been flatted back to a much smoother finish.
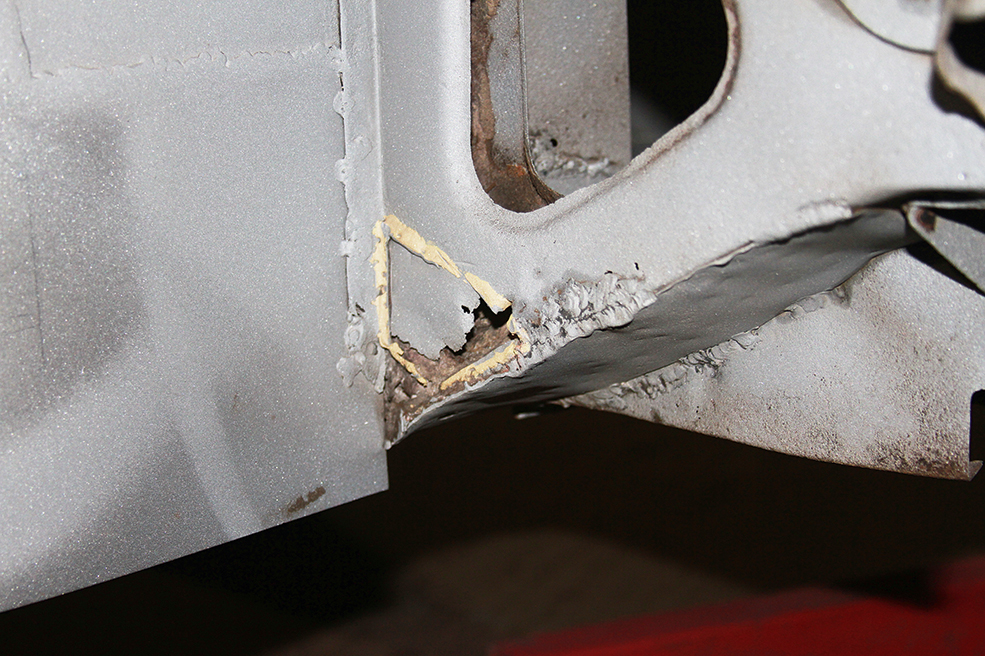
There was a small hole at the base of the A-post on its forward face, but the pillar itself was sound and there was no play in the door hinges. It had been poorly brazed to the sill, though.
There was, however, the expected rust at the bottom of the A-post where it sat on the top of the sill. This is prime rust territory on an MG Midget, and ours had been brazed at this point. Brazing such a repair was legal at one time, but it is not any more for a structural repair like this. There should be a visible seam at the bottom of the A-post where this sits on the sill panel’s top face; people used to braze this area because you could run the brass right into the joint and it would look original – the inward facing flanges were spot-welded at the factory, but there isn’t enough access to do that (or use plug welds) on the completed car.
Instead, when making a repair these days, people tend to weld across the join and then cut a groove into to get the correct look while maintaining the required strength. On further inspection, we found that the braze here was even weaker than normal because it was not even joined to the sill! We will have to make up a new section for this area.
We suspect that the reason so much filler had been used was not because the A-post was rotten, but in order to bring its face out to match the extra width of the sill below it. That’s because there were clear signs that a repair sill had simply been welded over the top of the original panel, and of course as well as harbouring rust, the double thickness of metal would have moved the sill outwards.
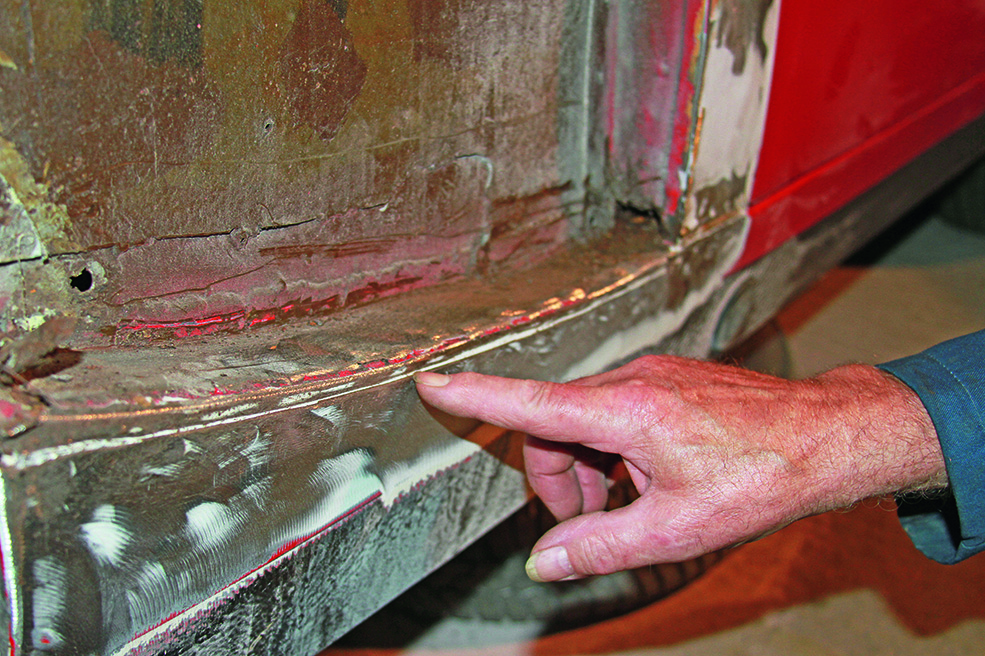
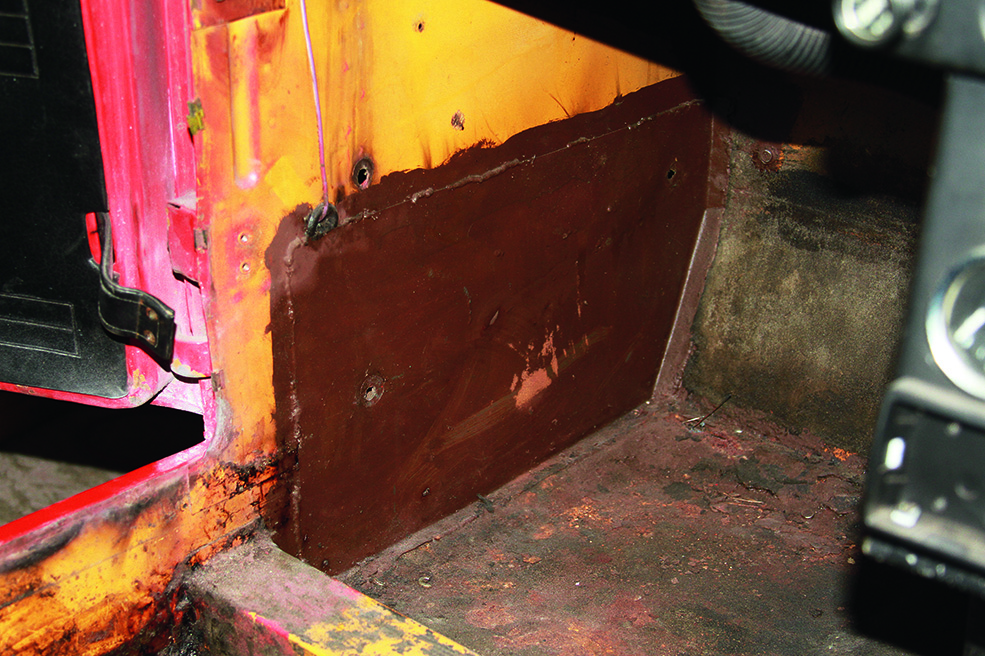
The outer sill should be a single panel that folds across the top and joins the upright panel that forms the outer edge of the footwell. Ours had a cover sill welded on along this line.
Removing the filler from the front of the sill panel showed that previous visitors had cut the new sill panel on its vertical face and welded it to the side of the existing panel. Presumably this had been done to avoid having to remove the front wing, which explains why the hole in the bottom of the A-post was not repaired. This method of welding on the new panel made us wonder how much of the old sill was left behind – but the only way to know for sure was to cut the front section off.
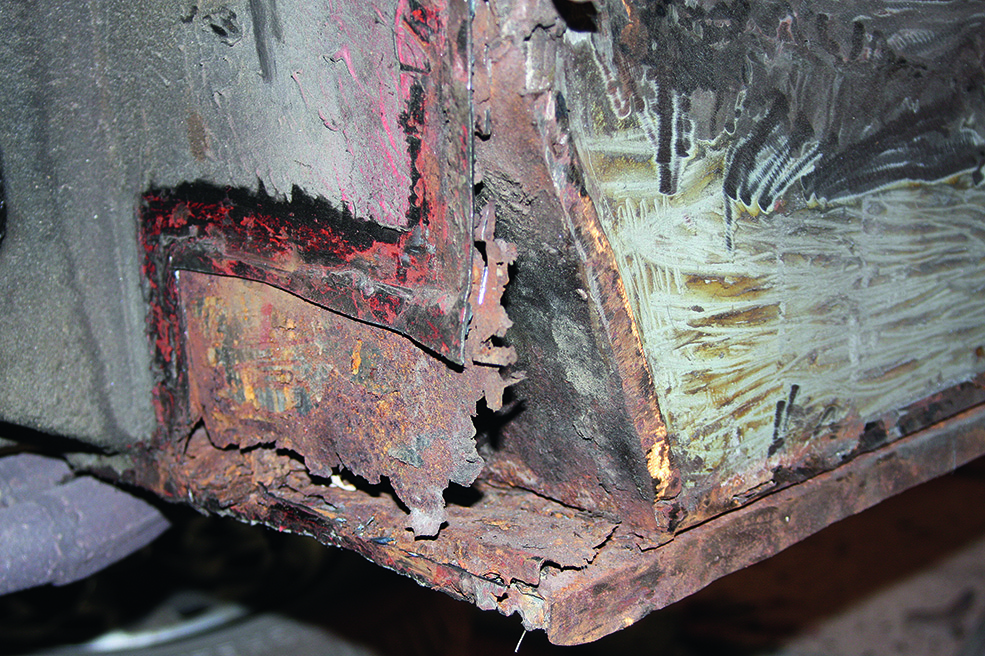
Before that we moved to the back of the sill. There should have been another seam here where the rear wing sits on top of the sill, much like at the foot of the A-post. Ours had been filled, but there was a crack across the filler and the gap between the door and the B-post was not right. We were keen to find out what lay under the filler – and that meant more destruction.
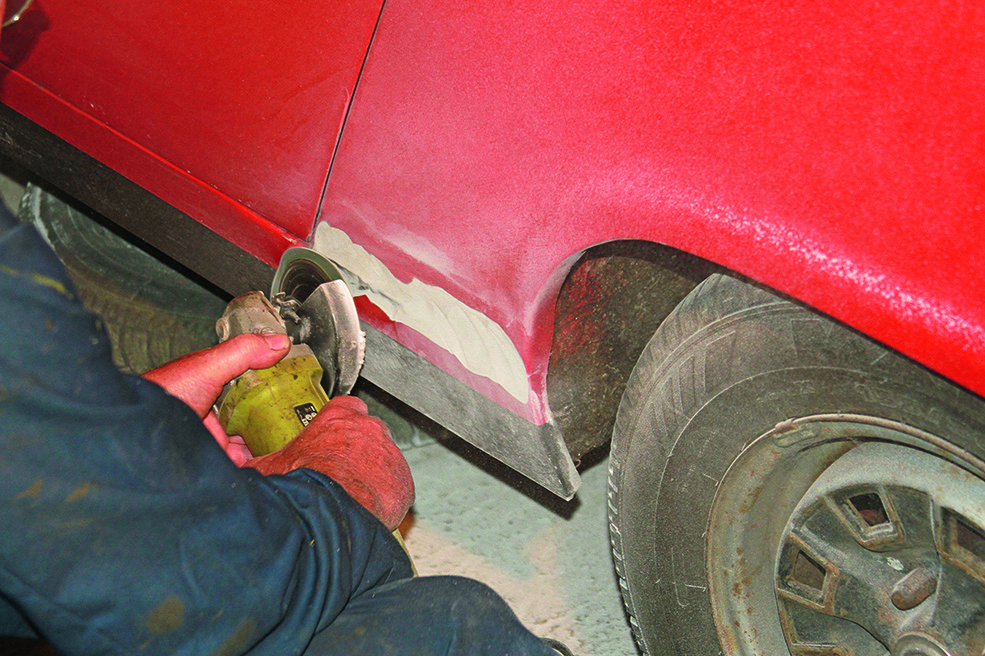
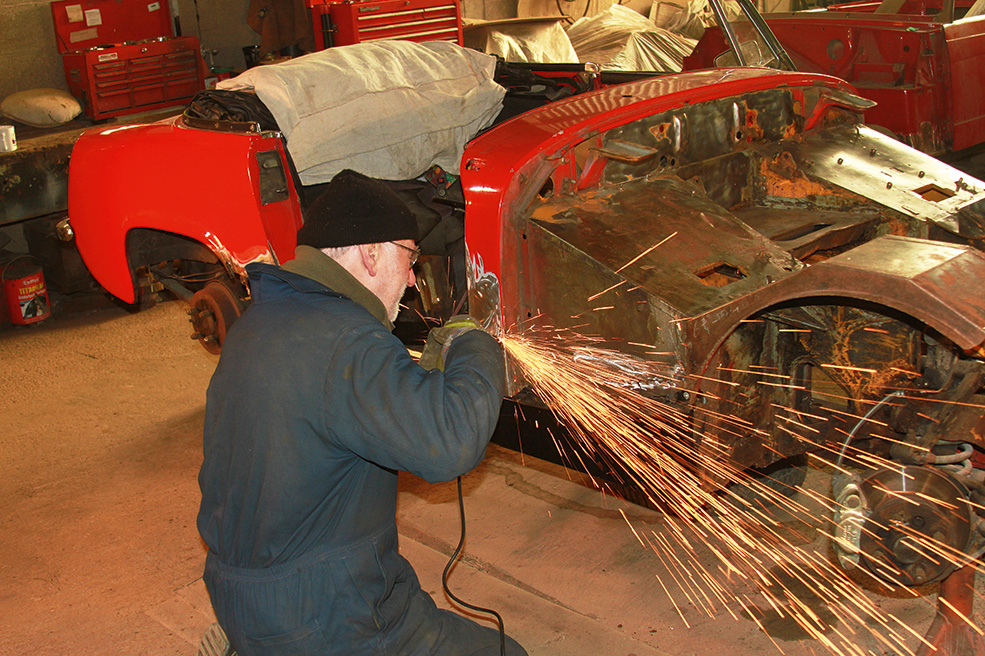
Using a sanding disc in an angle grinder, Alan started to remove the filler. The amount of dust this created made us wonder if the whole of the rear wing had been crafted from P40…
We sanded off clouds of filler but unfortunately there was not much of it by the shut line where we wanted to remove some thickness to open up the door gap. As we worked through the filler, a picture of past repairs emerged.
It seems that in the past, a few flat pieces were brazed in to repair some rust in the bottom of the rear wing, but like the front, not actually joined up to the sill. In this section you can get to the front part of the join from inside the car, so there’s no excuse for not doing a proper job; however, there is no such access at the back, so you have to do the same as at the bottom of the A-post in that section. In other words, you need to weld the two together and then cut out a groove for the correct look.
We continued sanding back the filler to determine how far it went, and a third of the way along the rear wheelarch we finally started to see the original paint. That meant we could be confident that we had got beyond the full extent of the previous repairs. Next we had to cut above the braze line and see what we have behind in the way of metal.
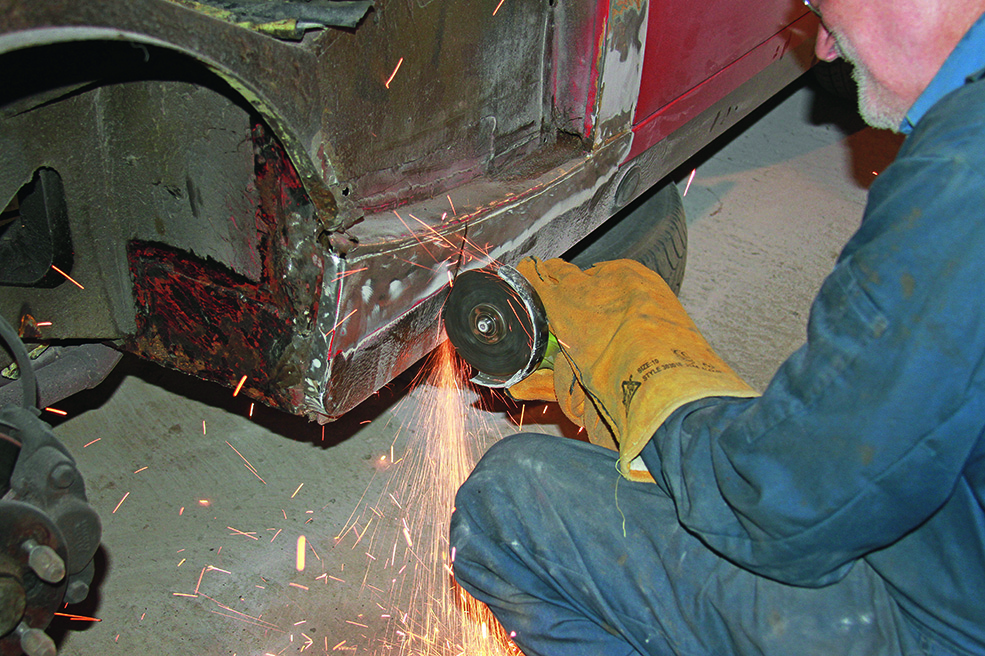
First though, we returned to the front to cut off the forward section of outer sill to see how much of the old panel they had left behind there. We found there were about two inches of the old sill left, but that it was not finished properly at the ends. This also revealed that the closing panel on the footwell had not been seam welded fully. At least the inner sill felt good from inside the car further back by the seat and the crossmember.
Then, having gone this far, we decided to just cut the rest of the sill off and have a proper look along its length. This then revealed that the inner panel had gone at the bottom in places, which to be honest was no great surprise. This meant that we needed an inner sill as well as the outer panel. Still, they were great value at £15.95 and £39.95 respectively which, when you see how much metal is included and how complex the outer sill pressing is in particular, is really quite astonishing.
By the end of the day, Our MG Midget had made the full transition for car to project. There was less metal left than we had hoped initially, but this is pretty much par for the course on a 50 year old classic. However, I had the distinct impression that this was not going to be a quick project with just a few localised repairs.
Structural issues
Digging away at a classic car to discover how far back the rust and previous repairs go is always a voyage into the unknown – you never know what you are going to discover, and you really shouldn’t start investigating unless you are prepared to follow things to their ultimate conclusion.
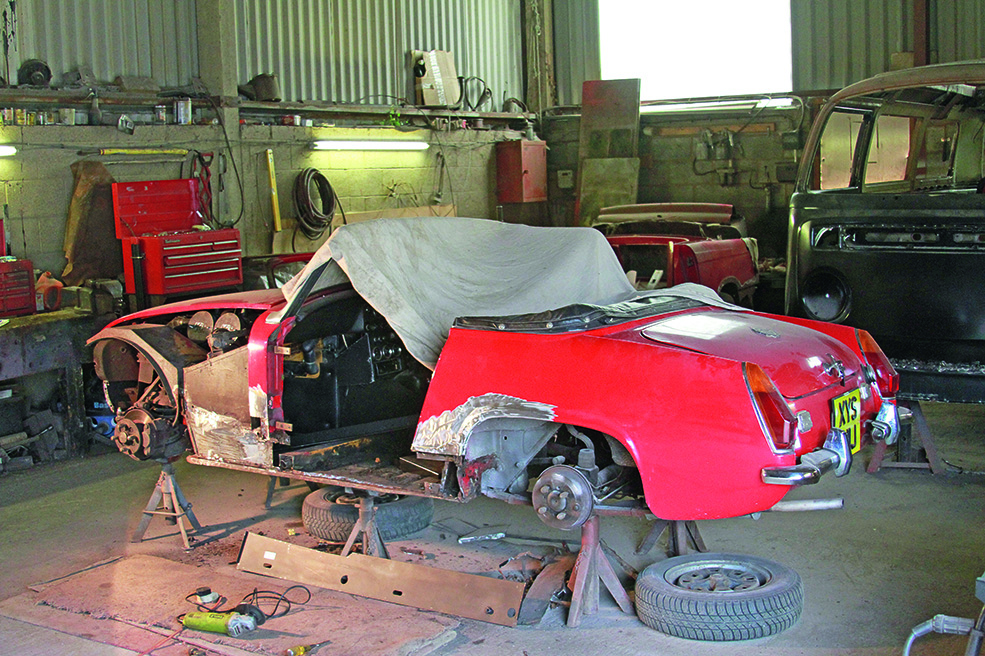
That was certainly the case with our project MG Midget. Having taken the decision to remove the nearside sill and see what lay beneath, there was a lot less Midget left on the axle stands when we next visited the workshop.
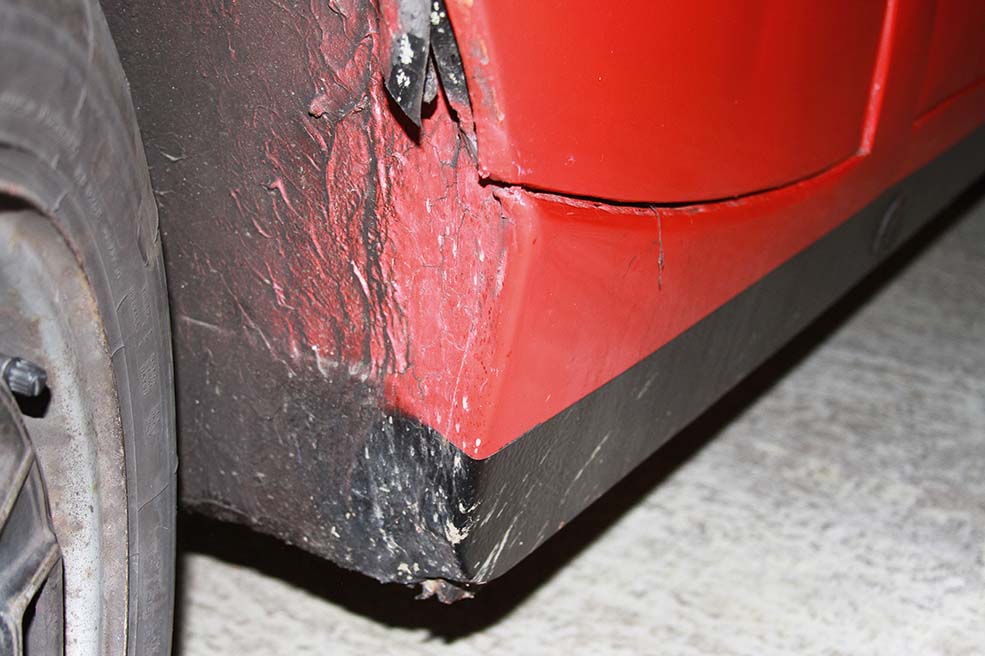
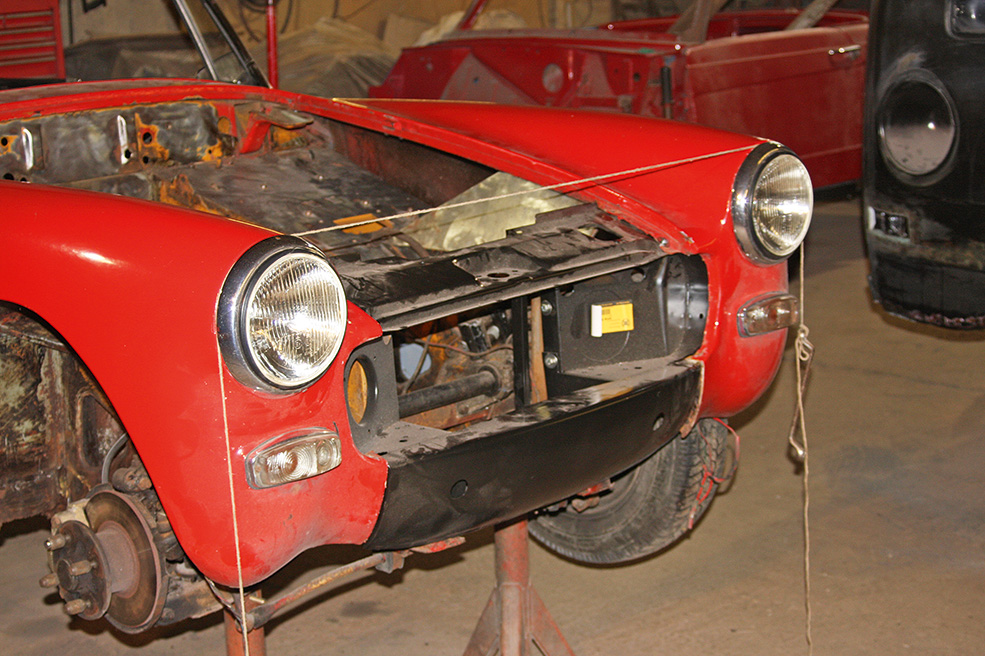
We previously saw that the front wing had been tack-welded to the front panel rather than bolted. This had raised our suspicions of further expense to come, not least because there was clear evidence of previous accident damage to the nearside front corner. The slam panel had been beaten only roughly back into shape, and the bonnet safety catch did not locate naturally on its hook, but needed a little manual help.
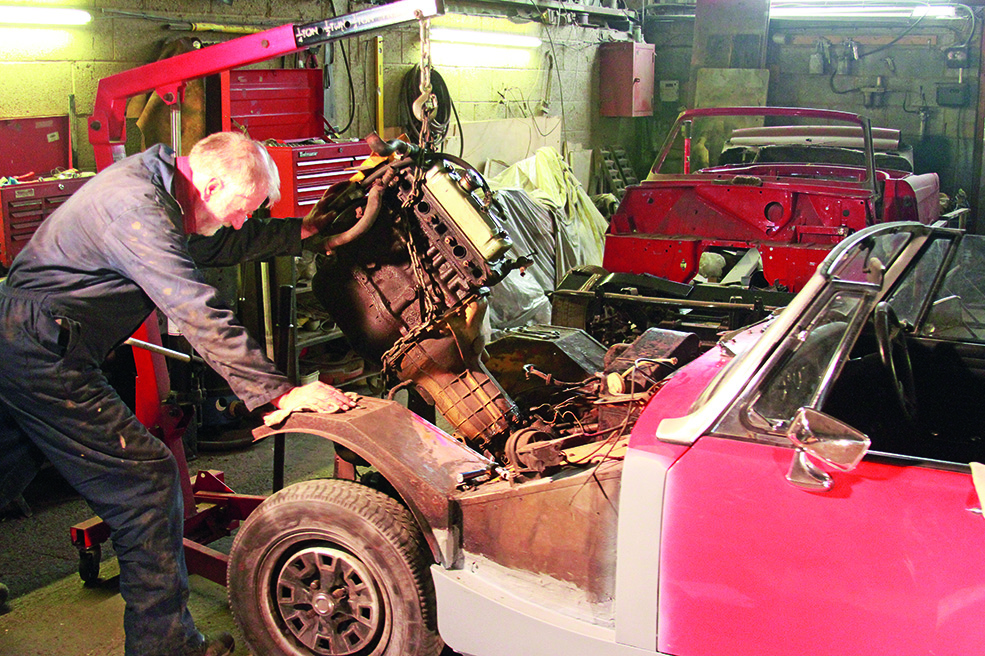
Things got bad enough that we decided to remove the engine and gearbox to get the job done properly
The slam panel could have been repaired and knocked back into shape, but we wanted to make sure that the structure to which it attached had not rotted or distorted. After all, the nearside front bumper iron did not poke centrally through its hole in the front panel. We set in chain a series of events that quickly knocked our original plan out of the window.
We had hoped to repair just the nearside sill initially, then look at the offside later when funds allowed. However, removing the front panel meant detaching it from the offside front wing. There would then be no point in correcting the position of the front panel if we were later planning to disturb the geometry of the offside structure, so that wing had to come off in order for us to investigate the sill on the driver’s side.
The story was to be very similar on the offside. The sill on this side had been repaired at least twice, and there was probably some original sill left underneath too. A repair flange had been welded against the inner sill/footwell side panel, presumably because only cover sills were available at that point.
Later, a second sill had been cut and welded from the outside, presumably to avoid taking the wing off – we know it must have been a full sill panel because it had been cut to go around the A-post, then where it ran under the door it went all the way to the inner sill. The A-post itself had only minor corrosion at the bottom, while the rear wing had been poorly attached to the top of the sill – again much as things had been on the nearside.
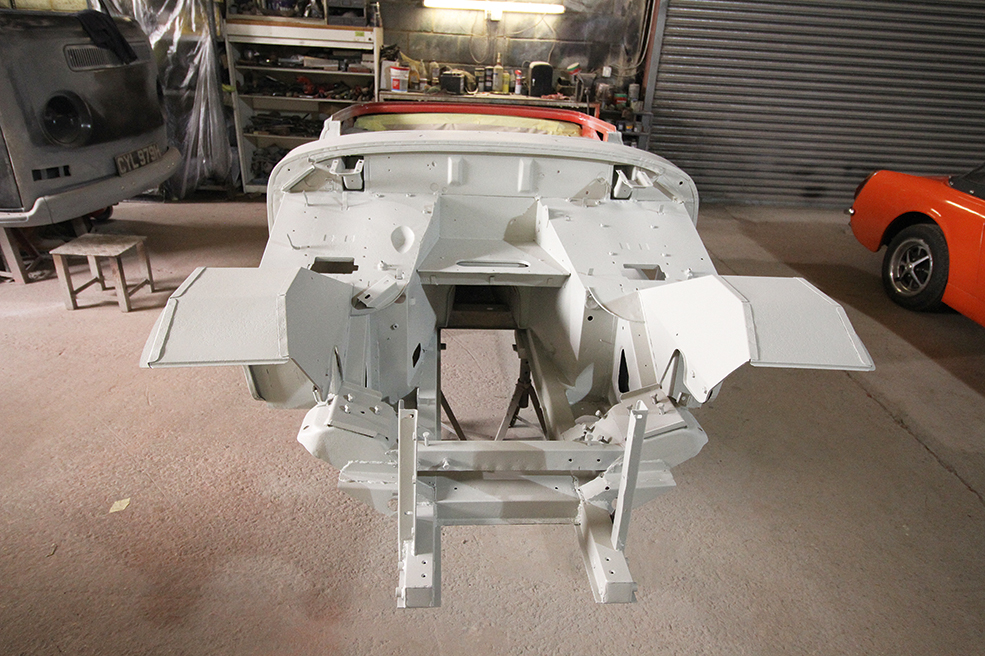
By the time we’d removed the front panel, radiator and dead fan, it was clear that getting into the engine bay was a good idea. We plan to strip this to bare metal and complete the car’s transition from orange to red properly.
So at this point we needed two new sills (both inner and outer), plus a new front panel. But removing the old front panel had meant draining the coolant and removing the radiator.
The radiator turned out to be held in by just one bolt, and being able to move, the fan had flattened a nice circle out of the fins. Replacing that would be pointless unless we also replaced all the coolant hoses and flushed out the heater matrix, and by the time the front of the car was off, there seemed little point in not removing the engine and gearbox too so that we could complete the colour conversion from orange to red and paint the engine bay. See how these things have a habit of spiralling out of control?
Overall, we were rewarded for taking a deep breath and doing the job properly; it revealed a number of issues which, while not insurmountable if they had surfaced at a later date, would certainly have spoiled the pleasure of driving the Midget – and would have involved doing some of the work over again.
Sill panel installation
We had already seen a nearside sill repair balloon into new inner and outer sills on both sides of the car, plus all the repair work around the wheelarches and A-posts. We also found some past damage to the front panel, and decided the best way forward was to replace this and effect any repairs that this revealed as necessary.
This quickly grew into removing the engine and gearbox, a blessing in disguise as that revealed a number of mechanical issues to be addressed, not least the fact that the clutch plate had worn down to its rivets. It is never nice to discover more work that needs doing, but it is certainly preferable to discover it on a dismantled car in the workshop rather than at the side of the M4 on a dark and wet Friday evening rush hour.
We put strength back into the nearside, welding in new inner and outer sills, plus the closing panels at either end. We knew that we would have to repeat this on the offside, but you always want to do one side of the car at a time, particularly on a convertible which has very little holding the front and back together once the sills have been removed.
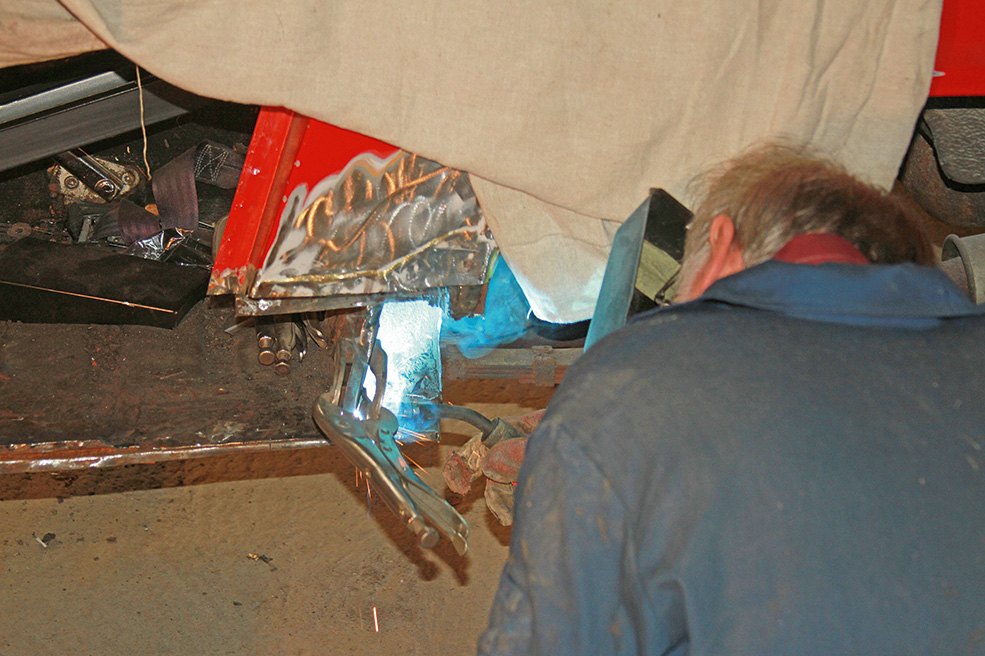
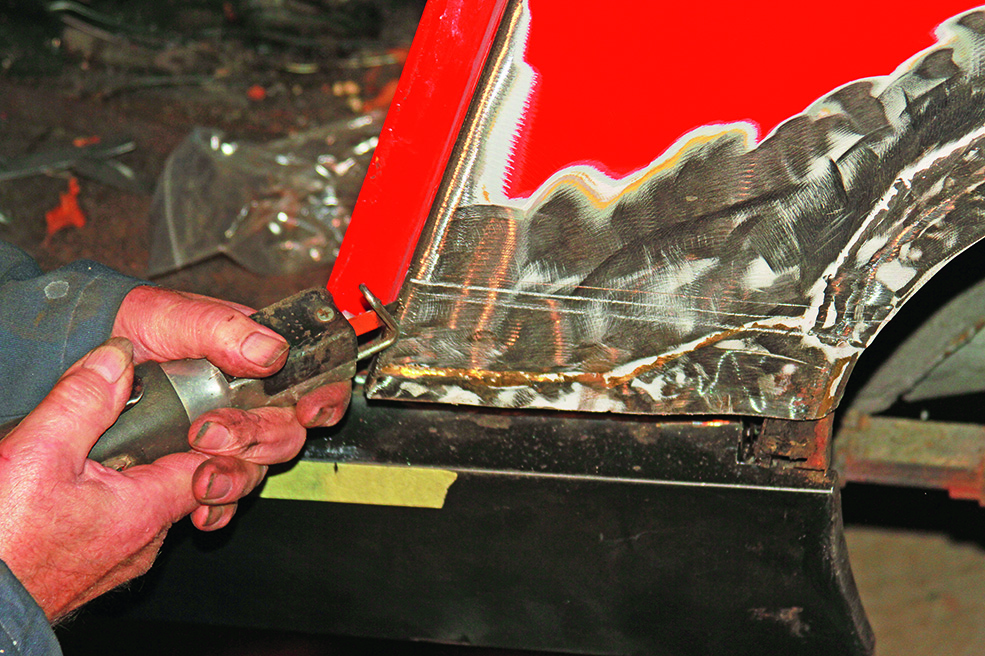
Having finally cut out all the rust around the nearside sill and reached solid metal, we could at last break out the MIG welder and start building the panel edges back up.
We aren’t taking any shortcuts with our MG Midget project. Unfortunately this does mean that costs are beginning to spiral, not yet quite out of control but certainly beyond any level we could hope to recuperate by selling the finished article.
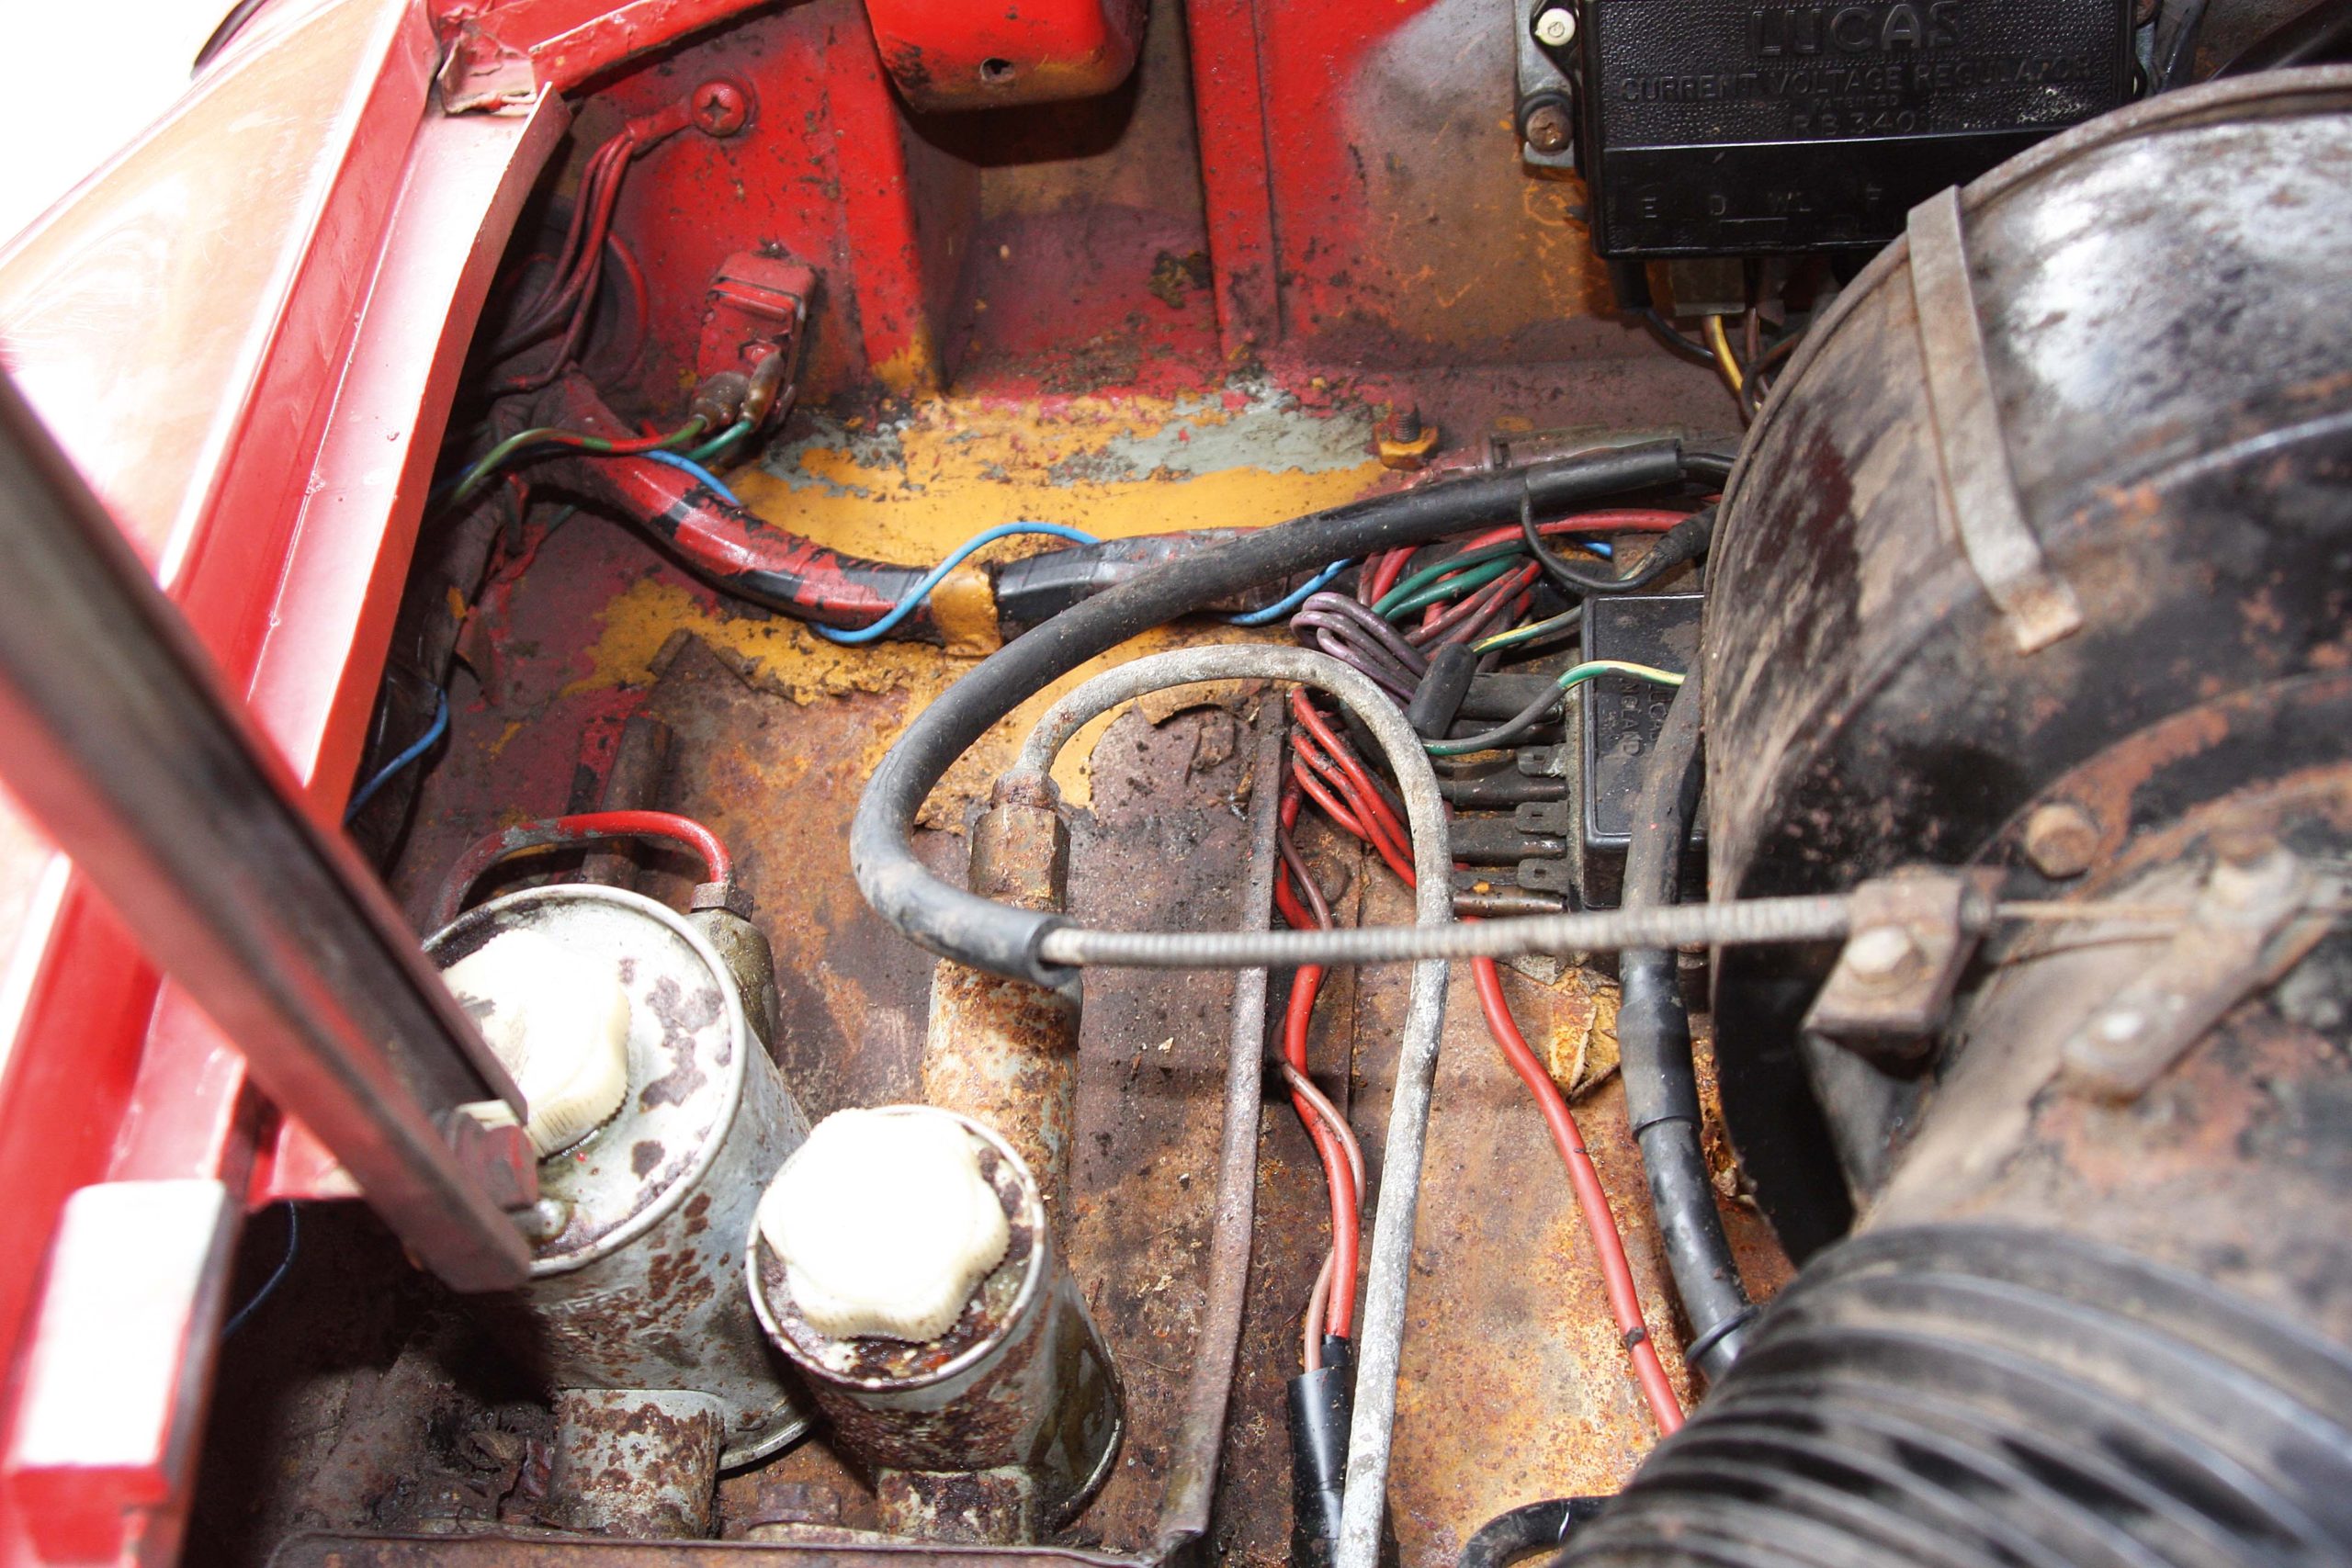
The problem here was that the Midget had previously been repainted from orange to a bright red. This had not been a total bare metal respray, just all the outer panels and, for some reason, inside the boot as well. The original colour remained behind the dash and under the carpet, which we could live with happily enough. However, the engine bay was the real problem as this really let down the rest of the car.
Having removed the engine to tackle some mechanical issues and also to tidy up some previous repairs in the engine bay, it made sense to prep the bay for red paint too. Unfortunately, there were cables, wiring, grommets, pipes and more getting in the way. Masking them off and painting around them would have ended up looking terrible, and it was not clear how we would be able to clean back to sound metal around so many obstructions anyway.
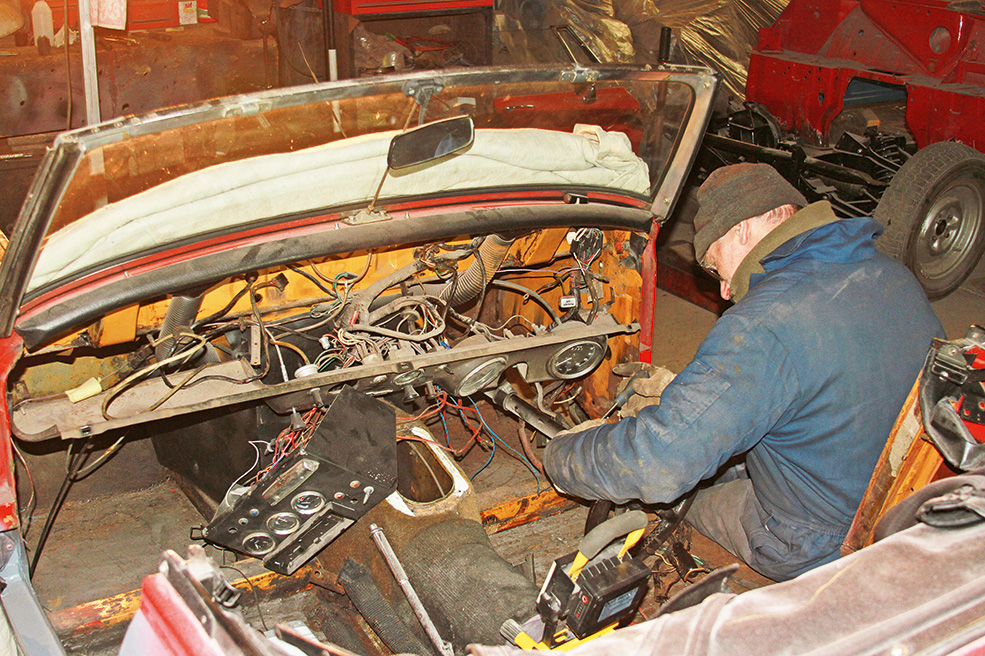
We were committed to stripping the engine bay properly. This involved lowering the dash to remove all the cables and controls, plus the screen and wipers.
So we started removing them, with metal straps and brackets taken home for cleaning up and painting black by hand. Cables and wiring were pushed back through the bulkhead into the cabin, and the steering column was removed.
We then started on the engine bay panels with wire brushes and the angle grinder. This is never pleasant work, but it was good to see that no new problems emerged and everything cleaned back to bright metal. The tops of the inner wings were a little pitted, but nothing a little rust converter couldn’t sort. Getting into all the corners with the angle grinder was tricky though, so we used a small DIY grit blaster to clean back to bare metal in short bursts, but not reliably so. It also created a huge amount of mess. So we put the kettle on and had a rethink.

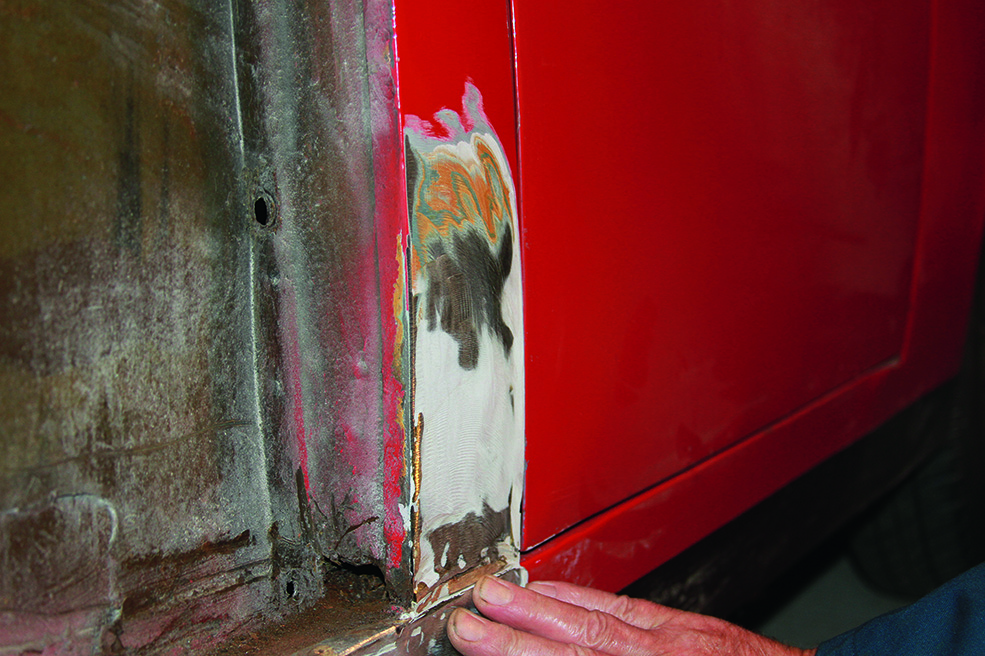
The A-post skin needed a little tweaking with hammer and dolly to get the panel gap right, then fInally a thin skim of filler was used over the welded repairs.
Contemplating the whole engine bay and gearbox tunnel, the only way we could see of doing the job properly was to have it professionally grit blasted. However, that would require the front suspension and steering to be removed so that we could clean properly around the dampers and rack, plus the brake and fuel lines would have to come off so that no grime could lurk behind them. But we didn’t want to remove the front suspension while the offside sill had been cut away as this could later cause us problems with alignment.
With the filler sanded back and once we were happy that everything was lined up perfectly, we applied a coat of paint to protect the finish until it was time for the respray.
The conclusion was that we could put away the wire brushes for now and we would complete the welding on the offside to the same standard as he had already done on the nearside, all the time keeping the car on its four wheels. We could then strip the front end entirely, put a dolly under it and wheel it outside. Hopefully, a mobile blaster could then take it back to bare metal ready for the next step.
A-pillar, door and body issues
It should come as no surprise to learn that a lot of the repairs required on the offside of our Midget mirrored those that had already been carried out on the nearside. Both the inner and outer sill panels had to be removed and replaced, but there were also a number of other tasks that came to light.
Rather than repeat the steps shown previously, we will rattle through the basic repairs and focus a little more on those additional jobs.
The driver’s side A-post has had a new skin at some point, covering all of the vertical section. This has been positioned poorly and closed up the door gap on the driver’s side so that it is 3/16in shorter than on the passenger side. The car also appears to have had a new lower skin on the driver’s door, or at least a repair to this area, and this has not been lined up properly.
The net effect of this is that the shut line is fine at the top, gets too close halfway down, then too large at the bottom. This means that the door catches on the latch on the B-post.
We took out the shim from behind the latch which stopped the scraping, but the gap there is still too small. Finally, the bottom of the A-post is sitting slightly too proud, meaning that it doesn’t line up perfectly with the front wing and the sill panel, plus the bottom corner of the door sticks out even further.
A panel beater can adjust out a lot of the discrepancies. The front bottom corner of the door can be knocked in and the edge stretched forwards, with the edges of the door and the A-post finessed so that the gap is consistent. At the back the B-post can also be knocked back to provide more clearance, but that will then require a lot of dressing and shaping to restore the rear wing’s curve and maintain a consistent 1/8in gap. Ultimately the right way forward is to correct the A-post.
Once happy with the panel fit, we took the panels back off and started cutting into the A-post skin, removing it in stages as we tried to decide how much had to be replaced.
First though, we completed some repairs to the front spring hanger of the offside rear spring and the floor panel in this area, having knocked swages into the floor panel using a hammer and the vice. We then fitted the inner sill, and positioned the outer sill with self-tapping screws.
When checking for alignment, we also refitted the front wings, and that meant that the new front panel had to go back on too. This was all very laborious, but you have to have everything in place when carrying out structural repairs or you will most probably find that the all-important outer panels will not line up properly afterwards and all your hard work will have been wasted.
The new front panel was a heritage part so not cheap, but it dropped into place perfectly. So did the nearside wing, but the offside wing was a little too far away from the scuttle panel, giving a larger gap than required and moving the hole for the bolt there out of position.
We made sure the wings were square. As well as measuring the gap between them at various points, weighted string across them was lined up by eye with the bulkhead.
This can probably be finessed when everything is tightened up as there is some slight wiggle room from having the bolt holes bigger than the actual bolts, or as a last result the holes can be ovalised to increase the adjustment available. The main thing we have to ensure is that the visible curved sections at the bottom of the wings and the front panel continue to line up.
On the A-post, we cut off the flange at the bottom and knocked the skin in, but it was still a little proud. Options then included trying to knock it in a bit more, but that is likely to distort the vertical surface too much. A new skin panel is only £20 and goes all the way up to the curve on the scuttle, and fitting more of that will allow us to shape the skin properly. It would also allow us to reposition the bottom so that everything was in line, so that was what we got.
The question then arose of how many layers of metal we were dealing with – had a repair skin simply been welded over the remains of the old one, and that is why it sits too far out?
We cut off the bottom 4in and it did appear to be mostly a single skin, but with a few remains of the original panels here and there. Cutting up another 4in started to tell more of the story – the bottom of the A-post hinge pillar had been replaced in the past, but not very well.
The poor positioning of this panel is probably the root of most of our problems, but the hinge plate retaining box has also been welded too far out, and so will have been keeping the skin panel proud.
In the end we took this off and made up his own repair sections, making the adjustment slots for the hinge screws oval and spraying what will be a hidden surface with weld-through primer before welding the bits together.
Back to bare metal with a mobile blaster
We have completed quite a lengthy list of repairs to our Midget in previous instalments, including new inner and outer sills both sides, A-post skins, repairs to the heel board, toe board/bulkhead, spring hangers and floorpan. Unfortunately, we were still far from finished with the cutting grinding and welding.
This should be a salutary warning to anybody contemplating a similar project, because it is all too easy to underestimate the amount of work required. Certainly, we hadn’t expected to be quite this far into a total restoration quite so quickly. After all, the Midget was complete when we bought it, looked presentable enough from a distance if you squinted, and actually drove really well.
But ultimately you can’t fight the march of time, and there is no getting away from the fact that our MkIII Midget was built with an expected life of around ten years, yet is now more than 50 years old.
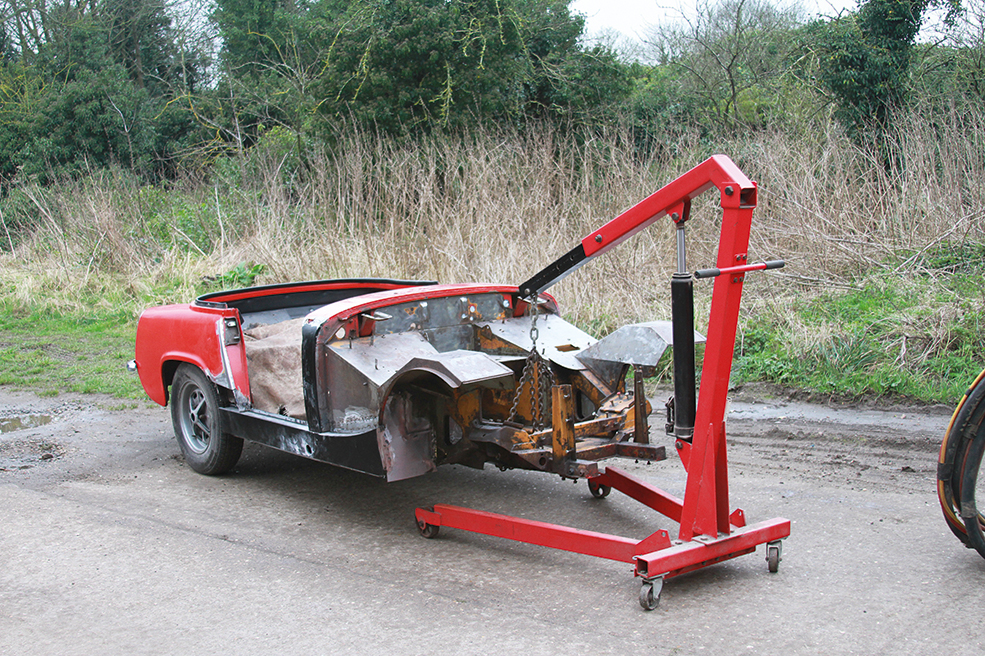
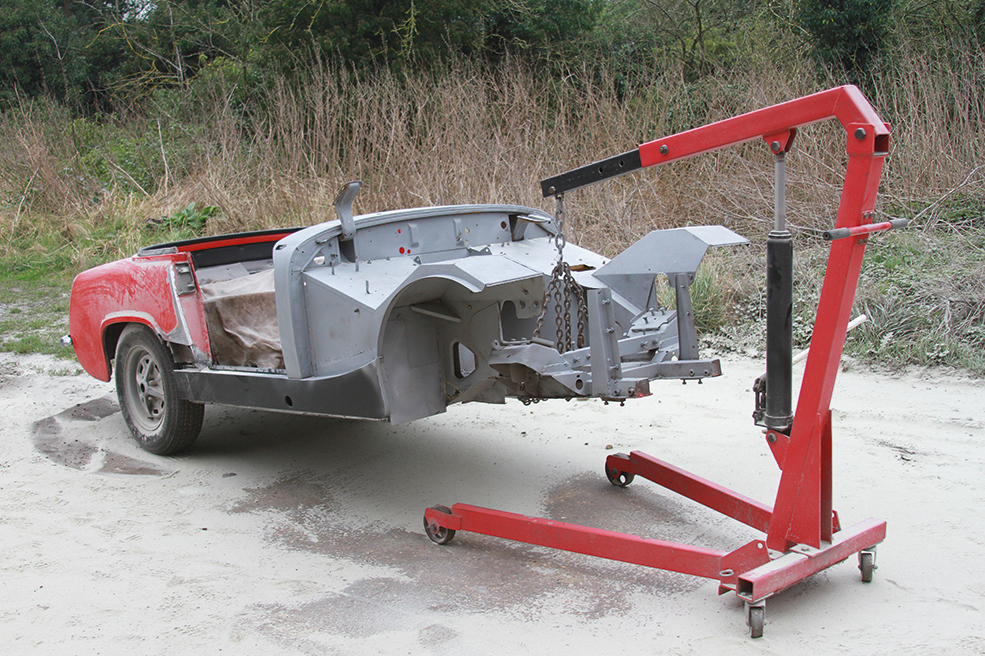
With suspension, brakes, steering and everything else removed from the front end, we fitted a pair of slave wheels to the back and hung the Midget off an engine crane so it could be wheeled outside.
And with any project of this vintage, it is not just the gradual but inevitable decay that you have to reverse, there will also be previous repairs to be put right. All too often these repairs will be condemned as bodges, and we suppose that technically that is correct. However, it does rather miss a couple of very important points.
One is that most cars follow a similar pathway through life – they are a major investment and so treated carefully by the initial owner for the first three years or so, then they start to move down the automotive food chain. As their value drops over the years, maintenance gets skipped to save a few quid here and there, while major repairs become uneconomic given the resale value of the car and so cheaper options (such as body filler rather than welded metal) are considered instead.
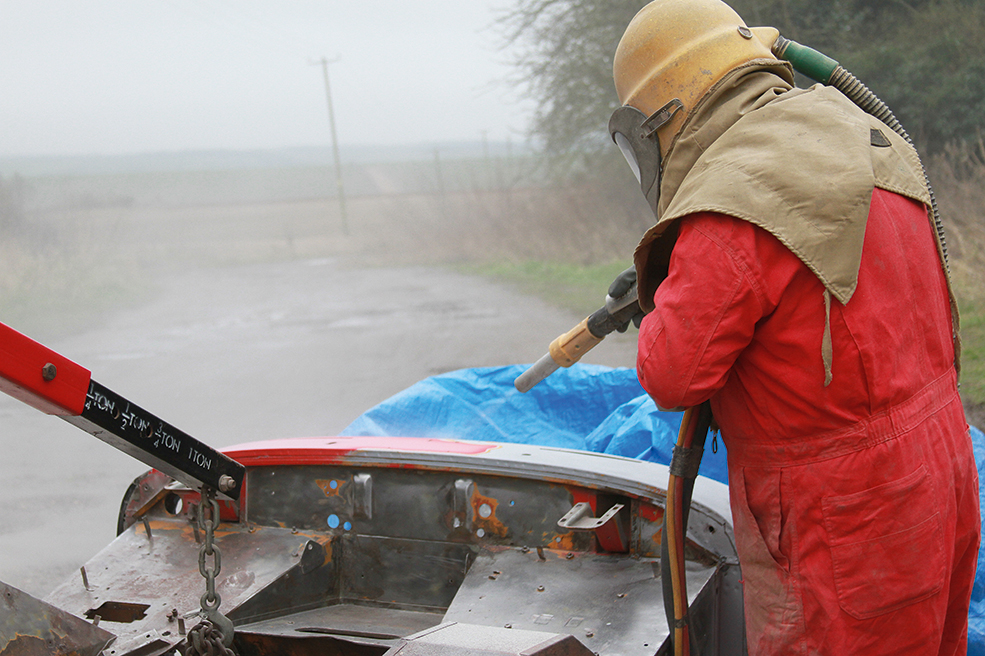
The mobile blaster brought with him a massive air compressor and sacks full of blast media, not to mention an air-fed suit. It quickly makes you realise the limitations of DIY blast equipment. Different nozzles and different pressures could be applied to suit the location. This made it possible to remove all coatings even from such narrow confines as the flange across the scuttle panel.
The other point is connected with this first one because years later, when the car is viewed as a classic hobby and we are both willing and able to invest more money into its restoration than it will ever be worth, we huff and puff about the state of these earlier bodges.
Yet it is those bodges that may well have saved a car from taking its final drive to the scrapyard, keeping it hanging together – if only by a thread – until you could come along to do the job properly. So when you uncover a bodge, don’t be too hasty to judge; instead, remember some of the things you did when you first started driving and use this as an opportunity to do penance for the worst of them!
It took around 30 minutes to strip the front end back to this state. It had taken much longer than that to scrape off the muck by hand.
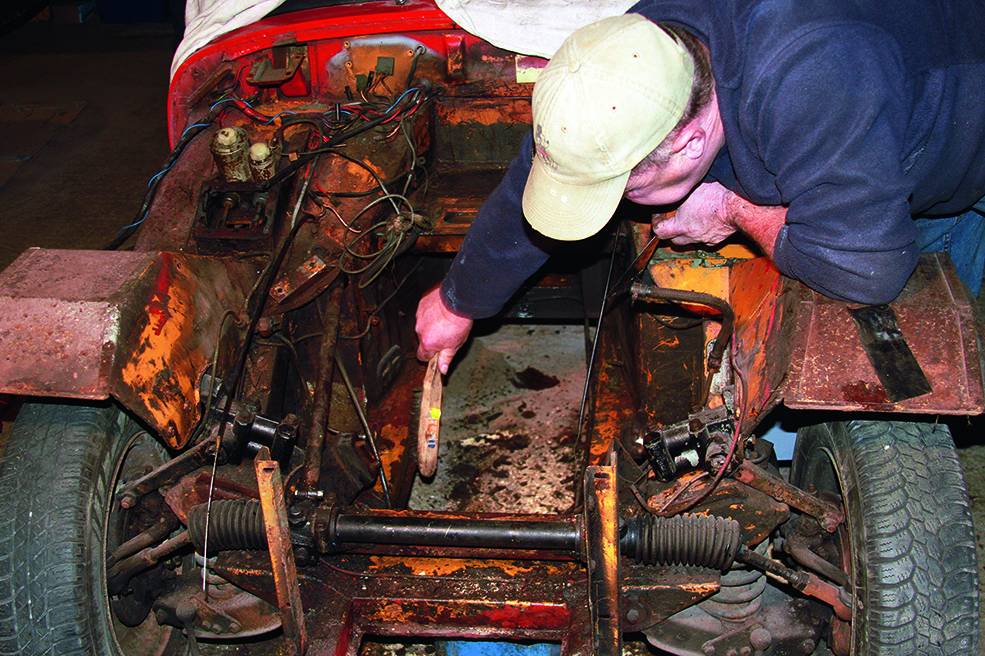
As mentioned previously, we had decided that the next step along this path would be to have the engine bay grit-blasted. To prepare for this, we had to remove the steering and front suspension. The rack looked fine and just needed a clean. The anti-roll bar could also do with a clean and paint, but we will need to check the drop links more carefully when we get to that stage, as well as the dampers.
The springs look pretty new and the kingpins feel OK, but we will only know for sure when we get around to cleaning off all the accumulated muck and grease so we can see what we are dealing with.
A benefit of blasting is that you know exactly how far the rust extends, and you have clean metal to which you can weld. This is in the offside front wheelarch by the toe board.
First though, we needed to clean off any underseal or soft coatings before the blaster arrived. We used a scraper and a heat gun for this, then wiped off any residues with some old petrol that had been sitting in another project for 20 years or more and was truly foul-smelling stuff.
Check out the images in this section to follow the process of stripping the Midget’s front end back to bare metal!
It was a great mental boost to have the front end of the car all one colour at last, rather than the previous mix of orange, red, rust, grease and general grime!
Final prep and paint
For such a little car, this Midget has turned out to offer something of a welding marathon. Having initially wanted to tidy up the nearside sill, we ended up moving round the car and finding more and more to fix in terms of rust and poor previous repairs. And as always happens on a project such as this, once you have got one area looking spot on, then the bit next to it which you’d previously classed as ‘acceptable’ suddenly becomes less so.
And so the project grew. Last time we had it stripped virtually to a bare shell, but reached something of a milestone when we had the entire front end grit-blasted and completed all the structural repairs there. However, if we thought that meant we could put the welding torch away, then we were sorely mistaken; sanding back the paint ready for primer revealed a few more issues at the back end.
A coat of primer then protected the repaired shell while we turned our attention to the removable panels.
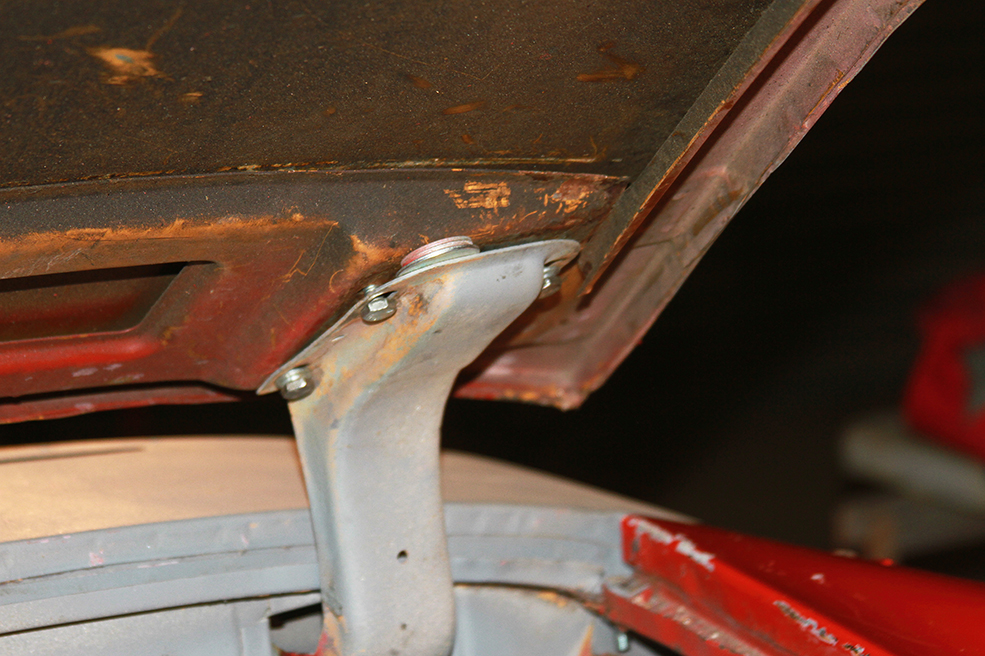
The next problem was the bonnet, which was not rusty, but did sit proud of the bulkhead and wing on the nearside even though it fitted well everywhere else. Figuring out exactly what was distorted proved something of a saga. First, we thought that the frame on that corner was pulling away from the skin, but dressing it back down made no improvement.
There was no obvious sign of anything catching, and if you detached the bonnet from the hinges then it actually dropped too low rather than sitting proud. Not that the hinges were lacking on travel and holding the panel up because climbing into the empty engine bay showed that they would drop away from the bonnet entirely if not bolted to it.
We had prepped and painted the interior, because the plan is that Simon will tackle this at home to save a few pennies.
To test things out, we borrowed another bonnet from Hall’s Garage and dropped that into position on our car. When the hinges were bolted up, it exhibited exactly the same problem – all lined up on the offside, but sitting proud on the nearside rear corner. That focused our attention on the hinges.
We put our bonnet back on, and sat in the engine bay with a torch to see how the gaps changed as we tightened up the bolts securing it to the hinges while Alan kept an eye on the outside.
With the bonnet propped up level, this showed that while the offside hinge would move up and sit flat against the bonnet, the one on the nearside met the bonnet at the back before the front edge was in place. In fact, we could get three large washers under the front of the hinge and then with the bolts tightened up, the bonnet would sit correctly.
Sitting in the engine bay with the bonnet closed showed that there was a gap between it and the hinge which could take three washers.
What we still didn’t know was whether the panel itself was distorted, or the hinge. Or maybe both – that is the joy of working on a car that is 50 years old and has inevitably had the odd prang in its past.
Next, we checked across the two hinges using a spirit level. The plates where they meet the bonnet are not flat, but are tilted down at the outer sides to match the curve of the bonnet. Clearly this was not the same on both hinges, and the nearside one appeared to by higher on its outer edge then the inside. Could it have been replaced with an OS hinge by mistake in the past, as they are handed?
The tinted primer refers to the final coat, to which Jason added a dash of the top coat. That will ensure easier and better coverage for the red.
With nothing to lose, we decided to try and fix what we had before buying replacements. The hinge itself is a curved U-shaped channel section, so first Alan cut a slot in the two side sections. This left just the flat front section holding it together, and we could bend this to close up the slots, then re-weld the side section to restore the strength but with the end plate at a more suitable angle from front to back. Before making those welds, a brutal bit of twisting took care of the sideways difference and gave us a properly matched pair of hinges.
After this, the fit was better, but still not 100%. It also failed to match the curve of the wing properly along the side of the engine bay, and sitting inside with the bonnet closed I could see where the bonnet frame appeared distorted. Pulling this down by hand seemed to improve things, so back off came the bonnet and Alan got physical.
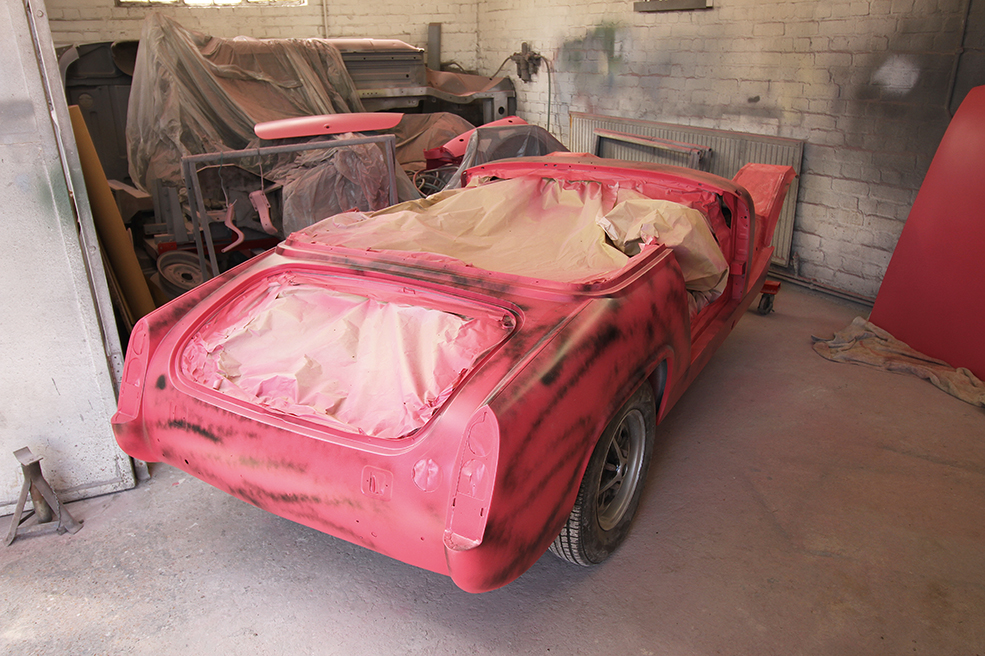
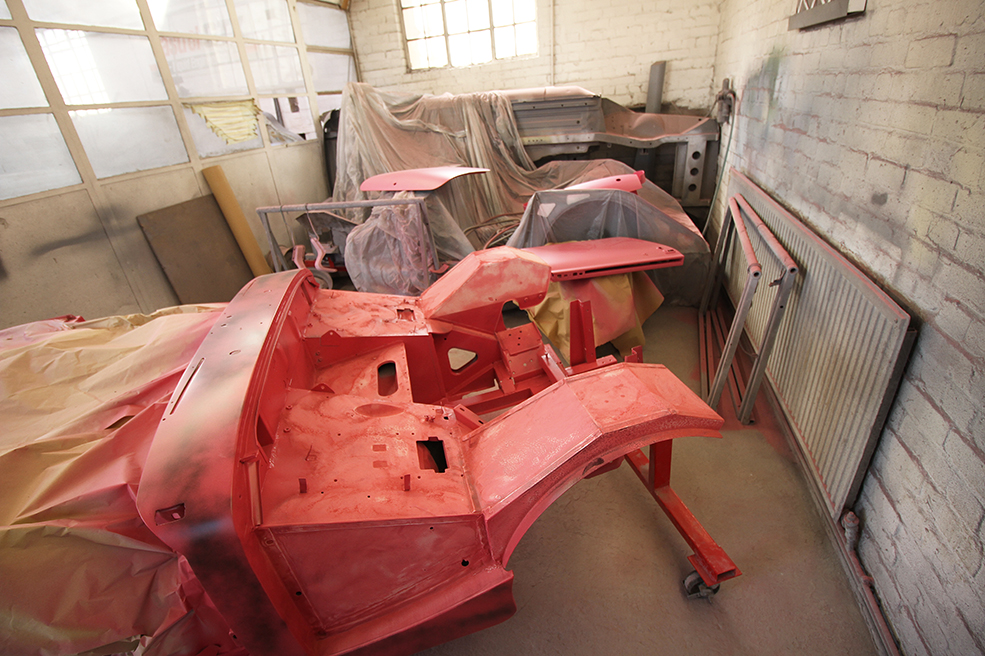
It was something of a shock to see it painted pink, though! The black guide coat will be removed during the final flatting back.
First he dressed the frame into better shape with a hammer and dolly. Again this improved things further, but we were still not entirely happy. So he put some carpet on the floor to protect the panel, laid the bonnet on this and pushed down hard along the edge. It looked brutal, but when he measured the distance from each side to the floor, the two distances were identical.
Before putting the bonnet back on, Alan elongated the holes in the hinge so that we had a little more adjustment to get an even gap between the bonnet and the bulkhead. It was probably a combination of all these things, but when we put the bonnet back on it was nearly there. The line down the nearside was still not perfect, but Alan then turned his attention to the wing and knocked this up a little – and with that, everything was spot on.
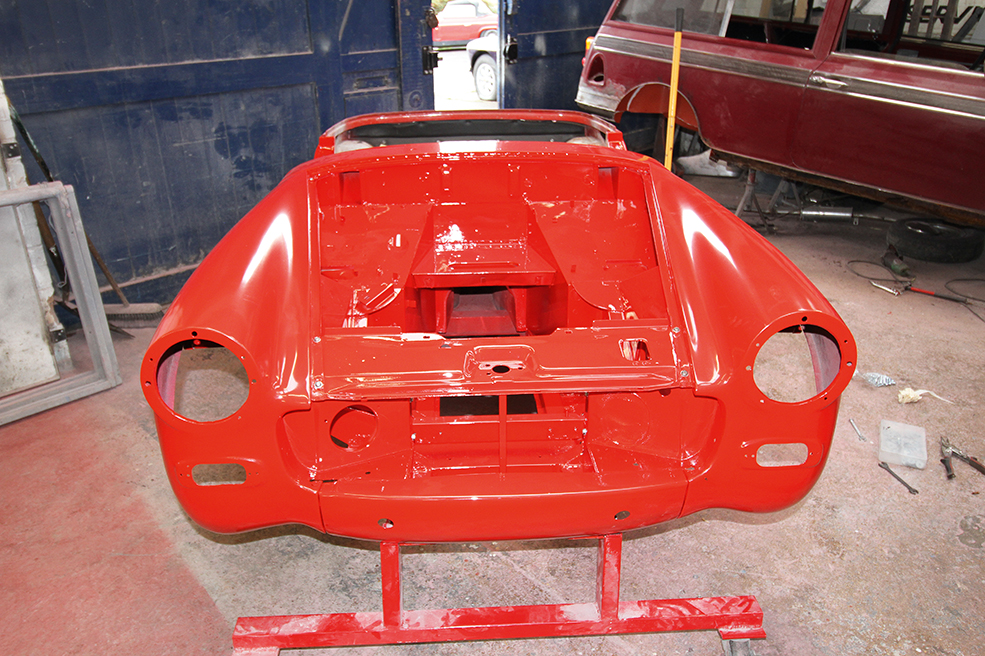
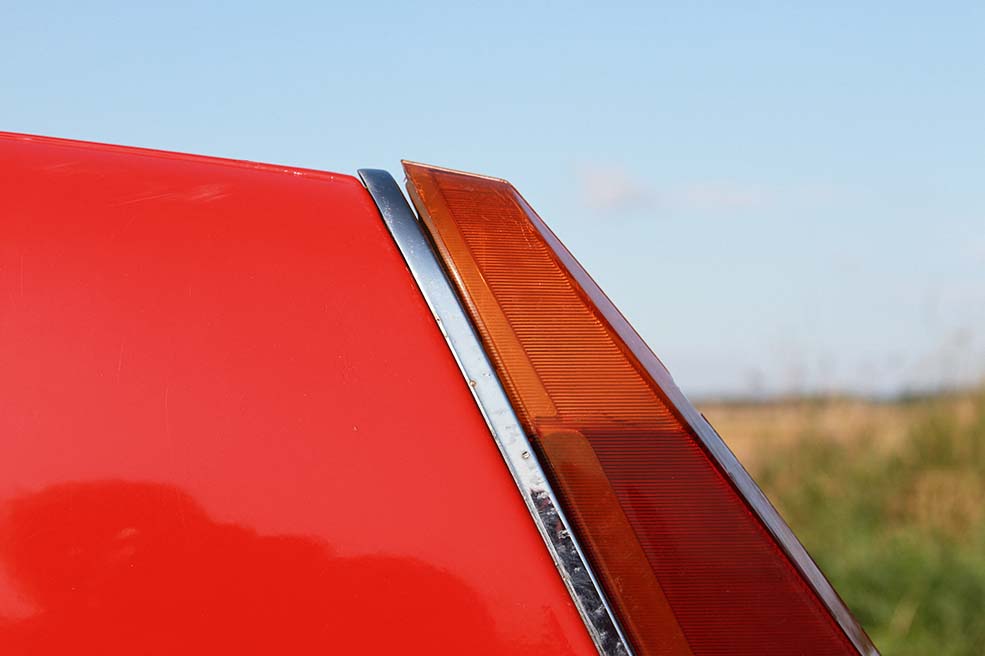
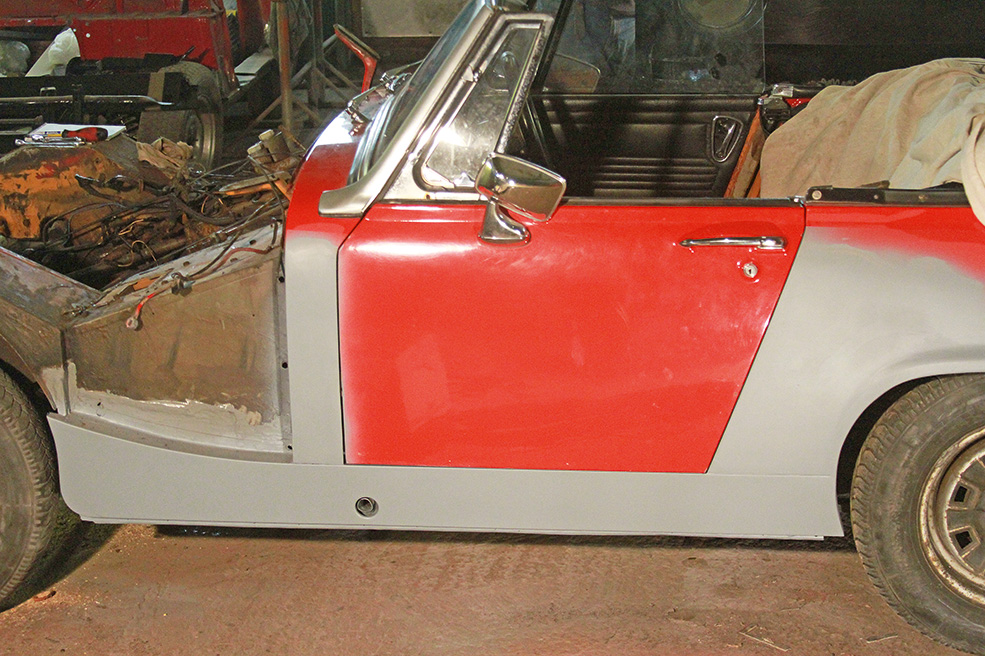
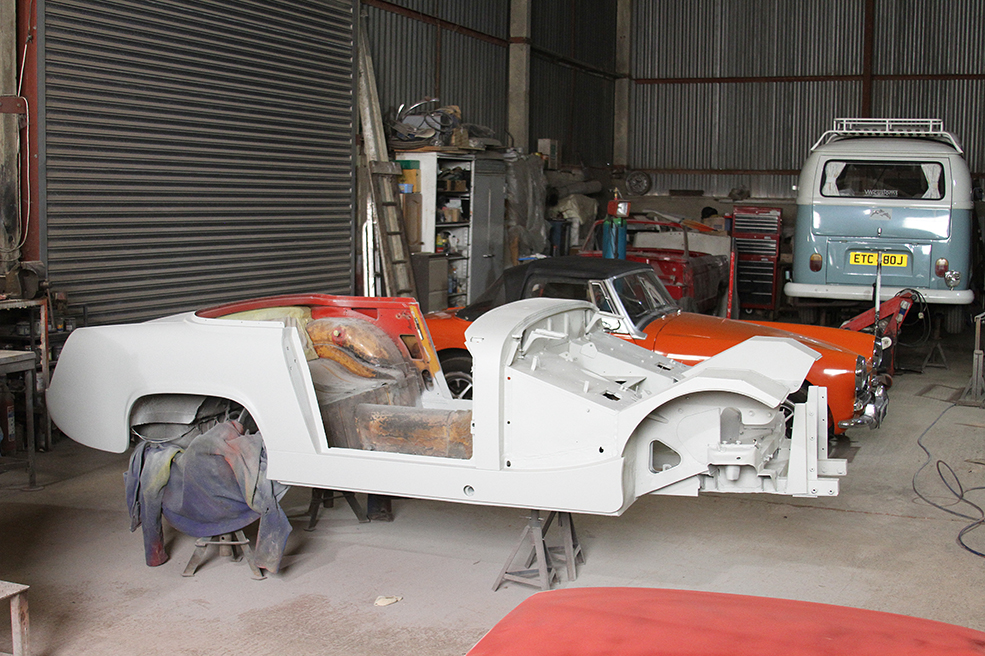
And here it is at last, finally all one colour. We chose Flame Red, which would have been an option in 1970 when this Midget was new.
After a few repairs to the front wing and a new skin on the driver’s door, we then transported the shell to Hall’s Garage, where they had agreed to do the final prep and painting in the cleaner conditions of their spray booth. Having seen on a number of other restorations the quality of the finish Jason can achieve under these conditions, I thought the car deserved nothing less after all the work Alan had put into the bodywork in his barn.