
In the first of a three part series, we follow Herbie Hospital’s restoration of a 1966 Beetle that was their main raffle prize at one of last year’s major VW festivals…
Restoration deadlines inevitably become extended due to unforeseen circumstances, such as the delayed delivery of parts, or finding more rot in the bodywork than expected. When a car has to be finished in time for a show because it’s the top prize in a charity raffle there can be no excuses for late delivery. Luckily, in the case of the Beetle restoration we’re following, VW air-cooled specialist Herbie Hospital of Leeds has managed several raffle prize deadlines in the past, so they knew what they were letting themselves into when Harewood VW Festival organiser Paul Scott delivered his rusty 1967 Beetle to them. He had donated it as the top raffle prize that has previously raised thousands of pounds each year for a number of charities.
Paul had bought his Beetle back in 2015 and from the outside the Beetle looked to be in good condition. Although the impressive Java green paintwork, chrome bumpers, alloy wheels and lowered suspension had survived well, the car was looking tired and would eventually need some TLC. Having owned a Bay Window camper in the past, this was Paul’s first taste of a Bug and he drove it for a year before an MoT test revealed a long list of faults, mainly corrosion related on the underside and in the sills. After calling into Herbie Hospital, they recommended a thorough strip and rebuild, which got Paul thinking about his annual VW show and the yearly task of finding a raffle prize.
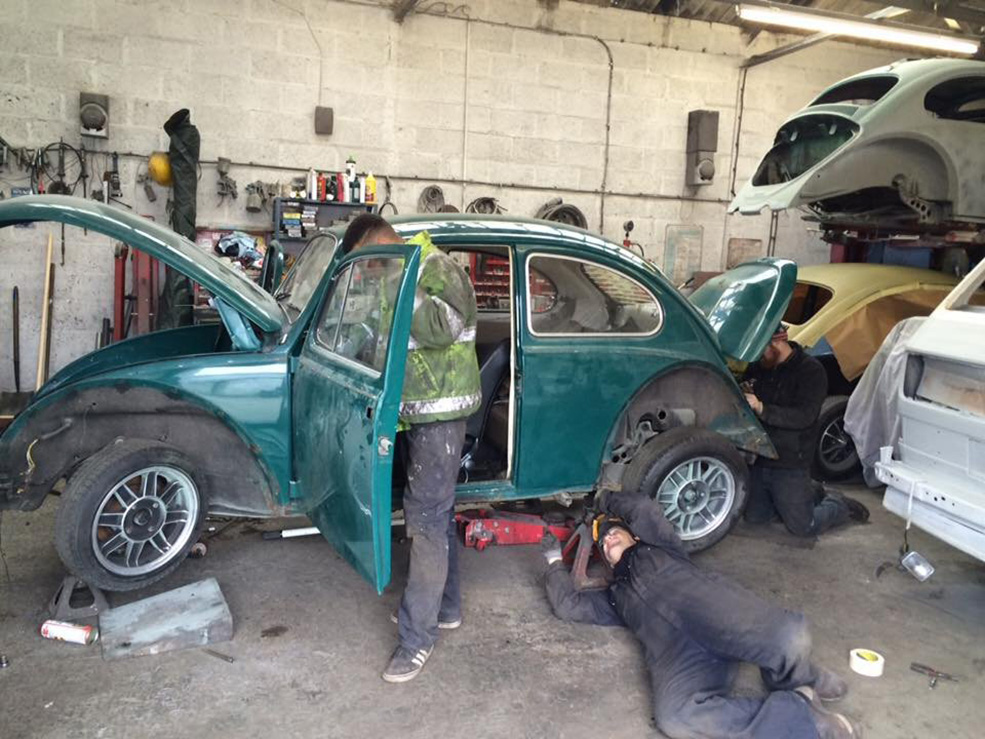
“Finding the right donor vehicle is always difficult because we want to ensure that the vehicle is safe and is something that our restoration team can work with as a good base for the finished Beetle to be built on,” he comments. So the Beetle was returned to Herbie Hospital and space made in their workshops for the restoration to start. First jobs involved removing all of the wings, the interior and anything that would prevent the bodyshell from being removed.
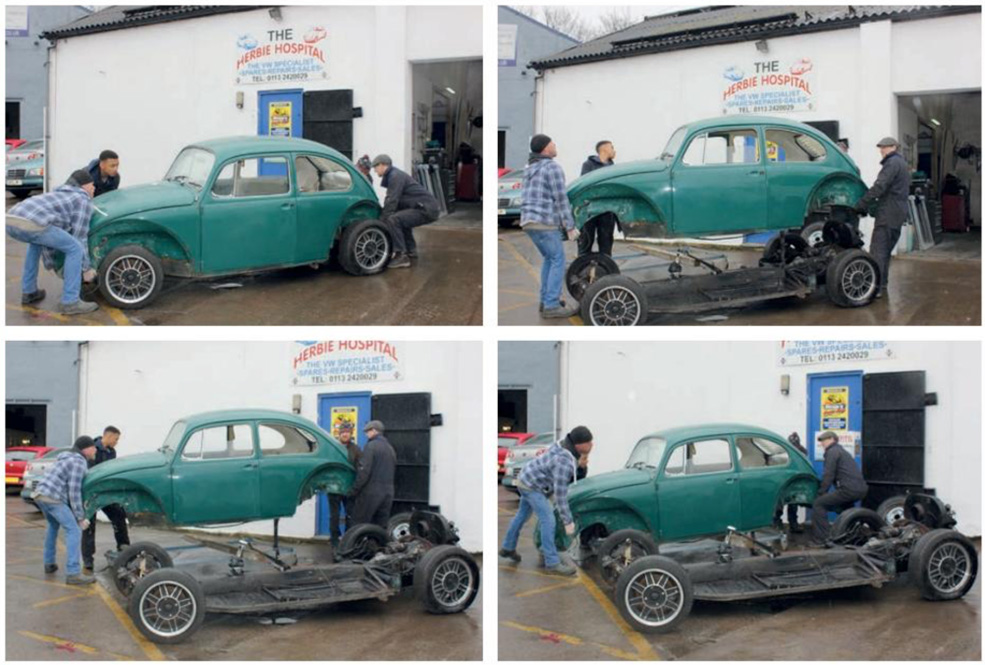
After asking a few customers to help, a team of Herbie staff and volunteers unbolted and lifted the bodyshell off the floorpan, leaving them with a rolling chassis and a clearer view of the extent of the corrosion. The bodyshell requires most of the interior to be removed and the petrol tank also had be removed from underneath the front end, before a number of mounting bolts can be accessed and undone. These are mainly threaded into the heater channel areas that allow warm air blown across the engine to be directed into the cabin. There are also a couple of bolts at the front where the bodywork is secured to the front suspension beam.
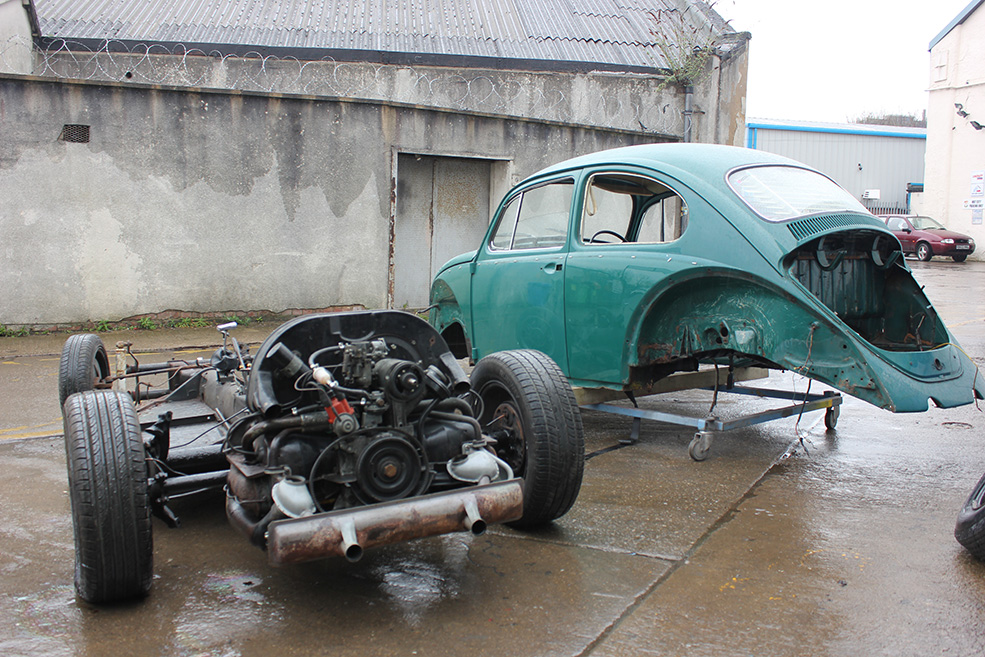
With the bodywork removed, it was clear the floorpans on the rolling chassis had seen better days but the rest of it was fine, especially the front beams which can corrode badly. The best solution was to cut out the floorpans each side of the central tunnel and fit two new panels. As for the steering, brakes (discs at the front and drums at the rear) and suspension (torsion bars and telescopic dampers), these parts could all be serviced and reused. The brakes were checked and serviced and with all of the brake lines clearly visible, Herbie decided to renew them all with fresh copper pipes and rubber flexi-hoses.
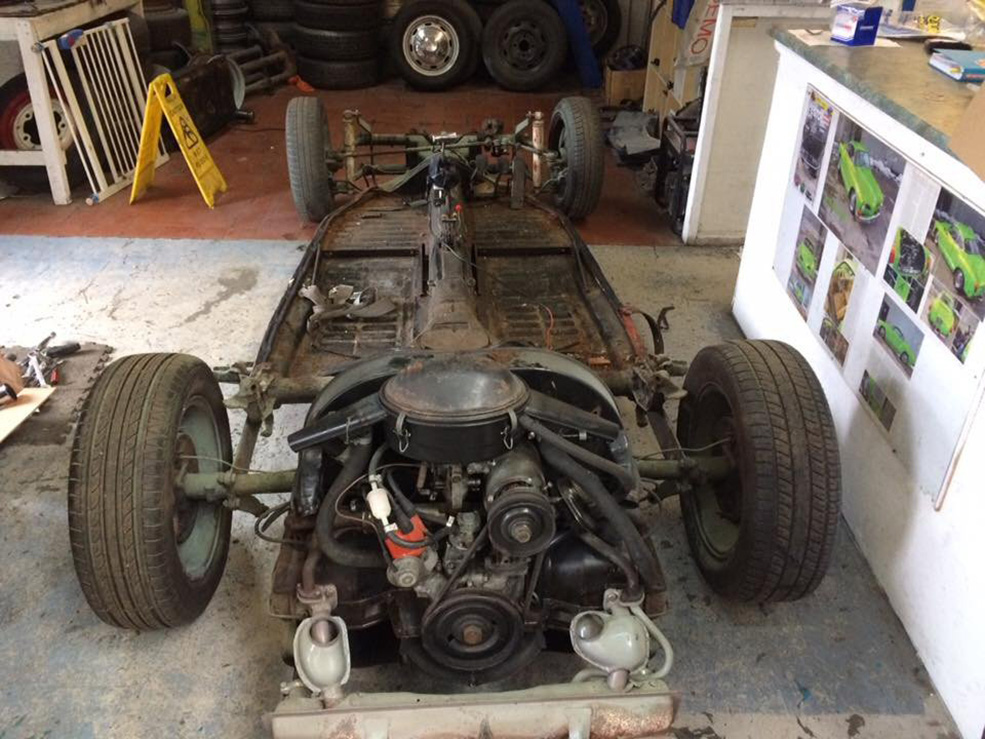
The Beetle’s front suspension set up consists of telescopic dampers and a double beam with torsion bars connecting the upper and lower arms at each front corner. Torsion bars are also fitted at the rear but these run inside tubes connected to trailing arms, while telescopic dampers smooth out the bumps. All of this was deemed to be in good condition, so the components were reused. A previous owner had previously fitted a lowered front beam complete with aftermarket polyurethane bushes and at the rear the Bug’s suspension had been lowered to match the lowered ride height at the front. The steering on this version of Beetle uses a steering box with a selection of link rods to the front wheels and a steering damper fitted onto the front beam.
Herbie fund these charity restorations themselves, volunteering their workshop time and skills and paying for the parts if a supplier cannot afford to help. Consequently, they take a more realistic approach to such projects, refurbishing items wherever possible, but never cutting corners where corrosion or failed components are found.
BEETLE SHELL & CHASSIS
Whilst the rolling chassis could be moved around the workshop, the bodywork was a little more awkward to manoeuvre until it was rested on a makeshift trolley before being transferred onto trestles to have the sills cut out and replaced. Leaving the rolling chassis on the road wheels, the next job was to cut out both floorpans and new panels from GSF Car Parts were trial fitted.
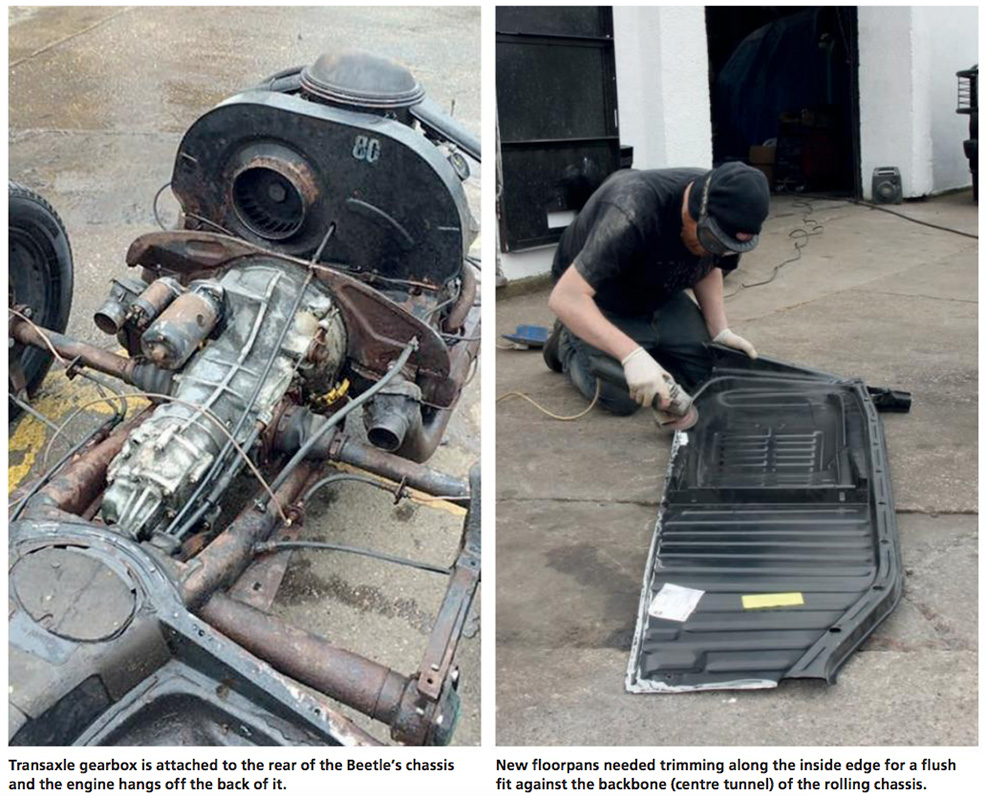
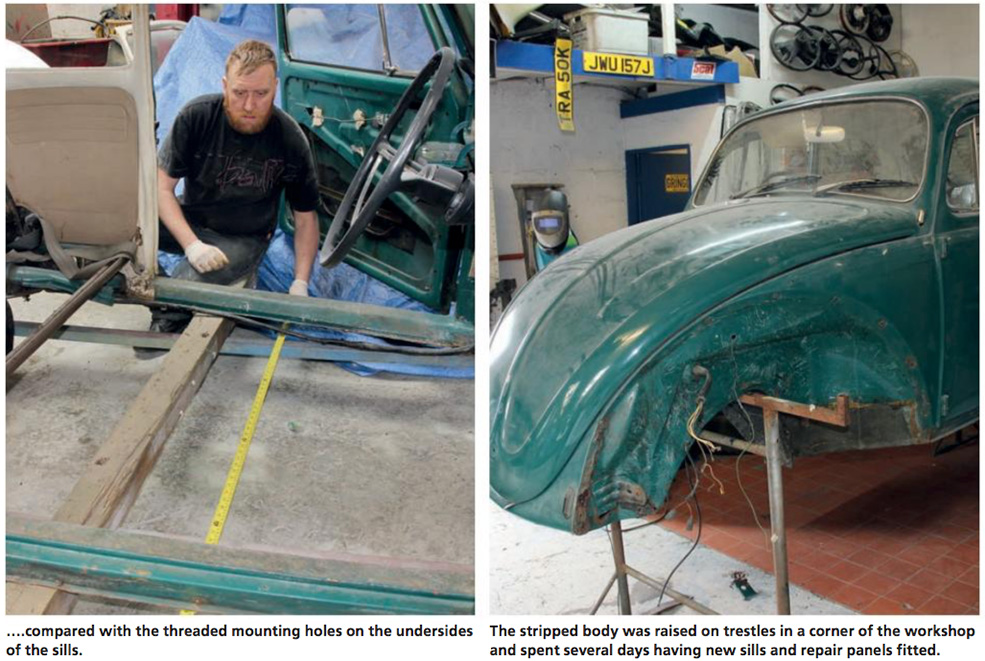
This is where mistakes can be made, especially if measurements aren’t taken and everything isn’t checked before permanently welding the new floorpans in position. This is because the mounting points on the bodywork along the sides of each floorpan have to match up with the threaded mounting points on the underside of the sills. Herbie took several measurements to make sure all of the mounting points lined up.
When trial fitting the floorpans, it was noticed that some sections didn’t mate flush to the centre spine of the chassis, so the new panels had to be trimmed. Once they were confident the floorpans were in the correct position, they tack welded them in position, checked the measurements again efore finishing off with seam welds.
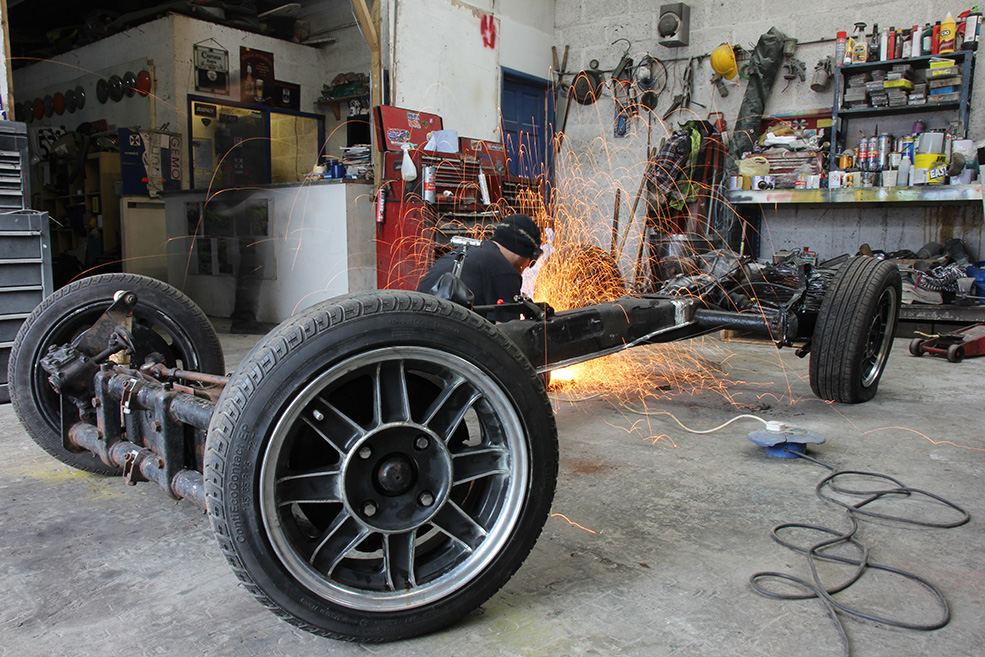
Whilst the floorpans were being renewed, the bodyshell was being similarly subjected to an angle grinder and cutting disc. First, braces were welded across the door apertures and between the sides to help maintain the shape of the bodyshell and prevent it flexing. Then a large 9-inch diameter cutting disc on a substantial Clarke angle grinder from Machine Mart was used to cut through the sills and remove them. This angle grinder has been used to cut through some large sections of bodywork on Beetles and campers before and is still going strong (new brushes are included should a set burn out).

The corrosion had extended to the lower half of the front and rear inner wheel arches. In some areas, patches could be fitted, but others needed complete repair panels. However, no matter how big or small the corrosion was, it still had to be cut out before new metal was welded in position. Herbie estimate they spent between three and four days cutting out rotten panels and welding in new metal. Despite fitting the brace bars they still cut out one section at a time, such as a sill, and weld a new panel in before moving onto the next area of corroded steel.
So the charity Beetle restoration got underway with some promising progress. The corrosion was well on the way to being removed. The suspension, brakes and steering only needed servicing, but there was still a long way to go. The paintwork had to be assessed along with the engine and gearbox. The interior was hopefully intact and could be reused. Find out more next month when we volunteer to strip and refresh the engine.
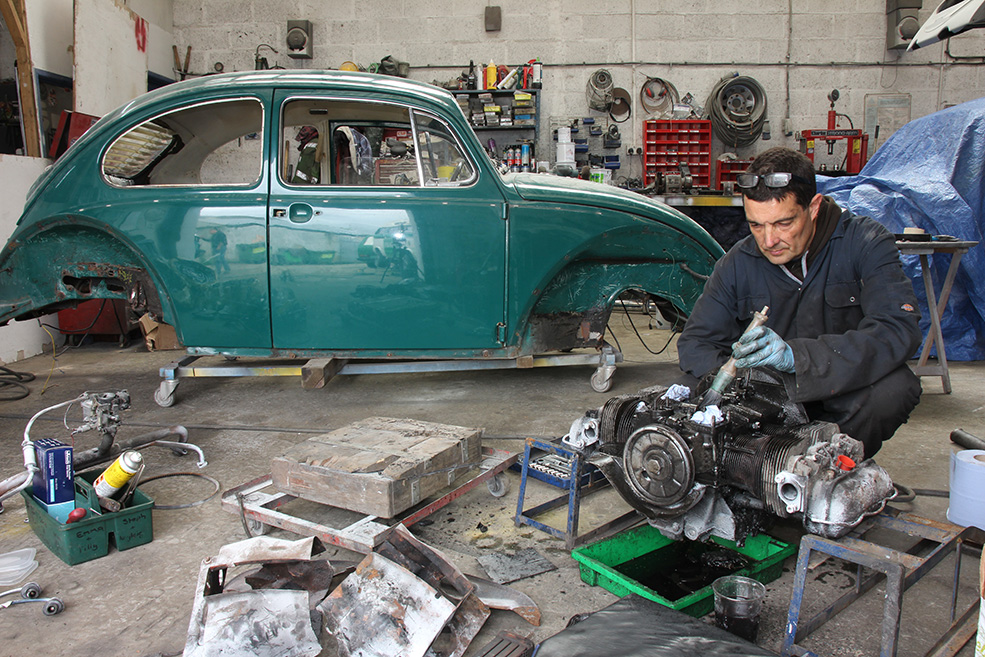
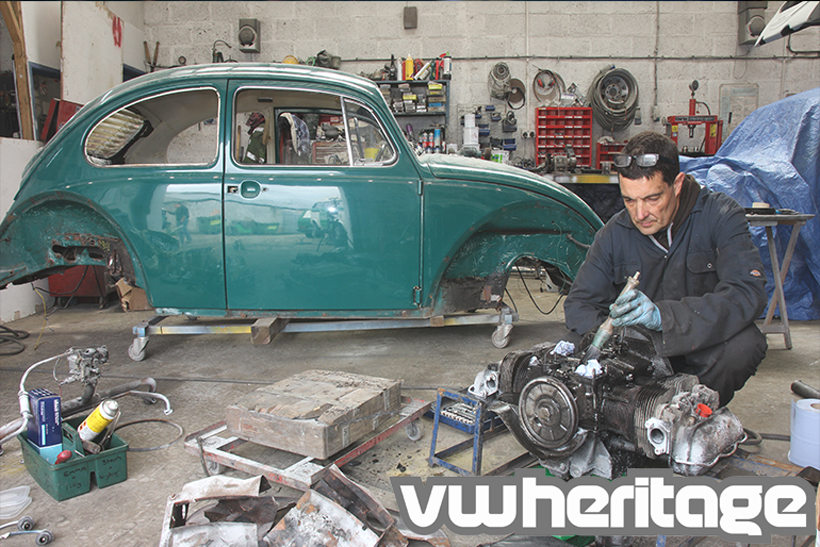
Next Month: We strip and refresh the Beetle’s 1500cc air-cooled engine.